Super Mario World 2: Yoshi's Island (SNES) — The 100-Point Game: Full Stage, Boss, Egg and Transformation Guide
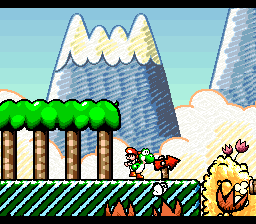
Finishing Yoshi's Island is easy. Finishing it properly is one of the most demanding jobs on the Super Nintendo. Every one of its 48 regular stages hides exactly 20 red coins, 5 Special Flowers and a full tank of 30 countdown stars, and only a perfect 100 points — all three, in a single run — opens each world's Extra stage. This guide is built around that pursuit: the scoring system explained as arithmetic, the complete stage roster for all six worlds, the stages where perfect runs most often fall apart, all twelve fort and castle bosses with their weak points, and the two toolkits the whole game runs on — eggs and transformations. Everything below describes the 1995 SNES original (Japanese title: スーパーマリオ ヨッシーアイランド, Super Mario: Yoshi Island). The 2002 Game Boy Advance port and the DS sequel have different content and are kept separate, in one clearly marked box near the end.
Quick Facts
| Item | Detail |
|---|---|
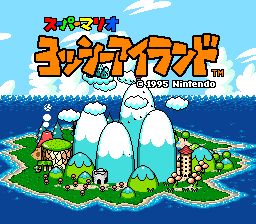
| Japanese title | スーパーマリオ ヨッシーアイランド (Super Mario: Yoshi Island) |
| Overseas title | Super Mario World 2: Yoshi's Island |
| Platform | Super Famicom / Super Nintendo Entertainment System (SNES) |
| Release date (Japan) | August 5, 1995 |
| Release date (North America) | October 4, 1995 |
| Release date (Europe) | October 1995 (references differ between October 5 and October 6; see the note below) |
| Developer | Nintendo EAD |
| Publisher | Nintendo |
| Directors | Takashi Tezuka, Toshihiko Nakago, Shigefumi Hino, Hideki Konno |
| Producer | Shigeru Miyamoto |
| Music | Koji Kondo |
| Genre | Side-scrolling platformer |
| Players | 1 (main game); hidden 2-player Mini Battles via a button code (see Strategy Essentials §7) |
| Cartridge | 16 Mbit (2 MB), LoROM mapping + Super FX 2 (GSU-2) enhancement chip, battery-backed save, 3 save files |
| Cartridge code (Japan) | SHVC-YI; ROM internal title "YOSSY'S ISLAND" |
| Structure | 6 worlds × 8 stages = 48 stages, plus 6 Extra stages and 6 Bonus Challenges |
| Port (kept separate) | Yoshi's Island: Super Mario Advance 3 (Game Boy Advance, 2002) — adds 6 Secret stages that do not exist in the SNES original |
The European version arrived in October 1995. Published references disagree on whether the date was October 5 or 6.
Overview
A stork carrying the infant Mario twins is ambushed by the Magikoopa Kamek. Baby Luigi is taken to Bowser's Castle; Baby Mario falls onto Yoshi's Island, where the Yoshi clan organises a relay: a different-coloured Yoshi carries the baby through each stage and hands him over at the Goal Ring. The colour rotation is fixed — green, pink, light blue, yellow, purple, brown, red, blue across stages 1 to 8 of each world — and every Yoshi plays identically.
The game discards the Mario series' usual health system. Yoshi himself is effectively invulnerable to ordinary contact; instead, a hit knocks Baby Mario off his back into a floating bubble, and a Countdown Timer starts draining. Recover the baby before it hits zero or Kamek's Toadies take him and a life is lost. The timer starts each stage at 10 and can be raised to a maximum of 30 by collecting Stars — and the number left when you cross the Goal Ring is one third of your stage score. Spikes, lava, pits and crushing hazards still kill outright, regardless of the timer.
Yoshi's own moveset, introduced here and kept by every later Yoshi game, is built around eating and throwing. The tongue grabs most enemies; swallow one (Down on the Control Pad) and it becomes an egg, up to six carried in a trailing line. Eggs are thrown with a moving target reticle, ricochet off walls, activate Winged Clouds, break objects and collect out-of-reach items. Around that core sit the Flutter Jump (hold jump to strain for extra air), the Ground Pound, watermelon seed/fire/ice breath weapons, and the Metamorphosis Bubbles that briefly turn Yoshi into vehicles (detailed in §5).
Each world follows the same skeleton: stages 1–3 of open country, a fort at stage 4 with a mid-boss, stages 5–7, and a castle at stage 8 with the world boss. Forts and castles have no Goal Ring — killing the boss is the exit. There are no warp zones and no hidden alternate exits: progress is strictly linear, but any cleared stage can be replayed freely, which is what makes score hunting practical.
Why It Still Matters
Yoshi's Island was Nintendo EAD's answer to a fork in the road. While the industry chased pre-rendered 3D looks, Miyamoto's team shipped a game that looks like a child's crayon and marker drawing come alive — soft outlines, scribbled shading, backgrounds that warp and breathe — and used the Super FX 2 chip in the cartridge (the upgraded successor of the chip that drew Star Fox's polygons, used here for the first time) to rotate, stretch and squash huge sprites rather than to fake 3D. Bosses swell to fill the screen; a whole stage tilts and swims when Yoshi touches a Fuzzy. It remains one of the clearest demonstrations that art direction ages better than rendering technology.
Mechanically it is the founding document of the Yoshi series: egg throwing with a lockable reticle, the flutter jump, the ground pound (a move the main Mario series later adopted), the countdown-timer health system, score-based stage grading, and vehicle transformations all start here. Its 100-point scoring also quietly invented a style of challenge later platformers would copy — the run is short, the checklist is absolute, and mastery means collecting everything, once, without getting hit at the end.
It is also, structurally, one of the fairest hard games of its era. Every stage can be replayed instantly, checkpoints (Middle Rings) bank your collectibles, and the game tells you exactly what a perfect score consists of from the first stage onward. Nothing about a failed 100 is hidden from you — which is precisely why players are still chasing the last few points decades later.
Highlights
- The 100-point contract. Three numbers — 30, 20, 5 — govern the entire game. Section 1 below turns them into a checklist you can run any stage against, including the two recovery tricks (Middle Rings and Point Star items) that save a damaged run.
- Twelve bosses, twelve gimmicks. Kamek's magic enlarges an ordinary enemy into each fort and castle boss, and almost every fight is a small puzzle: a Boo you can only hit with wall ricochets, a slime whose only weak point is a heart visible through its skin, a raven fought by ground-pounding stakes through a tiny moon. Full table in §4.
- The Fuzzy stage (1-7, "Touch Fuzzy, Get Dizzy"). The Super FX 2's calling card: brush one floating Fuzzy and the whole world rolls like a ship deck while the music warps. It is the game's most famous single effect and a genuine score-attack hazard.
- Poochy, the dog who doesn't care. The helper Poochy runs happily across lava and spike beds that kill Yoshi instantly — and his showcase Extra stage, "Poochy Ain't Stupid," is a masterclass in speed control. Brake by turning around; accelerate by not panicking.
- A hidden two-player mode in a one-player game. A button code — actually taught inside a secret room in Sluggy's Fort (5-4) — opens the Mini Battle menu, including two-player versus battles. See §7.
Strategy Essentials
1. The 100-Point System — the Whole Game in One Table
Every stage, including forts, castles and Extra stages, is scored out of 100 on exactly the same formula:
| Component | Where it comes from | Points each | Maximum | What players actually miss |
|---|---|---|---|---|
| Countdown Stars | Timer value remaining when you jump through the Goal Ring | 1 pt per star | 30 | Taking a hit in the last room and arriving with 22 |
| Red Coins | 20 hidden among the stage's ordinary coins in every stage | 1 pt per coin | 20 | Coins that look identical to normal ones until collected (they also count toward the 100-coin 1-Up) |
| Special Flowers | 5 per stage, usually off the main path | 10 pts each | 50 | The one placed past a point of no return |
| Total | 100 |
SCORE  =  Stars left (max 30)  +  Red Coins (max 20)  +  10 x Flowers (max 50)
100    =  30                   +  20                  +  50
PER WORLD: 8 stages x 100 = 800 points -> unlocks that world's Extra stage + Bonus Challenge
Rules that decide whether a run counts:
- All in one run. The score is whatever you hold at the Goal Ring. There is no partial carry-over between attempts — but note the Middle Ring rule below.
- Middle Rings are your bank. Passing a Middle Ring checkpoints you and tops the timer up by 10 stars (capped at 30) and converts nearby enemies into stars. Red coins and flowers collected before the ring are kept if you lose a life and restart from it. Plan 100-point attempts around the rings: the run is really two or three short segments, not one long one.
- The timer floor is 10. If you recover Baby Mario with fewer than 10 stars left, the count slowly refills to 10 on its own. Below-10 finishes are therefore rare — the real star risk is the gap between 10 and 30.
- Damage near the goal is the classic failure. A hit in the final room costs you the seconds spent recovering the baby, one-for-one from the score. If a run is going perfectly until the last screen, slow down: a 30-second wait costs nothing, a hit costs up to 20 points.
- Insurance items exist. Bonus Challenges and Mini Battles award stockable items usable from the pause screen (not during boss fights), up to 27 held. The two that rescue scores are the 10 Point Star and 20 Point Star, which add that many stars to the timer on the spot. Keep at least one for the goal approach of a stage whose stars are scarce. The full item list is in §6.
- Finding red coins honestly. Red coins are slightly tinted but easy to miss in motion. Two legal tells: the last red coin in a stage plays a different sound effect when collected, so a silent 20th-coin moment means one is still missing earlier; and the Magnifying Glass item (also from Bonus Challenges) makes red coins display as red and reveals most hidden Winged Clouds for one stage.
- The flowers pay twice. Each flower collected also becomes a flower panel on the Goal Ring roulette (5 flower panels, 5 blank): land on one and you play a Bonus Challenge for items and 1-Ups. Collecting all five flowers in a stage also awards a 1-Up directly.
- Perfection is recognised. Score 100 on all eight stages of a world and the two "?" spaces on its map become that world's Extra stage and its Bonus Challenge, playable at any time. Do it in all six worlds — Extra stages included — and a star mark appears on the title screen.
2. Complete Stage Roster — 48 Stages, 6 Extra Stages, 6 Bonus Challenges
Stage names are the English in-game names. Stage 4 is always a fort (mid-boss), stage 8 always a castle (world boss); the boss names are expanded in §4.
| World | Stages 1–8 | Extra stage (unlock: 800 pts) | Bonus Challenge |
|---|---|---|---|
| 1 | 1-1 Make Eggs, Throw Eggs · 1-2 Watch Out Below! · 1-3 The Cave Of Chomp Rock · 1-4 Burt The Bashful's Fort · 1-5 Hop! Hop! Donut Lifts · 1-6 Shy-Guys On Stilts · 1-7 Touch Fuzzy, Get Dizzy · 1-8 Salvo The Slime's Castle | Poochy Ain't Stupid | Flip Cards |
| 2 | 2-1 Visit Koopa And Para-Koopa · 2-2 The Baseball Boys · 2-3 What's Gusty Taste Like? · 2-4 Bigger Boo's Fort · 2-5 Watch Out For Lakitu · 2-6 The Cave Of The Mystery Maze · 2-7 Lakitu's Wall · 2-8 The Potted Ghost's Castle | Hit That Switch!! | Scratch and Match |
| 3 | 3-1 Welcome To Monkey World! · 3-2 Jungle Rhythm... · 3-3 Nep-Enut's Domain · 3-4 Prince Froggy's Fort · 3-5 Jammin' Through The Trees · 3-6 The Cave Of Harry Hedgehog · 3-7 Monkeys' Favorite Lake · 3-8 Naval Piranha's Castle | More Monkey Madness | Drawing Lots |
| 4 | 4-1 GO! GO! MARIO!! · 4-2 The Cave Of The Lakitus · 4-3 Don't Look Back! · 4-4 Marching Milde's Fort · 4-5 Chomp Rock Zone · 4-6 Lake Shore Paradise · 4-7 Ride Like The Wind · 4-8 Hookbill The Koopa's Castle | The Impossible? Maze | Match Cards |
| 5 | 5-1 BLIZZARD!!! · 5-2 Ride The Ski Lifts · 5-3 Danger – Icy Conditions Ahead · 5-4 Sluggy The Unshaven's Fort · 5-5 Goonie Rides! · 5-6 Welcome To Cloud World · 5-7 Shifting Platforms Ahead · 5-8 Raphael The Raven's Castle | Kamek's Revenge | Roulette |
| 6 | 6-1 Scary Skeleton Goonies! · 6-2 The Cave Of The Bandits · 6-3 Beware The Spinning Logs · 6-4 Tap-Tap The Red Nose's Fort · 6-5 The Very Loooooong Cave · 6-6 The Deep, Underground Maze · 6-7 KEEP MOVING!!!! · 6-8 King Bowser's Castle | Castles - Masterpiece Set | Slot Machine |
Reading the roster like a planner:
- 800 points per world is the only gate. There are no collectible keys or story locks between worlds; a player who can clear stages can walk to 6-8, but the Extra stages demand the full 800 in that world.
- Bonus Challenges are item farms once unlocked. Before unlocking, they appear only through the Goal Ring roulette; afterwards they can be replayed from the map, which is how you stock Point Stars before a hard 100-point attempt.
- The GBA port's six "Secret" stages are not in this table because they are not in this game. Super Mario Advance 3 (2002) adds one Secret stage per world on top of the SNES roster. Any guide listing 54+ regular stages is describing the port, not the original.
3. Where Perfect Runs Break — Hard-Stage Spotlights
Individual red-coin locations are deliberately not listed stage by stage here (they are the game; half the fun is the hunt). What follows is the shorter, more useful list: the stages whose structure most often destroys an otherwise perfect run, and the habit that fixes each.
| Stage | Why the 100 breaks | The counter-habit |
|---|---|---|
| 1-7 Touch Fuzzy, Get Dizzy | Contact with a Fuzzy warps the terrain and controls for several seconds; coins and flowers are collected (or missed) while the world is rolling | Treat Fuzzies as moving walls, not enemies: stop, let them pass, and never jump blind in a Fuzzy corridor |
| 2-6 The Cave Of The Mystery Maze | A branching cave where one-way drops punish the wrong order; whole coin clusters sit in the branch you didn't take | Do a slow "mapping" clear first with no score pressure, then run the 100 on the route you wrote down |
| 4-4 Marching Milde's Fort | The fort itself is the obstacle: a four-key hunt through a lava fortress before the boss room, with the score clock running the whole time | Learn the key order cold; the boss (see §4) is one of the easiest in the game, so spend your practice time on the fort, not the fight |
| 5-4 Sluggy The Unshaven's Fort | A long fort mixing spike floors (crossed with the mud helper Muddy Buddy stuck to Yoshi's feet) and the game's biggest secret — the Mini Battle code room (see §7) | Resist exploring on a scoring run; the fort is generous with side rooms and all of them cost stars |
| 6-5 The Very Loooooong Cave | Sheer length: an endurance cave where star pickups must be rationed across the whole run instead of grabbed on sight | Bank stars at every Middle Ring, and spend Point Star items here rather than on short stages |
| Extra 1 Poochy Ain't Stupid | You ride Poochy across lava and spikes; he accelerates on his own and most misses are overshoots at full speed | Brake by tapping the opposite direction early and often; Poochy stops for nothing else |
| Extra 6 Castles - Masterpiece Set | A fortress/castle medley as the final Extra stage: the game's boss architecture remixed into one long stage | Attempt it last, after the other five Extras; by then every trick it uses has been practised separately |
4. All Twelve Bosses — Weak Points and How Each Fight Works
Kamek creates every boss by sprinkling magic dust on an ordinary enemy. Stage 4 bosses ("fort" bosses) are the gentler set; stage 8 bosses ("castle" bosses) close each world. Stocked items cannot be used during boss fights, so every fight below is won with eggs, ground pounds and the arena itself.
| Stage | Boss | Weak point / method |
|---|---|---|
| 1-4 | Burt the Bashful | He takes no conventional damage — egg hits make his oversized pants slip. Keep hitting him (wall ricochets help) until the pants drop completely and embarrassment deflates him. |
| 1-8 | Salvo the Slime | Eggs shrink him, hit by hit. Every hit sheds Lemon Drops — eat them to restock your eggs. Stay out of his path so he can't shove you off the arena. |
| 2-4 | Bigger Boo | He freezes when faced and grows while your back is turned — and a frontal egg does nothing. Bank eggs off the wall behind him to strike his back; each hit makes him swell until he bursts. |
| 2-8 | Roger the Potted Ghost | The ghost in the pot is invulnerable; two Shy Guys push the pot around. Ground Pound the floor next to the pot to jolt it along, and shove it off the edge of the platform. |
| 3-4 | Prince Froggy | The fight happens inside him: Kamek shrinks Yoshi and Froggy swallows him. Aim eggs straight up at the dangling uvula at the top of the stomach; the Shy Guys that drop in are your egg supply. |
| 3-8 | Naval Piranha | Once grown, aim eggs at the head as it lunges along its vines. The famous shortcut: a carefully banked egg that reaches the little sprout before Kamek's transformation sequence ends the fight before it begins. |
| 4-4 | Marching Milde | Ground Pound the giant Milde and it splits into two smaller ones; split them again, then finish the smallest Mildes with eggs or by eating them. Watch the whole brood's movement, not just your target. |
| 4-8 | Hookbill the Koopa | Eggs to the head make him rear up and cough out eggs of his own (your resupply). When he topples onto his back, jump or Ground Pound the exposed belly — his only vulnerable spot. |
| 5-4 | Sluggy the Unshaven | His gel body is indestructible and eggs merely push him backwards — which is the point: his heart is visible through the translucent skin, and pushing him around exposes it to a clean shot. Aim for the heart, not the mass. |
| 5-8 | Raphael the Raven | Fought on a tiny moon with wooden stakes through it. Run around the moon until Raphael is opposite a stake, then Ground Pound your end: the stake shoots through and strikes him from below. |
| 6-4 | Tap-Tap the Red Nose | Eggs cannot hurt him at all — they only stagger him. The arena hangs over lava, so the fight is positional: keep knocking him back until he goes in. |
| 6-8 | Baby Bowser | Phase one is survival: dodge his Ground Pound shockwaves on the castle roof. Kamek then enlarges him into a screen-filling giant who advances from the background; drive him back with repeated egg throws until he falls. Running out of eggs or room ends it — keep both stocked. |
Two patterns worth internalising: bosses that "can't be damaged" (Burt, Roger, Tap-Tap) are all beaten by moving them, not hitting them; and bosses with a supply mechanic (Salvo, Froggy, Hookbill) feed you the eggs you need, so a fight that feels impossible usually means you are throwing eggs you should be eating.
5. Transformations — the Metamorphosis Bubbles
Touching a floating Metamorphosis Bubble transforms Yoshi for a limited time; Baby Mario waits at the bubble. Reach the Yoshi Block at the end of the section to transform back on the spot; let the timer expire and you are warped back to the bubble to try again. Picking up a second bubble of the same vehicle extends the time; a different one switches form (the starting point does not move).
| Form | What it does | Handling notes |
|---|---|---|
| Helicopter | Free flight in any direction | Slowly sinks when you do nothing, and drops fast if it clips an enemy; it cannot attack, but can stomp |
| Mole Tank | Digs through soft earth and clings to walls and ceilings of diggable material | The digging is the path: if a wall is soft, the route through it is intended; no attacks |
| Submarine | Underwater movement with homing torpedoes (Y or B button) | The only transformation with a real weapon; contact with an enemy makes it sink, so fire early |
| Train | Runs along track lines drawn on walls and backgrounds, whatever their angle | Cannot jump; Shy Guys drawn on the track wake up and block the line as you pass |
| Vehicle (Car) | Fast ground travel; the body can be raised on its suspension to dodge enemies and climb walls with good timing | Raise the body at a wall to scramble up it; speed is the risk, not the enemies |
Separately, the Super Star inverts the relationship: Baby Mario becomes Powerful Mario — invincible, able to run up walls and ceilings, cross spikes and glide with a cape — while Yoshi waits, curled into a giant egg. It is timed like the transformations and chained Super Stars extend it. Neither form exists in the later portable versions in exactly this SNES balance; treat GBA/DS descriptions of these sections with care.
MORPH FLOW
  [Metamorphosis Bubble] --touch--> [Vehicle form, timer starts]
        ^                                  |
        |                                  +-- reach [Yoshi Block] --> back to Yoshi, progress kept
        +---- timer expires: warped back --+
6. Eggs and Items — the Carrying Economy
Eggs are ammunition, keys and currency at once. The rules:
| Egg type | How you get it | Ricochets | When it breaks / notes |
|---|---|---|---|
| Green Egg | Swallow an enemy (Down), or hit an Egg Block | Up to 3 | The standard egg; no bonus contents |
| Yellow Egg | A thrown green egg changes colour as it ricochets off walls | Fewer than green | Contains a coin |
| Red Egg | A yellow egg that keeps ricocheting changes again | Fewest | Contains 2 Stars — a thrown-and-caught economy for topping up the timer |
| Flashing Egg | Found as-is, or from flashing Egg Blocks | — | Contains a Red Coin; it can also simply be carried through the Goal Ring to bank the coin safely |
| Giant Egg | Swallow a Fat Guy (the large Shy Guy variant) | Cannot be thrown far | Drop it for a shockwave that turns on-screen enemies into stars and coins; counts toward your six like any egg |
Carrying rules that shape every stage:
- Maximum six eggs, trailing behind Yoshi. Swallowing an enemy while full discards the egg at the front of the line — check your line before eating something in a flashing-egg section.
- Two throwing styles are offered in the options: a "patient" style (press once to start the reticle moving, press again to throw) and a "hasty" style (release the button to throw). Patient is the score-attack standard: the reticle can also be locked, and Yoshi can move and jump while aiming.
- Eggs are also tools. They trigger Winged Clouds (including invisible ones, revealed by contact), knock items out of tulips and buckets, skim across water, and collect coins without breaking. A shot that doesn't hit an enemy is rarely wasted.
- Egg Blocks are the refill points — green-framed blocks dispense eggs indefinitely up to your six; coloured blocks (yellow, red, flashing) convert into that single egg once.
Stockable special items (won in Bonus Challenges and Mini Battles; usable from the pause screen except during boss fights; maximum stock 27):
| Item | Effect |
|---|---|
| 10 Point Star / 20 Point Star | Adds 10 / 20 stars to the Countdown Timer immediately |
| Anytime Egg | Refills your eggs to the full six |
| Anywhere POW | Turns every enemy on screen into a star |
| Winged Cloud item | Turns every enemy on screen into a Winged Cloud (mostly coins inside, occasionally stars or a 1-Up) |
| Magnifying Glass | For one stage: red coins display as red, and hidden Winged Clouds become visible |
| Special Watermelons (green / red / blue) | Puts a powered watermelon in Yoshi's mouth — a long burst of seeds, fire breath that melts ice, or ice breath that freezes even cannon fire |
7. Hidden Extras Worth Knowing
- The Mini Battle menu (and the game's only multiplayer). On the stage-select screen, hold Select and press X, X, Y, B, A. A menu opens listing the Mini Battles — normally played against a Bandit behind locked hut doors inside stages — including two-player versus versions of the Watermelon Seed Spitting Contest and Throwing Balloons. Uniquely, the game teaches you this code itself: a hidden room in Sluggy's Fort (5-4), reached by disposing of the Chain Chomp behind the left-hand door at the start, contains a Hint Block that recites it. (The GBA port changes the code — one more reason the versions must not be mixed.)
- A star on the title screen. Score 100 in every stage of the game, Extra stages included, and a star mark is added to the title screen — the game's only completion badge.
- King Bowser's Castle has more than one route. The final castle offers a choice of numbered doors near the start, each leading through a different section of fortress before the boss — a last structural surprise in a game that has been linear for 47 stages.
- What is not in the SNES version: no Secret stages (GBA only), no playable Luigi, no second quest. If a source describes them, it is describing a different release.
Who It's For
- Completionists who like their checklists honest. The 100-point formula is fully visible, every stage replays instantly, and the game never hides what a perfect run requires. The full clear — 54 stages at 100 — is a substantial, self-paced project.
- Platformer players who prefer aim to speed. Egg throwing rewards banked shots, ricochet geometry and patience more than raw pace; the "patient" control style exists precisely for this temperament.
- Retro-technology fans. This is the Super FX 2's showcase and the high-water mark of the SNES's hand-drawn era — worth playing on a big screen just to watch the sprite scaling and warping work.
- Younger players, with a caveat. Merely finishing stages is forgiving (the timer floor of 10 and generous checkpoints see to that), but the 100-point layer is genuinely exacting. It is an ideal "play it together, hand the controller over for the hard room" game.
How to Play It Today
- Nintendo Switch (recommended). The SNES original is included in the Super Nintendo Entertainment System – Nintendo Classics app for Nintendo Switch Online subscribers; it was one of the service's 20 launch titles in September 2019. This is the SNES version described in this guide, with save states available at the system level.
- SNES Classic Edition / Nintendo Classic Mini: Super Famicom (2017). The original is built into the mini consoles — again the SNES version, unaltered.
- Original cartridge. Super Famicom and SNES cartridges (code SHVC-YI in Japan) are common and inexpensive second-hand; check the battery-backed save (three files) still holds. The cartridge contains the Super FX 2 chip, which is why this game historically resisted cheap emulation and clone hardware.
- The Game Boy Advance port is a different purchase. Yoshi's Island: Super Mario Advance 3 (2002) adds six Secret stages, changes the Mini Battle code, and makes red coins visually identical to ordinary coins. It is a fine version — but its extras are not SNES content, and this guide's tables describe the original.
- Sequels are not ports. Yoshi's Island DS (2006) and Yoshi's New Island (2014) are new games built on this one's systems; they do not contain this game's stages.
Find the original Japanese cartridge
Disclosure: The Rakuten and Yahoo! Shopping links are standard shopping links. Enkeisha does not earn a commission from purchases made through these links.
Find original hardware editions on eBay
As an eBay Partner Network affiliate, Enkeisha may earn a commission from qualifying purchases made through these links.
Search eBay listings (affiliate link)
Check the language, region, hardware compatibility, condition and authenticity before buying. Search results may include reproductions; links do not endorse individual sellers.