Super Metroid — The Complete Zebes Field Guide: All 100 Pickups, Every Boss, the Intended Route, and the Breaks That Rewrite It
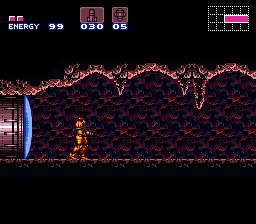
The last Metroid is in captivity. The galaxy is at peace — for about five minutes. Ridley steals the larva from the Ceres research colony, Samus Aran follows him down to a rebuilt, reoccupied Planet Zebes, and Super Metroid (1994) begins the descent that defined a genre. This is a strategy-first guide to the original Japanese Super Famicom version: the full inventory of exactly 100 pickups, an area-by-area map of where first-time players get stuck, counters for all four guardian bosses and the mid-boss roster, the intended route step by step, the sequence breaks and glitches speedrunners built a second game on — and the ending table, including what rescuing the animals actually changes. Where the sources disagree, this guide says so instead of picking a winner.
Quick Facts
| Item | Detail |
|---|---|
| Original title | Super Metroid (スーパーメトロイド), also billed as Metroid 3 |
| Platform | Super Famicom / SNES |
| Release (Japan) | March 19, 1994 |
| Release (North America) | April 18, 1994 |
| Release (PAL) | July 28, 1994 |
| Developer | Nintendo R&D1 with Intelligent Systems (programming) |
| Publisher | Nintendo |
| Director | Yoshio Sakamoto |
| Producer | Makoto Kano |
| Genre | Action-adventure / exploration platformer |
| Cartridge | 24 Mbit (3 MB) — among the largest SNES cartridges at release — LoROM FastROM, battery-backed save (8 KB SRAM, three save files) |
| Structure | Ceres prologue, then six areas of Zebes: Crateria, Brinstar, Norfair, Wrecked Ship, Maridia, Tourian |
| Total pickups | Exactly 100: 46 Missile expansions, 10 Super Missile expansions, 10 Power Bomb expansions, 14 Energy Tanks, 4 Reserve Tanks, plus the unique equipment below |
| Series position | Third game in the Metroid series, following Metroid (1986) and Metroid II: Return of Samus (1991) |
One cartridge note that surprises import players: the Japanese and North American releases use the same ROM in different shells, and the option screen offers English Text or Japanese Text. The Japanese text applies only to the introductory/demo screens — the rest of the game's sparse text is in English either way — so a Japanese cartridge is fully playable for an English reader, and vice versa. Later remakes and sequels are different games: Metroid: Zero Mission (2004) remakes the first Metroid, not this one, and nothing in this guide should be carried over to it.
Overview
After the Ceres escape, Samus lands on Zebes with nothing — no Morph Ball, no Missiles, an energy readout of 99. Everything she becomes is found underground. Zebes is one continuous map of six areas threaded by elevators and hidden passages, and progress is gated almost entirely by equipment: a red door wants Missiles, a green door a Super Missile, a yellow door a Power Bomb, a heated room the Varia Suit, deep water the Gravity Suit. The game teaches this language without tutorials: friendly creatures demonstrate the two great movement techniques — the Etecoons show wall jumping, the Dachora the Shinespark — in rooms placed exactly where a stuck player will wander into them.
Guarding the way to Tourian are four bosses — Kraid, Phantoon, Draygon and Ridley. Kill all four and the golden statue in Crateria sinks, opening the final area and Mother Brain. Between those poles sits the real game: 100 pickups, most of them optional, hidden behind bombable walls, crumbling floors and false ceilings. The ending you get is decided by the clock alone, not by your item percentage — a point the endings table below states precisely.
Why It Still Matters
Super Metroid is the template the word "Metroidvania" was built to describe: an interconnected world, ability-gated backtracking, and environmental storytelling with almost no dialogue — a dead soldier before Kraid's door, a husk of a Torizo in Tourian, a rescue you are allowed to skip. Its second life matters just as much: because its movement techniques are deep and its map porous, it became a foundational speedrun game, with categories (any%, 100%, low%) that are effectively different sports on the same cartridge. And the 24-megabit cartridge — among the largest on the system at release — was spent on atmosphere: rain on Crateria's surface, the silence of the Wrecked Ship, the red soil of lower Norfair.
Highlights
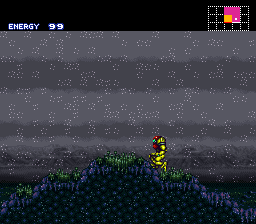
A world that teaches by showing. No NPC explains the wall jump or the Shinespark. The animals demonstrate them, in context, and the game trusts you to have been watching — the same animals you can later choose to save during the escape.
Bosses as area keys. Each guardian death changes the world, not just a counter: Phantoon's fall restores power — lights, save stations, map — to the entire Wrecked Ship; Draygon's death is the only road to the Space Jump.
The Mother Brain sequence. The first phase deliberately restages the original Metroid's finale, down to the Zebetite tubes — and then the brain stands up. The scripted tragedy that follows (see the boss table) hands Samus the Hyper Beam, and it lands because the game spent hours making the larva matter.
Depth under the floorboards. Underneath the generous intended game sits a second, expert one — wall jumps, bomb jumps, the Mockball, Crystal Flash — that the developers demonstrably knew about: the techniques are demonstrated in-game. Section 5 separates them from the true glitches.
Strategy Essentials
1. The full inventory: all 100 pickups
Expansions follow one arithmetic throughout: each Missile, Super Missile and Power Bomb expansion adds 5 to capacity. The unique equipment is listed once, with the area where it is found — note that a few "area" borders are drawn differently by different guides (the Morph Ball room, for instance, sits on the Crateria/Brinstar seam in the old Tourian ruins), so the table lists only the totals for expansion pickups.
| Category | Count | Effect / maximum |
|---|---|---|
| Energy Tank | 14 | +100 energy each; maximum energy 1,499 (the starting 99 plus 14 × 100). At least a handful are effectively mandatory — the late bosses hit far too hard for a 3-tank suit |
| Reserve Tank | 4 | One each in Brinstar, Norfair, the Wrecked Ship and Maridia. Stored energy that refills Samus automatically (or manually) when her main tanks empty. They start empty and must be filled at recharge points |
| Missile expansion | 46 | +5 each; maximum 230 Missiles |
| Super Missile expansion | 10 | +5 each; maximum 50 Super Missiles. One Super Missile hits roughly like five Missiles and opens green doors |
| Power Bomb expansion | 10 | +5 each; maximum 50 Power Bombs. Screen-wide blast; opens yellow doors and exposes hidden blocks |
| Total pickups | 100 | 46 + 10 + 10 + 14 + 4 expansions and tanks, plus 16 unique equipment items make up the 100% counter as the game counts it |
| Unique equipment | Found in | What it does |
|---|---|---|
| Morph Ball | Brinstar (the old Tourian ruins below Crateria) | Roll into a ball; the first item, as in 1986 |
| Bombs | Crateria (guarded by the Bomb Torizo) | Morph Ball bombs; also the engine of the bomb jump |
| Charge Beam | Brinstar | Hold fire to charge a stronger shot; enables the pseudo-Screw Attack spin and the beam-combo specials |
| Spazer Beam | Brinstar | Widens the beam to three prongs |
| Super Missiles (first set) | Brinstar, past Spore Spawn | See expansions above |
| Varia Suit | Brinstar, awarded after Kraid | Halves most damage in effect and grants heat resistance — upper Norfair's heated rooms become survivable |
| Hi-Jump Boots | Norfair | Higher jump; also improves movement in liquid even before the Gravity Suit |
| Speed Booster | Norfair | Sprint to blue speed; charges the Shinespark and breaks booster blocks |
| Ice Beam | Norfair | Freezes most enemies — platforms, and the only way to kill a Metroid (freeze, then Missiles) |
| Power Bombs (first set) | Norfair, beside Crocomire's arena on the standard route | See expansions above; routes differ, and some walkthroughs meet a first set elsewhere — the totals do not change |
| Grappling Beam | Norfair | Swing from grapple blocks and certain ceilings; also the Draygon executioner's tool (see boss table) |
| Wave Beam | Norfair | Beam passes through walls |
| X-Ray Scope | Brinstar (red Brinstar shaft) | Scans through walls to reveal hidden passages and breakable blocks — the 100% hunter's best friend |
| Gravity Suit | Wrecked Ship | Free movement underwater (and further damage and heat protection); Maridia becomes navigable |
| Space Jump | Maridia, awarded after Draygon | Repeated spin jumps in mid-air |
| Plasma Beam | Maridia | The strongest beam component; pierces enemies. Cannot normally be combined with the Spazer (see Murder Beam, section 5) |
| Spring Ball | Maridia | Jump while in Morph Ball form without a bomb |
| Screw Attack | Norfair (lower Norfair, past the Golden Torizo) | Spin jump becomes a weapon |
2. Area by area: what matters, where you get stuck
| Area | Key pickups and gates | Where first-time players get stuck |
|---|---|---|
| Crateria | The hub. Bombs (via the Bomb Torizo), the ship as a free full recharge, the Tourian statue | The opening descent: the Morph Ball is below you, through the old ruins — players who head right first find only locked doors. Late game, the crumble-block shaft after the Gauntlet defeats hurried players without the Space Jump |
| Brinstar | Morph Ball, Charge Beam, Spazer, first Super Missiles, Varia Suit; one Reserve Tank | Spore Spawn's room and the "early Super Missile" door behind it; the pink Brinstar climb, where the way up is a bombable floor and a shaft that looks like background; finding Kraid's lair entrance, disguised as part of a statue's mouth |
| Norfair | Hi-Jump, Speed Booster, Ice Beam, Wave Beam, Grappling Beam, first Power Bombs, Screw Attack; one Reserve Tank | Heated rooms before the Varia Suit (they are a hard no, not a challenge); Crocomire's bridge; the Grappling Beam's own room, which demands you cross a lava lake with the tool you have just been given; lower Norfair's rising lava and the Golden Torizo's room on the way to the Screw Attack |
| Wrecked Ship | Gravity Suit; one Reserve Tank; a Super Missile pair east and west | The whole ship is unpowered until Phantoon dies: no save, no map, no recharge inside. The entrance itself — across the moat from Crateria — stops players who arrive without the Grappling Beam or a Shinespark (see section 5). The walking Chozo statue that carries you across the spike floor is a puzzle, not an enemy |
| Maridia | Space Jump, Plasma Beam, Spring Ball; one Reserve Tank | Moving at all before the Gravity Suit — without it, Maridia is a slow-motion trap and the intended answer is "come back later". The glass tube you must Power Bomb from inside the sandy pipes; Botwoon's corridor; the Spring Ball room, whose entrance is visible long before it is reachable |
| Tourian | No pickups. Metroids, the larva, Mother Brain, the escape | Metroids can only be killed frozen: Ice Beam plus Missiles (a Power Bomb knocks them off you but does not kill them). Tourian is one-way in practice — stock up before the statue. After Mother Brain, a three-minute escape: the animal room (see endings) is a short detour off the escape route |
3. Boss and mid-boss counters
The four guardians must all fall before Tourian opens. Figures for "hits to kill" vary between references depending on weapon mix, so this table gives targeting and method — the things that actually end fights — rather than hit counts.
| Boss | Area | How the fight works and how to end it |
|---|---|---|
| Kraid | Brinstar | Damage counts only in the mouth, and only when it opens. Shoot his eyes/face to make him roar, then put Missiles or Super Missiles into the open mouth; he rises in stages as he takes damage, growing to fill the room. Catch his claw projectiles for refills. A miniature Kraid ambushes you on the approach — a deliberate echo of his 1986 size. Reward: the Varia Suit |
| Phantoon | Wrecked Ship | Vulnerable only when solid with its eye open. Between appearances it rains destructible blue flames — shoot them for refills and stay patient. Super Missiles into the eye end it fastest but provoke an enraged flame volley after each hit, so fire once and move. Reward: power restored to the Wrecked Ship, and the way to the Gravity Suit |
| Draygon | Maridia | Two established kills. Conventional: Super Missiles and charged shots into the belly while dodging the slowing mucus it sprays and its swoops. The famous shortcut: before it arrives, destroy the gun turrets on the walls until they spark; then let Draygon grab Samus, select the Grappling Beam and grapple the sparking turret stump — the current runs through Samus and electrocutes Draygon to death. Samus takes damage throughout, so arrive with several full Energy Tanks (references suggest roughly four tanks' worth of health as a comfort margin). Reward: the Space Jump |
| Ridley | Lower Norfair | Not the Ceres encounter — that one is scripted; he leaves once Samus is weakened, so just survive it. The real fight is all aggression: fireballs, tail stabs, swoops and a grab. Keep to the air with Space Jump, unload Super Missiles, then Missiles, then charged Plasma shots; he flashes progressively redder as he weakens. Morph Ball play with Power Bombs is a documented low-risk chip strategy for players who brought the Spring Ball, but slow. Stock everything first — this is the game's hardest sustained fight |
| Mother Brain | Tourian | Phase 1 restages 1986: cross the acid room, break the Zebetite tubes with Missiles, then shatter the tank and hit the brain while turrets and Rinkas fire. Phase 2: the brain rises on a biomechanical body — rings, bombs and beams; spend Super Missiles on the head and keep moving. The fight is scripted to reach her charged rainbow-coloured beam: it will pin Samus and drain her to near death no matter how well you play, at which point the giant larva intervenes, drains Mother Brain, refills Samus — and is killed passing her the Hyper Beam. Finish the body with Hyper Beam shots to the head, then escape in three minutes |
Mid-bosses and gatekeepers, in route order: the Bomb Torizo (Crateria — sidestep its charges, shoot the chest; it teaches aimed fire), Spore Spawn (Brinstar — hit the exposed core when the shell opens; guards the first Super Missiles), Crocomire (Norfair — it cannot be killed by damage; shoot its face to push it back step by step into the lava, then watch the skeleton's last advance), Botwoon (Maridia — the mid-point serpent; hit the head as it exits its holes), and the Golden Torizo (lower Norfair — a faster, tougher Torizo guarding the Screw Attack; Super Missiles stagger it, and it can catch and throw ordinary Missiles back, so do not feed it).
4. The intended route, in stages
| Stage | Objective | You leave with |
|---|---|---|
| 1 | Ceres prologue: meet Ridley, escape the station | Nothing but the plot — this fight cannot be won |
| 2 | Crateria descent → Morph Ball, first Missiles, Bombs | The exploration basics |
| 3 | Brinstar: Charge Beam, Spore Spawn, first Super Missiles, Spazer | Green doors openable |
| 4 | Kraid | Varia Suit |
| 5 | Upper Norfair: Hi-Jump Boots, Speed Booster, Ice Beam | Heated rooms and Metroid-killing both solved |
| 6 | Crocomire → first Power Bombs, Grappling Beam, Wave Beam | Yellow doors openable |
| 7 | Wrecked Ship: Phantoon | Gravity Suit, a powered ship |
| 8 | Maridia: Botwoon, Draygon | Space Jump, then Plasma Beam and Spring Ball |
| 9 | Lower Norfair: Golden Torizo → Screw Attack, then Ridley | All four guardians dead |
| 10 | Backfill with the X-Ray Scope if you are chasing 100%, then Tourian | Mother Brain, the Hyper Beam, the escape |
Two routing truths: the game never locks you out of backtracking before Tourian, so feeling stuck almost always means "a door colour you cannot open yet", not "a mistake"; and 100% is best done as one sweep at stage 10, when the X-Ray Scope, Space Jump and Screw Attack make every earlier secret trivial.
5. Sequence breaks, techniques and glitches
Read this table in two halves. The first group are techniques the game itself teaches or plainly permits — using them is mastery, not cheating. The second group are glitches: established in the speedrunning literature, described here in outline only. Where sources disagree on a requirement, the disagreement is printed.
| Technique | Type | What it does / where it pays |
|---|---|---|
| Wall Jump | Taught in-game (the Etecoons demonstrate it) | Spin-jump against a wall, press away from it and jump again at the contact frame; repeatable up a single wall. Reaches the Wave Beam, Spazer and X-Ray Scope early, enters the Wrecked Ship without the Grappling Beam (early Gravity Suit), and shortcuts shafts everywhere |
| Bomb Jump / Infinite Bomb Jump | Permitted technique | Timed Morph Ball bombs bounce Samus upward; a practised rhythm climbs indefinitely. Reaches the Varia Suit without the Hi-Jump Boots and expansions otherwise gated behind the Speed Booster or Space Jump |
| Shinespark | Taught in-game (the Dachora demonstrates it) | With the Speed Booster: run to blue speed, crouch to store the charge, then jump to fly vertically, diagonally or horizontally. Crosses the moat to the Wrecked Ship, skips climbs, and — with advanced short-charging — reaches rooms the designers fenced off with distance |
| Mockball | Execution trick at the edge of glitch | Enter Morph Ball form out of a dash jump while keeping dash speed on the ground. The classic payoff: cross the bridge room in green Brinstar fast enough to take the early Super Missiles and skip Spore Spawn entirely; also an early Ice Beam route |
| Crystal Flash | Hidden intended technique | A full emergency heal at the cost of ammunition. Requirements per modern references and TAS documentation: energy at 50 or less, Reserve Tanks empty, at least 10 Missiles, 10 Super Missiles and 11 Power Bombs; in Morph Ball form, lay a Power Bomb and hold aim-up + aim-down + down + fire through the explosion. Source split, printed deliberately: the official 1994 Player's Guide states the energy condition as 29 or fewer. Both cannot be the trigger; treat 29-or-fewer as the guaranteed-safe figure. Either way the Flash consumes 10/10/10 of the three ammo types beyond the starting bomb |
| Murder Beam | Glitch — outline only | A menu trick equips the Spazer and Plasma beams simultaneously, which the game normally forbids; charged shots fired under strict conditions (facing left, fully charged) deal stacked damage, and it is used against Mother Brain's later phases. Firing it carelessly crashes the game. This guide gives the concept, not a step-by-step: on original hardware a crash mid-run is a real cost, and the input window is documented in dedicated glitch references for those who want it |
| Green Gate Glitch | Glitch — noted, not taught | Certain green gates can be opened from their "wrong" side, enabling deep skips such as a Screw Attack route that bypasses the Golden Torizo. Frame-tight and route-specific; it belongs to RTA routing documents rather than a general guide, and no claim about it here should be read as a how-to |
What this guide deliberately leaves out: out-of-bounds and memory-corruption routes (such as X-Ray climbing into wrong-warp territory). They are real and community-documented, but they are TAS-and-glitch-category material — unstable on a casual cartridge run and impossible to summarise responsibly at outline length.
6. Endings: the clock, and the animals
Item percentage does not affect the ending — only clear time does. The thresholds are the same in the Japanese and overseas versions; what you see differs only in Samus's closing pose.
| Clear time | Ending |
|---|---|
| Under 3 hours | Best ending — Samus appears without the Power Suit |
| 3 to 10 hours | Middle ending — Samus appears with the suit's helmet removed |
| Over 10 hours | Standard ending — Samus appears fully suited |
Boundary note: the official Player's Guide prints the bands as "3:00 or less / 3:01–10:00 / 10:01 or more", while Metroid Database and most modern references print "under 3 hours / 3–10 / over 10". The practical difference is a single minute at exactly 3:00 (and 10:00); if you are aiming at the best ending, aim under 3:00 and the disagreement cannot touch you.
The animals. During the escape, detour into the old Bomb Torizo room in Crateria, where the Dachora and Etecoons are trapped, and shoot the right-hand wall to free them. This changes neither which ending you earn nor your time band. It adds one small thing to the final shot: as Samus's ship leaves the exploding planet, a tiny point of light escapes with her — the animals made it. Speedrunners turned the choice into the community's eternal question, "save the animals or save the frames?", because the detour costs a few seconds. On a first playthrough, this guide's answer is: save them. You watched them teach you how to play.
Who It's For
Play it if you want the purest form of exploration action: one map, no quest markers, a heroine who goes from helpless to unstoppable entirely through things you found. It rewards anyone who has ever bombed a suspicious wall "just in case" — and then rewards them again at a different skill level, because the technique ceiling (section 5) has sustained decades of speedrunning.
Think twice if you need constant direction: the game will let you wander a powered-down ship and a drowning cave system without comment, and the moat crossing and the Maridia glass tube are famous first-run walls. The tables above exist to get you over them without spoiling the rest.
How to Play It Today
As of this writing, the straightforward legal route is the Super Nintendo Entertainment System – Nintendo Switch Online library on Nintendo Switch, where Super Metroid was among the service's launch titles in September 2019 — a Nintendo Switch Online membership is required, and the catalogue can change, so check the current line-up first. The game was also built into the SNES Classic Edition / Nintendo Classic Mini Super Famicom (2017), still a tidy second-hand option. Earlier Virtual Console releases (Wii, Wii U, New Nintendo 3DS) sit on storefronts now closed to new purchases, so they only help if you already own them. The original cartridge still circulates widely second-hand — and the Japanese Super Famicom version is the same ROM with the English-text option described in Quick Facts, making it a perfectly playable import; what a 1994 save battery owes you after thirty years is, of course, pot luck.
- Original Super Famicom / SNES cartridge:
- Nintendo Classic Mini / SNES Classic Edition (built-in):
Find the original Japanese cartridge
Disclosure: The Rakuten and Yahoo! Shopping links are standard shopping links. Enkeisha does not earn a commission from purchases made through these links.
Find original hardware editions on eBay
As an eBay Partner Network affiliate, Enkeisha may earn a commission from qualifying purchases made through these links.
Search eBay listings (affiliate link)
Check the language, region, hardware compatibility, condition and authenticity before buying. Search results may include reproductions; links do not endorse individual sellers.