Super Mario World — All 96 Exits, Four Switch Palaces, and the Road to the Special Zone: The Deep Strategy Guide
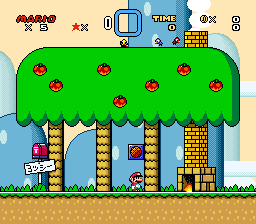
Beating Bowser in Super Mario World is the easy part. The real game is the counter on the file-select screen: 96 exits, hidden across red-dotted courses, four Switch Palaces, a star-shaped shortcut world, and eight expert courses locked behind all of it. This deep guide is built for players who want to finish the Super Famicom / SNES original properly — every secret exit and what it unlocks, every Switch Palace, the full Star Road and Special Zone route, every boss, and the Yoshi and Dragon Coin systems — with the Game Boy Advance remake's changes kept clearly separate from the original.
Quick Facts
| Item | Detail |
|---|---|
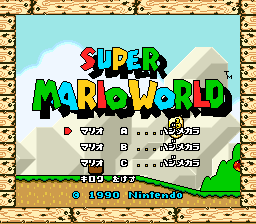
| Japanese title | Super Mario World: Super Mario Bros. 4 (スーパーマリオワールド) |
| English title | Super Mario World |
| Platform (original) | Super Famicom / Super Nintendo Entertainment System |
| Release (Japan, SFC) | November 21, 1990 (a Super Famicom launch title) |
| Release (North America, SNES) | August 23, 1991 |
| Release (Europe, SNES) | April 11, 1992 |
| Developer | Nintendo EAD |
| Director / Producer | Takashi Tezuka / Shigeru Miyamoto |
| Publisher | Nintendo |
| Genre | 2D platformer |
| Players | 1–2 (alternating) |
| Japanese cartridge | 524,288 bytes (4 Mbit), LoROM, ROM + RAM + battery-backed save |
| Completion target | 96 exits (a star appears beside the counter at 96) |
| Series position | Launch title for the Super Famicom / SNES; Yoshi's debut |
Overview
Mario, Luigi, and Princess Toadstool are vacationing in Dinosaur Land when the Princess disappears and the native Yoshis are found sealed in eggs. The brothers cross seven main areas — Yoshi's Island, Donut Plains, Vanilla Dome, the Twin Bridges, the Forest of Illusion, Chocolate Island, and the Valley of Bowser — storming a castle at the end of each before the final approach to Bowser's Castle.
Three systems make this far more than a left-to-right platformer. First, the overworld is a web, not a line: courses with a red dot hide a second, secret exit, and those exits open shortcuts, bonus courses, and entire hidden areas. Second, Yoshi — who hatches from eggs in blocks — eats enemies and shells, and shell colours grant him temporary powers (see the matrix below). Third, the Cape Feather, first found in Donut Plains 1, turns Mario into a flying character who can cross whole courses from above, which is exactly what many secret exits assume you can do. Progress is saved at set points (after castles, fortresses, Ghost Houses, and Switch Palaces), so a 96-exit run is a campaign, not a sitting.
Why It Still Matters
Super Mario World sold over 20 million copies and became the best-selling game on its console, but its lasting influence is structural. It introduced secret exits to the Mario series — the idea that a course can contain two goals, and that finding the hidden one redraws the map. Every later 2D Mario, and a generation of platformers after it, inherited that grammar. It also introduced Yoshi, the reserve item box, the save-prompt rhythm after major clears, and a completion counter that made "100%" a visible, countable goal years before that became standard. Because the map is fully interconnected, it rewards knowledge over reflexes on a replay: a skilled player can ride the Star Road to Bowser's doorstep having fought only one Koopaling (Iggy), while a completionist faces one of the fairest, most checkable 100% hunts of the 16-bit era.
Highlights
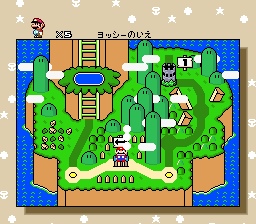
- A map that fights back against linearity. 24 of the 96 exits are secret. Some open one-course detours; others — the Forest of Illusion above all — are required just to stop walking in circles.
- The Star Road shortcut web. Five Star Warps link the far corners of Dinosaur Land, and the Star World courses hide a sixth secret: the Special Zone, the game's expert tier.
- A completion reward you can see. Clearing the Special Zone permanently changes the season in Dinosaur Land — the map turns autumnal and several enemies change appearance (details below). Few games of the era rewired their whole look as a trophy.
- Yoshi as a system, not a gimmick. Shell colours, coloured Yoshis in the Star World, Yoshi's Wings bonus flights, and Dragon Coins all interlock — the tables below untangle them.
Strategy Essentials
The 96 Exits, Counted Properly
The file-select counter tracks exits, not courses. The arithmetic that every 96-exit guide depends on:
| Component | Count | Notes |
|---|---|---|
| Courses and locations with at least one exit | 72 | Includes the 4 Switch Palaces; excludes Yoshi's House, the Top Secret Area, and Bowser's Castle, which add nothing to the counter |
| Normal exits | 72 | One per location above — a Giant Gate, a castle/fortress clear, or a palace switch |
| Secret exits | 24 | A second exit in 24 of those locations, reached by a Key and Keyhole or a second goal |
| Total | 96 | A star appears to the left of the "96" on the file-select screen when all are found |
Where the exits live, by area (counts follow the standard exit checklist order):
| Area | Exits | Secret exits inside |
|---|---|---|
| Yoshi's Island | 6 | 0 |
| Donut Plains (incl. Donut Secret courses) | 15 | 5 |
| Vanilla Dome (incl. Vanilla Secret courses) | 14 | 3 |
| Twin Bridges | 7 | 1 |
| Forest of Illusion | 14 | 5 |
| Chocolate Island | 11 | 2 |
| Valley of Bowser | 11 | 3 |
| Star World (Star Road) | 10 | 5 |
| Special Zone | 8 | 0 |
| Total | 96 | 24 |
Reading the map: a red dot marks a course with two exits; a yellow dot has one. Ghost Houses are the exception to the visual rule — four of the six have secret exits despite having no dot. No castle or fortress has a secret exit, and neither does anything on Yoshi's Island or in the Special Zone. The most commonly missed exits are the Star World normal exits (they open nothing new, so players forget to take them), the Forest Ghost House secret exit (it loops back to Forest of Illusion 1, so it feels pointless — it still counts), and Soda Lake (the path it opens on the map is invisible).
Every Secret Exit — and What It Unlocks
All 24, in the order you are likely to meet them. "Key" means carrying a Key to a Keyhole; the exceptions are noted.
| # | Course | How the secret exit works | Unlocks |
|---|---|---|---|
| 1 | Donut Plains 1 | Key and Keyhole on a ledge reached by Cape flight | Donut Secret 1 |
| 2 | Donut Plains 2 | Key and Keyhole (upper route) | Green Switch Palace |
| 3 | Donut Ghost House | Alternate door route high in the house (Cape helps) | Top Secret Area |
| 4 | Donut Secret 1 | Key and Keyhole | Donut Secret House |
| 5 | Donut Secret House | Hidden door above the normal exit door; the boss Big Boo guards this exit (see Bosses) | Star Warp to Star World 1 |
| 6 | Vanilla Dome 1 | Key and Keyhole | Vanilla Secret 1 |
| 7 | Vanilla Dome 2 | Key and Keyhole (after the second swim) | Red Switch Palace |
| 8 | Vanilla Secret 1 | Key and Keyhole | Star Warp to Star World 2 |
| 9 | Cheese Bridge Area | A second Giant Gate beyond the normal one — fly under/past the first gate (Cape or Yoshi) | Soda Lake |
| 10 | Forest of Illusion 1 | Key and Keyhole | Forest Ghost House |
| 11 | Forest of Illusion 2 | Key and Keyhole (hidden passage) | Blue Switch Palace |
| 12 | Forest of Illusion 3 | Key and Keyhole | #5 Roy's Castle (shortcut — skips the Ghost House route) |
| 13 | Forest Ghost House | Alternate door route | Forest of Illusion 1 (a loop — but it counts) |
| 14 | Forest of Illusion 4 | Key and Keyhole | Forest Secret Area |
| 15 | Chocolate Island 2 | Key and Keyhole; which route through the course you get depends on your time, coins, and Dragon Coins, so runs vary | Chocolate Secret |
| 16 | Chocolate Island 3 | Second Giant Gate past the first; the normal exit loops back to the same course | Chocolate Fortress |
| 17 | Valley of Bowser 2 | Key and Keyhole | Valley Fortress |
| 18 | Valley Ghost House | Alternate exit route | #7 Larry's Castle |
| 19 | Valley of Bowser 4 | Key and Keyhole | Front Door of Bowser's Castle and Star Warp to Star World 5 |
| 20 | Star World 1 | Key and Keyhole | Star World 2 |
| 21 | Star World 2 | Key and Keyhole | Star World 3 |
| 22 | Star World 3 | Key and Keyhole | Star World 4 |
| 23 | Star World 4 | Key and Keyhole | Star World 5 and the Front Door of Bowser's Castle |
| 24 | Star World 5 | Key and Keyhole (high up — bring flight: Cape, or a Blue Yoshi) | Gnarly — the entrance to the Special Zone |
Two practical notes. First, at least two secret exits are effectively mandatory to finish the game at all, because some normal exits lead nowhere new (Chocolate Island 3's loops back; Forest of Illusion 4's leads to an already-open dot; most Star World normal exits open nothing). Second, the Top Secret Area (secret exit 3) is the game's refill station: a free Yoshi and power-up blocks, revisitable as often as you like — the standard stop before a hard castle.
The Four Switch Palaces
Each palace is a short course ending in a giant switch. Stepping on it permanently turns every dotted outline of that colour, in every course, into a solid ! Block. Palaces can be cleared only once — afterwards they collapse and cannot be replayed. Three of the four are themselves hidden behind secret exits.
| Colour | Palace location | How you reach it | What the ! Blocks do |
|---|---|---|---|
| Yellow | Yoshi's Island | Normal path — clear Yoshi's Island 1 and climb to it | Solid platforms; hit one from below for a Super Mushroom |
| Green | Donut Plains | Secret exit of Donut Plains 2 | Solid platforms; hit one from below for a Cape Feather |
| Red | Vanilla Dome | Secret exit of Vanilla Dome 2 | Solid platforms only — no item inside |
| Blue | Forest of Illusion | Secret exit of Forest of Illusion 2 | Solid platforms only — no item inside |
Do them as early as each becomes available. The blocks are placed as if the designers assumed you would: they bridge pits, shorten Bowser's Castle (the Front Door route's first room can be crossed on them), and put a Mushroom or Feather within reach in dozens of courses. The Green palace is the single best power-up investment in the game — a Feather on tap, everywhere, forever.
Star Road and the Special Zone
Five Star Warps connect Dinosaur Land to the star-shaped Star Road. Each warp is opened from the main map:
| Star Warp opened from | Leads to |
|---|---|
| Donut Secret House (secret exit) | Star World 1 |
| Vanilla Secret 1 (secret exit) | Star World 2 |
| Soda Lake (clear it; Soda Lake itself is behind Cheese Bridge Area's secret exit) | Star World 3 |
| Forest Secret Area (reached via Forest of Illusion 4's secret exit) | Star World 4 |
| Valley of Bowser 4 (secret exit) | Star World 5 |
Inside the Star World, the logic inverts: the normal Giant Gate of each course simply returns you to the same Star Road point, and only the secret exit builds the road onward. Each Star World course also contains a Baby Yoshi — feed it five enemies (or one power-up) and it grows into a coloured adult Yoshi (see the Yoshi matrix).
| Course | Baby Yoshi | Normal exit | Secret exit opens |
|---|---|---|---|
| Star World 1 | Red | Loops to the same Star Road point | Star World 2 |
| Star World 2 | Blue | Loops to the same Star Road point | Star World 3 |
| Star World 3 | Yellow | Loops to the same Star Road point | Star World 4 |
| Star World 4 | Red | Loops to the same Star Road point | Star World 5, and the Front Door of Bowser's Castle |
| Star World 5 | Yellow | Completes the Star Road loop | The Special Zone (via the warp on the central mountain) |
Clearing Star World 5's secret exit raises a new Star Warp to the Special Zone: eight expert courses, taken in a fixed order, with no secret exits.
| # | Special Zone course | Note |
|---|---|---|
| 1 | Gnarly | The opener — a vertical climb that sets the tier's tone |
| 2 | Tubular | The infamous one: most of the course is flown on a P-Balloon, drifting between enemies |
| 3 | Way Cool | Expert course built around moving-platform timing |
| 4 | Awesome | Expert course; among the longest in the zone |
| 5 | Groovy | Expert course |
| 6 | Mondo | Expert course |
| 7 | Outrageous | Expert course |
| 8 | Funky | The finale — the longest Special course; near the goal, coins spell out "YOU ARE A SUPER PLAYER!!" |
What changes when you clear the Special Zone (original version): a new Star Warp returns you to Yoshi's House, and Dinosaur Land shifts from spring to autumn, permanently on that save file. The overworld palette turns orange-brown; Koopa Troopas wear Mario masks; Piranha Plants become pumpkin-headed Jumping Pumpkin Plants; Bullet Bills become Pidgit Bills. It is a cosmetic trophy — no courses change — and it cannot be undone without starting a new file. (The GBA remake moves this reward: there, the autumn change requires all 96 exits instead — see the version box.)
Dragon Coins (Yoshi Coins)
The large coins with Yoshi's face are a per-course challenge layered over everything above.
| Rule | Detail |
|---|---|
| Where they are | Most ordinary courses hold at least five. Castles, fortresses, and Ghost Houses have none in the original. Chocolate Secret is the famous exception among normal courses: it holds only one |
| What they pay | Each also counts as one normal coin. In sequence they score 1,000, 2,000, 4,000, and 8,000 points; the fifth awards a 1-Up instead |
| Six or more | A few courses hold more than five; every coin from the fifth onward awards a 1-Up |
| The catch | If you have already collected five in a course and pass through a Warp Pipe to a new area, the remaining Dragon Coins vanish for that run. Losing a life resets the course's Dragon Coin count — they are a single-run challenge |
| Tracking (original) | None. The original does not record which courses you have cleared of Dragon Coins, and there is no reward for collecting them all. Enjoy them as a 1-Up route, not a checklist — the checklist treatment is a GBA addition (see below) |
| Bonus areas | Taking Yoshi's Wings flies Yoshi (who turns blue) to a coin-heaven bonus area that itself holds five Dragon Coins |
Yoshi: Shells and Colours
Any Yoshi gains a temporary power from the shell in its mouth; a coloured Yoshi adds its own power on top, with any shell. Powers last while the shell is held — swallow or spit it and they end.
| Shell held | Effect (any Yoshi) |
|---|---|
| Green | No added power |
| Red | Spit it out as three fireballs |
| Yellow | Every landing kicks up a sand cloud / mini-quake that topples nearby enemies |
| Blue | Yoshi sprouts wings and flies while the shell is held |
| Flashing (rare) | All of the above at once |
| Yoshi colour | Where you first get one | Innate power (with any shell) |
|---|---|---|
| Green | Eggs in blocks across Dinosaur Land | None — shell powers only |
| Red | Baby Yoshi in Star World 1 and Star World 4 | Spits any shell back out as three fireballs |
| Blue | Baby Yoshi in Star World 2 | Flies with any shell — the most useful Yoshi in the game |
| Yellow | Baby Yoshi in Star World 3 and Star World 5 | Mini-quake landings with any shell |
Once you have found a coloured Yoshi in the Star World, eggs in blocks can hatch that colour instead of green (for Mario; the details differ slightly by brother and state). Two more Yoshi facts worth knowing: if you hit an egg block while already riding a Yoshi, the egg gives a 1-Up Mushroom instead; and Yoshi cannot enter castles, fortresses, or Ghost Houses — he waits outside, so plan those courses on foot.
Bosses
Every castle ends with a Koopaling; every fortress ends with the four Reznors. One optional boss, the Big Boo, guards Donut Secret House's secret exit. In castle order:
| Boss | Location | How to win |
|---|---|---|
| Iggy Koopa | #1 Iggy's Castle (Yoshi's Island) | On a tilting platform over lava — stomp him repeatedly to push him toward the low edge until he falls in. Fireballs also push him |
| Reznor (×4) | Vanilla Fortress | Four fire-breathing triceratops on a rotating wheel of platforms. Hit each platform from below to knock its Reznor into the lava — one hit each. After two fall, the floor starts collapsing from the centre; finish from atop a vacated platform |
| Morton Koopa Jr. | #2 Morton's Castle (Donut Plains) | Three stomps. He climbs the walls and ceiling and drops on you; jump as he lands so the shockwave does not stun you |
| Lemmy Koopa | #3 Lemmy's Castle (Vanilla Dome) | Three stomps — but he pops out of pipes alongside two decoys. Hit the real (yellow) Lemmy; a Lava Bubble roams the room |
| Ludwig von Koopa | #4 Ludwig's Castle (Twin Bridges) | Three stomps. He breathes fireballs, retreats into a spinning shell dash, then leaps — stomp him as he lands and keep the rhythm |
| Reznor (×4) | Forest Fortress | Same fight as Vanilla Fortress; the floor collapses faster |
| Roy Koopa | #5 Roy's Castle (Forest of Illusion) | Three stomps. Morton's wall-climb pattern, but he speeds up after each hit and the room's walls close in a little with every slam he lands |
| Reznor (×4) | Chocolate Fortress | Same fight again, on the main Chocolate Island route |
| Wendy O. Koopa | #6 Wendy's Castle (Chocolate Island) | Three stomps. Lemmy's pipe-and-decoys fight on a flat floor, now with two Lava Bubbles to dodge |
| Reznor (×4) | Valley Fortress | The fourth and final Reznor fight |
| Larry Koopa | #7 Larry's Castle (Valley of Bowser) | Iggy's tilting-platform fight, reprised — but three Lava Bubbles now erupt through the platform. Push him into the lava as before |
| Big Boo (optional) | Donut Secret House | Guards the secret exit to the Star World 1 warp. He is transparent and harmless himself; throw three Grab Blocks at him while he is visible. Mind the two ordinary Boos, and do not tear up so much floor that you fall through |
| Bowser | Bowser's Castle (Front Door or Back Door) | Three phases in the Koopa Clown Car. In each phase he drops two Mechakoopas: stomp one to wind it up, grab it, and throw it up onto Bowser's head — two hits per phase, six in total. Between phases, dodge the falling fire rain and take the Mushroom the Princess tosses you. In the final phase he also drops heavy balls and bounces the Clown Car along the ground — run underneath as it leaps |
General boss notes: most Koopalings are briefly invulnerable while spinning in their shells, so time stomps for when they emerge. Fireballs work on Iggy and Larry (they push rather than damage in the usual way). And remember that castles and fortresses can be replayed by holding L + R on a cleared one — useful for practising a boss — but Switch Palaces cannot be replayed at all.
Version Differences: the GBA Remake Is Not the Original
Super Mario World: Super Mario Advance 2 (Game Boy Advance; Japan December 14, 2001, North America February 11, 2002, Europe April 12, 2002) is a close port, but several systems this guide describes were changed. Treat anything below as remake-only:
| Feature | Original (SFC/SNES, 1990) | GBA remake (2001/2002) |
|---|---|---|
| Players | 1–2 alternating; Luigi plays identically to Mario | Single-player; Luigi is a selectable character with his own physics — higher, floatier jumps, worse traction, higher-bouncing fireballs |
| Autumn change | Triggered by clearing the Special Zone | Triggered only by finding all 96 exits; Goombas and Pokeys also change appearance |
| Dragon Coins | No tracking, none in castles/fortresses/Ghost Houses, no total reward | Added to nearly every course (including castles, fortresses, and Ghost Houses); a status screen (Select on the map) tracks them per course; collecting all of them (480) turns them into Princess Coins |
| Exit tracking | Counter only | Status screen lists exits per course and which brother found them |
| Lives | — | Lives are saved between sessions; the cap is raised (commonly listed as 999) |
The 96-exit tables, Switch Palace locations, and boss strategies in this guide are the same in both versions; the Dragon Coin and autumn rules are where the two games genuinely diverge.
Who It's For
- Completionists who want a 100% target that is finite, visible, and fair — 96 exits, every one findable without a guide, every one satisfying to check off.
- Platformer historians — this is where secret exits, coloured Yoshis, and the modern Mario map were invented, in their original form.
- Returning players who beat Bowser as children and stopped at 40-something exits. The back half of this game — Forest of Illusion, Star World, Special Zone — is effectively a second game you may never have seen.
How to Play It Today
- Nintendo Switch — Super Nintendo Entertainment System: Nintendo Classics: the original is included with a Nintendo Switch Online subscription; the most convenient legal way to play the unaltered game today.
- Super NES Classic Edition / Nintendo Classic Mini: Super Famicom: the 2017 mini consoles include it pre-installed.
- Original hardware: Super Famicom / SNES cartridges are common and inexpensive second-hand; the battery in a 1990 cartridge may need replacing to hold saves.
- Game Boy Advance: Super Mario Advance 2 cartridges play on GBA, GBA SP, and the Game Boy Player — a fine version, with the remake differences noted above.
- Older Virtual Console releases (Wii, Wii U, New Nintendo 3DS) exist on already-purchased accounts but their storefronts are closed to new purchases.
Find the original Japanese cartridge
Disclosure: The Rakuten and Yahoo! Shopping links are standard shopping links. Enkeisha does not earn a commission from purchases made through these links.
Find original hardware editions on eBay
As an eBay Partner Network affiliate, Enkeisha may earn a commission from qualifying purchases made through these links.
Search eBay listings (affiliate link)
Check the language, region, hardware compatibility, condition and authenticity before buying. Search results may include reproductions; links do not endorse individual sellers.