Super Mario RPG — The Mario Adventure Where Your Thumbs Do the Fighting
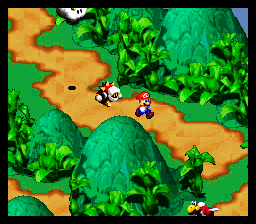
Most turn-based RPGs ask you to pick a command and watch. Super Mario RPG asks you to pick a command and then land it — press again at the instant of impact, hold and release on a rising star meter, spin the control pad in a snowstorm — and it asks the same of your defence. Released for the Super Famicom in 1996 as the first RPG in the Mario series, it is a Square-built adventure whose battles never let your hands rest, wrapped around a quest for seven fallen stars.
Scope of this article: This article covers only the original Super Famicom / SNES version (1996). The Nintendo Switch remake (2023) changes a number of things described here — among them the colour of the fifth Star Piece, where the Signal Ring is found, and the addition of Triple Moves, an Action Gauge and post-game rematch bosses with new ultimate weapons. Where a difference matters, it is flagged in the text. Everything else follows the original throughout.
Quick Facts
| Item | Detail |
|---|---|
| Original title | スーパーマリオRPG (Super Mario RPG) |
| English title | Super Mario RPG: Legend of the Seven Stars |
| Platform | Super Famicom (Super Nintendo Entertainment System outside Japan) |
| Release date (Japan) | March 9, 1996 |
| Release date (North America) | May 13, 1996 |
| European release | No cartridge release at the time; Europe first received the game via the Wii Virtual Console in 2008 |
| Developer | Square |
| Publisher | Nintendo |
| Genre | Role-playing game (RPG) |
| Directors | Yoshihiko Maekawa, Chihiro Fujioka |
| Producer | Shigeru Miyamoto |
| Music | Yoko Shimomura |
| Cartridge size | 32 Mbit (4 MB), SA-1 enhancement chip |
| Save system | Battery-backed save RAM (256 Kbit) |
| Players | 1 |
| Playable party | 5 characters in total; 3 active in battle, including Mario |
| Level cap | 30 |
Overview
The opening is pure Mario: Bowser carries off Princess Toadstool, Mario storms Bowser's Keep, and the two are mid-duel on the chandeliers when Exor — a living sword the size of a tower, sent by the smith-king Smithy — plunges through the roof. On the way down, Exor shatters the Star Road, the high road where wishes become shooting stars, and its seven Star Pieces scatter across the world. Until they are recovered, no wish can come true.
The party that assembles to fix this is the game's first joke and its biggest charm. Mario is joined by Mallow, a cloud-like boy who believes he is a frog and was raised at Tadpole Pond; by Geno, a star being animating a wooden doll, sent by the Star Road itself; and then, in the series' great role reversal, by Bowser — who has lost his Keep, his army and his dignity to Smithy's gang and wants them back — and by the rescued Toadstool herself, who turns out to be the finest healer in the game.
Exploration is in the isometric, pre-rendered style Square made famous in the mid-1990s, with enemies visible on the field: touch one and a turn-based battle begins, avoid it and there is no battle at all. Between the dungeons sits a string of set pieces that have nothing to do with combat — a mine-cart ride, a wedding to crash in Marrymore, a curtain-climbing chase up Booster Tower, a barrel-volcano, a sunken ship whose door is locked with a six-letter password. The main quest is compact for its era, but the optional layer underneath it — 39 hidden treasure chests, a hidden boss, a casino, a dojo — is where this deep-dive guide spends most of its time.
Why It Still Matters
This is where the Mario RPG house style was invented. The Action Command — a timed second press that strengthens an attack or blunts an enemy's — became the defining mechanic of both the Paper Mario and Mario & Luigi series that followed. Almost everything those games do with timing, guarding and badge-like accessories has a direct ancestor on this cartridge.
It also matters as a one-time meeting of two studios at their peak. Square supplied the systems, the pre-rendered look and a script full of in-jokes about its own Final Fantasy games — including an entire optional boss built as a Final Fantasy tribute (see Culex, below) — while Nintendo supplied the cast and the discipline that every system be explainable by playing with it. The result sold the idea that an RPG could be funny, physical and short enough to finish, at a moment when the genre was heading the other way. And because the original cartridge never received a European release, for a whole region this was a rumour of a game for twelve years — one reason its reputation ran ahead of it for so long.
Highlights
- Battles you play with your hands, not just your cursor. Every weapon has its own timed-hit moment, every special move has its own input style, and defence is an active skill rather than a stat. Mastering the timing is worth more than a level or two of grinding.
- A party with no passengers. Mallow reads enemies' minds and calls the weather, Geno is a glass cannon with the game's most famous trick shot, Bowser finally gets to be the heavy, and Toadstool's healing makes the hardest optional fights survivable. Swapping the two non-Mario seats to suit a boss is a real decision.
- Secrets with a sense of humour. A treasure chest you can only reach by standing on a Toad's head during your first minute in the castle; a boss hidden behind a sealed door, sulking about crystals; a gardener who will grow you a beanstalk if you bring him a seed and some fertiliser. The game teaches you to jump at every wall.
- Yoko Shimomura's score. Forest flutes, a haunted-ship waltz, and a boss theme borrowed — openly, and with love — from Final Fantasy IV for the one fight that deserves it.
Strategy Essentials
1. Action Commands — The Whole Game Is Timing
The instruction booklet divides Action Commands into four families, and the table below follows that division, with the guard and one famous special case added. Two principles cover almost everything: for attacks, the correct moment is the instant of contact (not when the animation starts), and pressing early or mashing does not count — a mistimed press simply produces the plain version of the move.
| Input type | How it works | Representative moves | What success does |
|---|---|---|---|
| Timed Hit (normal attack) | Choose Attack, then press the attack button again at the moment the weapon connects. Each weapon has its own moment: just before a punch lands, at the end of a hammer's swing, just as a shell is kicked, just before a projectile fires | Every character's weapon attacks | A second, stronger hit. This is your default damage for most of the game — an untimed attack is roughly a half-finished one |
| Timed Hit (defence / guard) | When an enemy attacks, press the button just as the attack connects on your character | Works against physical attacks | Reduces the damage; with exact timing, a physical attack can be reduced to zero. Most large magic attacks cannot be guarded this way — for those, defence stats, the Defend command and defensive items are the answer |
| Repeated Timed Hit | Press again at each contact point to keep the move going | Mario's Jump (3 FP) and Super Jump (7 FP): press again just before each landing to bounce again | Each successful press adds another hit. Super Jump is the game's great skill test — see the 30 / 100 jump rewards in the secrets table below |
| Continuous Hit (mash) | Press any button repeatedly for the duration | Mario's Fire Orb (5 FP); Bowser's Bowser Crush (16 FP) | More presses, more hits and more damage |
| Star Hit (hold and release) | Hold the button while a star meter fills; release when three stars are showing. Holding past the peak wastes the charge | Geno's Beam (3 FP) and Geno Flash (16 FP) | Maximum power at exactly three stars. Geno Boost (4 FP) is a close cousin: a plain press raises Attack, but pressing again before the rising arrows disappear adds a Defence boost as well |
| Rotational Hit | Rotate the Control Pad for the duration of the animation | Mallow's Snowy (12 FP); Bowser's Terrorize (6 FP) and Poison Gas (10 FP) | Faster, fuller rotation means more damage (and, for Bowser's status moves, a better chance the effect lands) |
| Single precise press (special case) | One press at one exact visual moment | Geno Whirl (8 FP): press as the disc leaves the screen | Against enemies that are not immune, a perfect press deals 9,999 damage. Most bosses are immune — the celebrated exception is Exor: in the original version, once one of Exor's eyes has been destroyed, a perfectly timed Geno Whirl can end that fight at once. This began as an original-version quirk and is best treated as a curiosity, not a plan |
Three habits that make the system work for you:
- Learn each new weapon once, on a weak enemy. The timing window moves with the animation — a hammer, a shell and a glove all "land" at different moments. One practice fight per new weapon pays for itself in every boss that follows.
- Guard everything physical. Even an imperfect guard cuts damage, and the perfect guard that negates an attack entirely is the single biggest survivability gain available at any level. Save the Defend command (which halves what a character takes on their turn, at the cost of their action) for turns spent setting up or surviving an expected magic attack.
- Flower Points are a shared pool. All five characters draw FP from one party-wide gauge, raised by Flower items found in chests and after battles. A special-heavy party is a party that must budget — which is why the humble timed normal attack matters so much.
Levelling note. The level cap in the original is 30, and you will normally finish well below it — grinding to the cap is a project for the optional bosses, not a requirement for Smithy. At each level-up you choose one of three bonus groups (HP; Attack and Defence; Magic Attack and Magic Defence), and the group offering the larger bonus rotates in a fixed cycle. Choosing the boosted group each time is the difference between a solid party and an exceptional one at the same level. New special moves stop arriving in the mid-teens, so late levels are about stats, not new toys.
2. The Seven Stars — Where Each One Falls
Exor's fall scatters the Star Road into seven Star Pieces. The colours below are the original version's colours — note the fifth piece in particular, which is blue here and was changed to pink in the remake.
| # | Star Piece (original colour) | Where it is found | How you get it |
|---|---|---|---|
| 1 | Light blue | Mushroom Kingdom (Mushroom Castle) | Defeat Mack — Claymorton in the remake's naming — and his Bodyguards, who have occupied the castle and taken the throne room |
| 2 | Green | Forest Maze | Follow Geno into the maze and defeat Bowyer, the bow-wielding gang member raining arrows on Rose Town |
| 3 | Orange | Moleville Mines (the Coal Mines at Moleville) | Get past Punchinello, the bomb-maker; his own oversized King Bomb is what finally shakes the Star Piece loose |
| 4 | Purple | Star Hill | No boss guards this one. Touch the star flowers to open the star doors and walk the hill of ungranted wishes — the calmest Star Piece in the game |
| 5 | Blue (pink in the remake) | The Sunken Ship, then Seaside Town | Beat Jonathan "Johnny" Jones in his ship to win it, lose it at the town gate to the disguised Yaridovich (Speardovich), then beat Yaridovich to take it back |
| 6 | Red | Barrel Volcano | Fight through the Czar Dragon to find it, watch the Axem Rangers steal it, then defeat the Rangers aboard their airship, the Blade, to claim it |
| 7 | Yellow | Smithy's Factory (the Weapon World) | The last piece is in Smithy's own keeping. Defeat Smithy at the end of the Factory and the Star Road can finally be repaired |
3. Hidden Chests, the Hidden Boss and the Collectables
Hidden treasure chests: 39 in total. They are invisible blocks in all but name — jump at the right spot and a chest appears. Their contents lean heavily on Frog Coins, Flowers (which raise your maximum FP) and a few items found nowhere else. The count by area:
| Area | Hidden chests |
|---|---|
| Mushroom Kingdom | 3 |
| Bandit's Way | 1 |
| Rose Town | 2 |
| Forest Maze | 6 |
| Pipe Vault | 2 |
| Yo'ster Isle | 1 |
| Booster Pass | 2 |
| Booster Tower | 4 |
| Marrymore | 1 |
| Sunken Ship | 1 |
| Land's End (including Belome Temple) | 6 |
| Monstro Town | 1 |
| Bean Valley | 3 |
| Nimbus Land and Nimbus Castle | 5 |
| Smithy's Factory | 1 |
| Total | 39 |
Representative chests worth planning around:
| Chest | Location and method | Why it matters |
|---|---|---|
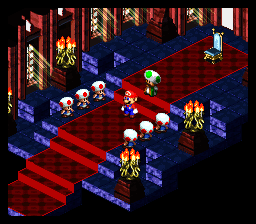
| Frog Coin | Mushroom Castle, above the throne-room doorway, during your first entry — ride the escorting Toad's head up to the ledge and jump | The famous one: in the original this chest is missable for good if the moment passes. (The remake makes it obtainable later; the original does not.) |
| Flower ×2 | Mushroom Kingdom item shop basement — the resident gives you a practical lesson in hidden chests, then becomes your stepping stool for the second | Your first two FP increases, and the game's own tutorial that hidden chests exist. Note for veterans of the remake: in the original he does not hand you the Signal Ring here |
| Kerokero Cola | Bandit's Way — jump from the spinning flower | Full HP and FP recovery for the whole party; one of the best single items in the game, and it is sitting in the first side area |
| Red Essence | Forest Maze, near the save point before the exit; another waits in Bean Valley | Three turns of invincibility for one character — a stored answer to Culex or Smithy |
| Goodie Bag | Booster Tower, above a visible chest near the top | A reusable coin source in battle; most players sell it for a tidy sum instead |
| Flower | Sunken Ship, the mirror room — jump on your own double's head, then jump again | The most Mario solution to a puzzle in the game |
| Frog Coin | Nimbus Castle, floating in empty air beyond a doorway late in the castle | The chest that teaches the final lesson: in this game, the void is also a floor |
The Signal Ring problem (original version). The accessory that chimes when a hidden chest is in the room exists in the original — but you get it late. Only after defeating Valentina in Nimbus Land can you find Croco hiding in the rightmost house of the town, and startle him into dropping the Signal Ring. That means most of the 39 chests are, on a first original-version playthrough, found by memory, by guides, or by jumping a lot. The early-game Signal Ring of the remake is one of its friendliest changes — do not go looking for it in the Mushroom Kingdom basement here.
Frog Coins and where to spend them. Frog Coins are the game's second currency, earned from hidden chests, mini-games and a few enemies, and they are finite enough to budget. The main outlet is the "Frog Coin" Emporium at Tadpole Pond, which sells battle items ordinary shops never stock — Bracer and Energizer (2 Frog Coins each) and Crystalline (5), which raise a character's or the whole party's defences and attack mid-battle. The Frog Sage's student separately offers Earlier Times (15 Frog Coins), which restarts a battle from the beginning — expensive insurance, and the closest thing the original has to a panic button. Tadpole Pond's Juice Bar, unlocked in stages by performing melodies for the composer Toadofsky, is the other regular drain on your coins.
The hidden boss: Culex. Behind a sealed door in Monstro Town waits the game's superboss — a dark knight from another dimension who fights in flat, hand-drawn Final Fantasy pixel style, accompanied by four elemental Crystals, to a rearrangement of the Final Fantasy IV boss theme. The door opens with a Shiny Stone: buy Fireworks from a mole in Moleville for 500 coins, trade them to the mole girl running her pretend shop among the crates, and carry the stone to Monstro Town. Culex himself has 4,096 HP — more than any single target in the game except Smithy's final form — and this is a long war of attrition, not a damage race: bring Toadstool, bring your best defensive gear (the Lazy Shell armour below is the classic choice), work through the Crystals, and let his FP run dry. Victory earns the Quartz Charm, an accessory whose considerable battle effects make it the connoisseur's prize of the original. (The powered-up post-game rematch with Culex that some guides describe is a remake addition; in the original, this one fight is the whole story.)
Two more optional fixtures. In Monstro Town's dojo, a short chain of three bouts — against Jagger, then against the master, Jinx, twice — earns the Jinx Belt. And in Booster Tower, winning the knife-juggling game of Knife Guy twelve times in a row earns the Bright Card, your membership for Grate Guy's Casino, hidden out in Land's End, where the "look the other way" game can produce rare prizes such as the Star Egg.
4. Bosses and Endgame Equipment
Read bosses with Mallow first: his Thought Peek reveals an enemy's remaining HP and, often, a hint at its weakness. The table sticks to weaknesses and mechanics that hold across the original's guides — several of these bosses have no elemental weakness at all, and pretending otherwise wastes FP.
| Boss | Weakness / key mechanic | What to do |
|---|---|---|
| Croco (both fights) | Weak to Fire | Mario's Fire Orb ends the argument early; in the second fight, take back your coins as well as the win |
| Mack (Claymorton) | Weak to Thunder | Mallow's Thunderbolt both hurts Mack and clears his Bodyguards; a thunder hit also leaves him stunned for a turn |
| Bowyer | No elemental weakness; periodically seals one battle button (Attack, Special or Item) | Alternate with whatever he has left open — physical while Special is sealed, specials while Attack is sealed — and keep Mallow healing |
| Punchinello | No elemental weakness; immune to Jump | His Bob-ombs are the real damage. Ignore the temptation to clear them all, guard the explosions, heal steadily and hit Punchinello himself; Mario needs Jump Shoes if you insist on jumping |
| Jonathan "Johnny" Jones | His Bandana Blue crew fights first; then Johnny calls for a one-on-one duel with Mario | Clear the crew with area attacks, then go into the duel with Mario healthy and stocked — it is a test of your guard timing more than your stats |
| Yaridovich (Speardovich) | Fights with a mirage double | Area attacks are inefficient; identify the real body (the mirage cannot take the same punishment) and concentrate everything on it |
| Valentina and Dodo | Dodo breaks off mid-fight for a solo bout against one party member | Keep all three members healed before the split, not just your favourites — whoever Dodo takes aside has to last |
| Axem Rangers, then the Blade | Five rangers with different strengths; Axem Pink heals her teammates; afterwards the Blade's Breaker Beam needs charging time | Focus one ranger down at a time, Pink early if her healing is undoing your work; when the Blade starts charging its beam, that is your cue to heal and guard, not to race it |
| Exor | The eyes shield the body | Destroy an eye first to open Exor up — and see the Geno Whirl note in the Action Command table for the original version's famous shortcut |
| Smithy, first phase | Smithy himself has no weakness; his Smelter is weak to Thunder | Keep the Smelter from feeding him new minions while you wear the body down; Toadstool on healing duty is the standard formation |
| Smithy, final form — the heads | Tank Head: weak to Thunder. Treasure Chest Head: weak to Fire. Wizard Head: no elemental weakness — answer it with physical attacks. Mask Head: a defensive wall with no useful weakness | The fight is a wardrobe of problems: read the head, switch damage types to match, and let the Mask Head wait while you heal and restore FP |
| Culex (optional) | See the secrets section | The examination at the end of all of the above: levels in the high twenties, best armour, Red Essences in reserve |
Endgame equipment. Most characters' best weapons wait behind the six doors of the second visit to Bowser's Keep, or in plain sight in a shop you have already visited. Figures are the weapons' attack values.
| Character | Best weapon (attack) | Where to get it |
|---|---|---|
| Mario | Lazy Shell (90) | Give the Seed (found in Bean Valley) and the Fertilizer (found on the hidden path east of Nimbus Land) to the Gardener in Rose Town, then climb the beanstalk that grows |
| Mallow | Sonic Cymbals (70) | A reward from one of the Action Courses behind the doors in Bowser's Keep |
| Geno | Star Gun (57) | A reward from one of the Battle Courses behind the doors in Bowser's Keep |
| Bowser | Drill Claw (40) | A reward from one of the Battle Courses behind the doors in Bowser's Keep |
| Toadstool | Frying Pan (90) | Sold in Moleville's item shop after the Barrel Volcano events, disguised on the shelf as a humble "metal plate", for 300 coins |
| Armour / accessory | Effect | Where to get it |
|---|---|---|
| Lazy Shell (armour, anyone) | Defence and Magic Defence +127 each, and protection from status and elemental attacks — at the cost of Attack, Magic Attack and Speed −50 each | The second chest at the top of the Rose Town gardener's beanstalk, beside the weapon of the same name. Put it on your healer and she simply stops falling down |
| Super Suit (armour, anyone) | +50 to Attack, Defence, Magic Attack and Magic Defence, +30 Speed, with status and elemental protection | Land 100 consecutive Super Jumps in one battle, then report to the Chow in Monstro Town who keeps your record. Practice against a Spikey, which shrugs off jump attacks and cannot be accidentally finished off |
| Attack Scarf (accessory, Mario only) | +30 to every stat, and protection from instant-death attacks | The same Chow's prize for 30 consecutive Super Jumps — the realistic goal, and one of the best accessories in the game |
| Jinx Belt (accessory) | Rewards the dojo chain in Monstro Town; a martial-arts all-rounder that also protects against instant death | Win the three dojo bouts described above |
| Quartz Charm (accessory) | The hidden boss's prize; its effects apply in battle and are among the strongest of any accessory | Defeat Culex in Monstro Town (see above) |
A note for readers arriving from the remake: the original has no Sage Stick, Stella 023 or Wonder Chomp — those stronger ultimate weapons are post-game additions of the Switch version. In the original, the table above really is the ceiling, which is part of why the Lazy Shell and Super Suit have the reputations they do.
Who It's For
Play the original if you want the game as its timing was tuned in 1996 — no on-screen timing prompts, no Action Gauge, no Triple Moves, and a Signal Ring that arrives fashionably late — or if you are tracing the family tree of Paper Mario and Mario & Luigi back to the root. It is also, quietly, one of the best first RPGs ever made: visible enemies, a shared FP pool, a level cap of 30 and bosses that teach one mechanic each. If what you specifically want is the quality-of-life layer and the post-game rematches, the remake is the version built for you — just know that several of its best conveniences are exactly that: additions.
How to Play It Today
- Original cartridge: The Super Famicom cartridge is the only way to buy this exact version as a physical object, and it remains common in Japanese second-hand shops. It saves to a battery that is now three decades old — test the save before a long run, and expect that a battery swap may be in a given cartridge's future.
- Classic Mini consoles: The game was included in the Nintendo Classic Mini: Super Famicom (and in the SNES Classic Edition outside Japan), which is a legitimate, tidy way to play the original version on a modern television if you can find the hardware.
- Virtual Console (legacy): Wii (2008) and Wii U Virtual Console releases existed — the Wii release was Europe's first chance to buy the game at all — but those storefronts are closed to new purchases, so treat them as options only for libraries already owned.
- Nintendo Switch remake (2023, different version): The easiest way to buy a Super Mario RPG today, presented here for completeness: a full remake with Triple Moves, an Action Gauge, the early Signal Ring, a pink fifth Star Piece, post-game boss rematches and new ultimate weapons. Excellent, and not the version this article describes.
Find the original Japanese cartridge
Disclosure: The Rakuten and Yahoo! Shopping links are standard shopping links. Enkeisha does not earn a commission from purchases made through these links.
Find original hardware editions on eBay
As an eBay Partner Network affiliate, Enkeisha may earn a commission from qualifying purchases made through these links.
Search eBay listings (affiliate link)
Check the language, region, hardware compatibility, condition and authenticity before buying. Search results may include reproductions; links do not endorse individual sellers.