Super Ghouls 'n Ghosts — The Deep Strategy Guide: Two Loops, Seven Weapons, One Bracelet
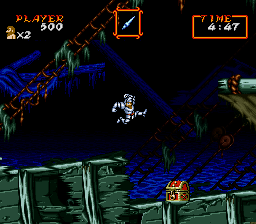
Finishing Super Ghouls 'n Ghosts once is not finishing it. Capcom's 1991 Super NES exclusive sends Arthur through seven Quests on the first loop, tells him at the very end that the one weapon that can kill the final boss is hidden somewhere he has already been, and starts him again from the graveyard. This guide treats that structure seriously: the chest ladder, the weapon-and-magic matrix, the armor tiers, and the exact conditions for the Goddess's Bracelet are all laid out in tables, because in this game the systems are the strategy.
Quick Facts
| Item | Detail |
|---|---|
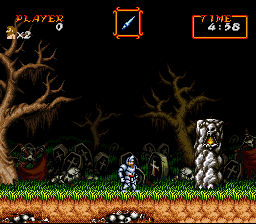
| Japanese title | 超魔界村 (Chō Makaimura) |
| English title | Super Ghouls 'n Ghosts |
| Platform | Super NES / Super Famicom |
| Release (Japan) | October 4, 1991 |
| Release (North America) | November 28, 1991 |
| Release (Europe) | December 10, 1992 |
| Developer | Capcom |
| Publisher | Capcom (JP/NA); Nintendo (PAL) |
| Genre | Side-scrolling action platformer |
| Players | 1 |
| ROM size | 8 Mbit (1,048,576 bytes), LoROM, no battery save |
| Original Japanese price | ¥8,500 (reported launch price) |
| Series position | Third entry in the Ghosts 'n Goblins series; the first not released in arcades |
Overview
Arthur's princess — Guinevere in the English manual, Princess Prin Prin in-game — is snatched away again, this time by the Emperor Sardius (Samael in the Japanese version), who wants the whereabouts of the Goddess's Bracelet, the only weapon that can destroy him. Arthur crosses seven stages before the game sends him back to the start. Quest 8 opens on the second loop if he clears Quest 7 with the Goddess’s Bracelet equipped. The first five Quests are split into two sections each; Quests 6 and 7 are single stretches; Quest 8 is the throne room itself.
Three mechanical changes define this entry. First, the up-and-down shooting of the arcade predecessor is gone: Arthur throws horizontally only. Second, he gains a double jump — and it is the game's central skill. A single jump commits Arthur to a fixed arc: once airborne he cannot steer, though the double jump can be used to change direction in mid-air. Third, armor is no longer just a hit point. Bronze and Golden armor transform the weapon Arthur is holding, and Golden armor adds charged magic on top.
The safety net is thin. Any hit strips Arthur's armor completely, whatever tier he was wearing; a second hit while unarmored costs a life, and so do pits and a time-out. Each section runs on a five-minute timer that resets when the second section begins. Continues are limited, although collecting money bags adds credits, up to a maximum of nine. Options let you pick from four difficulty settings and set starting lives from 1 to 9.
Why It Still Matters
This was an early Super NES showpiece — the rotating terrain in Stage 4, The Ghoul’s Stomach, huge sprites, layered snow and sea effects — built by a team led, in his first management role, by Tatsuya Minami under producer Tokuro Fujiwara, the series' creator. It sold 1.09 million copies on the SNES alone. But its lasting reputation rests on design rather than spectacle: it is the series' purest statement of the two-loop contract, and its chest system turns every stage into a resource route you plan, not just a corridor you survive. The double jump, new here, became the series' signature answer to the committed jump: you cannot correct a leap, but you can spend a second one.
Highlights
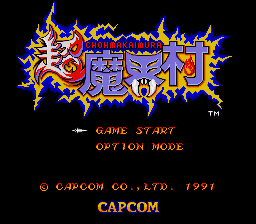
- The double jump as a decision, not a crutch. Because the first jump's arc is fixed, the second jump is your only mid-air correction — and the game is built around tempting you to spend it early.
- The chest ladder. Treasure chests do not pay out randomly. Their contents follow a sequence tied to Arthur's armor state, so a clean run literally builds Arthur up chest by chest (see Strategy Essentials).
- Weapons that change identity. The same slot is a different weapon in Steel, Bronze, and Golden armor, and a different spell as well. Choosing what to pick up is choosing three tools at once.
- A final boss you must earn the right to fight. Sardius/Samael cannot even be faced, let alone hurt, without the Goddess's Bracelet carried through the end of the second loop.
Strategy Essentials
1. The Two Loops
| First loop | Second loop | |
|---|---|---|
| Quests | 1–7 | 1–7 again, then Quest 8 opens |
| Goddess's Bracelet | Does not appear | Can appear (conditions below) |
| End of Quest 7 | The Princess reveals the Bracelet's existence; Arthur is returned to Quest 1 | If Arthur holds the Bracelet, he advances to Quest 8; if not, he is sent back to Quest 6 to search again |
| Final boss | Not fought | Sardius (JP: Samael), vulnerable only to the Bracelet |
| Ending | Not the true ending | True ending after Sardius falls |
Loop 1:  Quest 1 → 2 → 3 → 4 → 5 → 6 → 7 ──► revelation: find the Bracelet
                                                    │
Loop 2:  Quest 1 → 2 → 3 → 4 → 5 → 6 → 7 ──► holding the Bracelet?
                                                    ├─ Yes ─► Quest 8: Sardius ─► true ending
                                                    └─ No  ─► back to Quest 6, search again
On the second loop, take the Goddess’s Bracelet and keep it equipped through the end of Quest 7 to reach the final stage.
2. The Goddess's Bracelet — Conditions, Checked Carefully
The Bracelet (Japanese name: プリンセスの腕輪, "Princess's Bracelet") is a weapon, not an accessory: a short-range orb of light whose power decays with distance, cannot be fired rapidly, and has no magic even in Golden armor. In exchange, its close-range damage is the highest class in the game, its range grows with armor tier, and in Golden armor it can erase enemy shots. It is also the only weapon that can damage Sardius.
How to find the Goddess’s Bracelet
| Condition | Status |
|---|---|
| Second loop or later | Confirmed — Japanese references, English references, and the in-game story all agree; it never appears in loop 1 (the GBA Arrange Mode is the sole exception, where it is available from the start) |
| Arthur must be wearing the Golden Armor | Open the next chest in the weapon slot of the chest sequence. |
| It appears from a chest whose turn in the sequence is a weapon | Stated explicitly in Japanese references (Wikipedia JP / Pixiv Encyclopedia): open a weapon-turn chest while in Golden armor |
| The Sun Shield must also be equipped | Stated in the English manual tradition (as reproduced in the Ghoul Realm manual archive): "once Arthur is equipped with the Golden Armor and the Sun Shield, the next chest he cracks open will have a faerie inside that changes into the Bracelet." Japanese references do not list the shield as a condition (one notes the shield is unrelated) |
In the second loop, take Bronze Armor, Golden Armor and the Sun Shield in order. Open the next chest that would contain a weapon. Sources differ on whether the shield is independently required, and this route includes it. If you drop the Bracelet for another weapon, recover it before clearing Quest 7.
3. The Chest Ladder
Starting a stage in Steel armor and taking no hits, the chest sequence runs in a fixed order (GameFAQs walkthrough tradition, consistent with the armor-state patterns described in Japanese references; getting hit resets your practical position because you lose the armor the ladder built):
| Chest # (uninterrupted) | Contents |
|---|---|
| 1st | Weapon |
| 2nd | Bronze Armor |
| 3rd | Golden Armor |
| 4th | Sun Shield |
| 5th | Weapon — in loop 2, in Golden armor, this is the Bracelet slot |
| 6th | Trap |
| After that | Weapons or the Conjurer (magician), whose curse temporarily transforms Arthur |
Practical consequences: do not waste early chests. Every chest you trigger and skip is a step of the ladder spent. And hidden chests are revealed by passing specific spots — including, usefully, the arc of a double jump — or instantly by the Crossbow's Seek magic.
4. Armor and Shields
| Tier | How obtained | Effect | On taking a hit |
|---|---|---|---|
| Unarmored | After any hit | No weapon enhancement; shortest Bracelet range | Lose a life |
| Steel Armor | Starting armor; restored by the key at stage end if unarmored | Baseline weapons only | Become unarmored; shield lost |
| Bronze Armor | Chest (Steel equipped) | Weapons become their enchanted versions (more power, altered behavior) | Become unarmored; shield lost |
| Golden Armor | Chest (Bronze equipped); arrives with the Moon Shield | Enchanted weapons plus charged magic per weapon | Become unarmored; shield lost |
| Shield | Blocks | Notes |
|---|---|---|
| Moon Shield | 1 projectile | Comes with Golden armor; slightly speeds up the magic gauge charge |
| Sun Shield | 3 projectiles* | Fastest magic gauge charge; remaining block count resets on stage clear |
*The figure of three follows the English manual and English guides. Japanese reference wording describes the Sun Shield as surviving two hits — i.e., breaking on the third — which is the same practical limit counted differently. Shields only block projectiles, only from the front, and never protect against contact damage or pits.
5. Weapons and Magic — The Full Matrix
Arthur fires horizontally only, holds one weapon at a time, and picking up a new weapon discards the old. "Enchanted" is the Bronze/Golden form; "Magic" is the charged spell available only in Golden armor (hold the weapon button to charge; magic also grants invincibility while it fires).
| Base weapon | Behavior (Steel) | Enchanted form (Bronze/Gold) | Magic (Gold only) | Best use |
|---|---|---|---|---|
| Lance | Straight throw; up to 2 on screen; slow cycle | Flaming Lance — stronger, longer, wreathed in flame; loses rapid fire (1 at a time) | Thunder — lightning strikes and spreads left, right, and upward; can pass through solid objects per the manual | The safe default; Thunder clears enemies across the screen |
| Dagger | Small, fast, straight; up to 3 on screen; no refire delay | Magic Dagger — pauses a beat, then accelerates into a piercing laser dagger | Fire Dragon — a flaming dragon loops across the screen with heavy multi-hit damage | The connoisseur's pick: Magic Dagger shreds bosses; Fire Dragon is among the strongest magics |
| Crossbow | Two arrows diagonally upward per shot; up to 2 shots (4 arrows); low per-arrow power | Magic Crossbow — 3 homing arrows; excellent vs. Red Arremer Aces; note it may home onto a chest on screen, and a lingering arrow can block refiring | Seek — reveals all hidden chests in the area, ignoring their trigger conditions; no attack, but the longest invincibility of any magic | Stages with fliers and hidden chests; the anti–Red Arremer tool |
| Torch | Arcing blue fireball; ground burst becomes a crawling pillar of flame; up to 2 active; very high single-hit power | Magic Torch — same arc, taller and stronger flame pillar | Shield — three orbiting orbs that damage enemies on contact and block some shots | Ground-bound crowds and low targets; poor against high or distant enemies |
| Scythe | Straight throw that hugs the ground when low or crouch-fired; 1 at a time | Magic Scythe — same behavior, more power, longer hit effect | Tornado — twin tornadoes sweep outward and upward; huge coverage, many hits | Tornado is a boss-grade panic button; the base scythe is situational |
| Axe | Slow, wide circular looping flight; 1 at a time; cannot pierce walls | Hefty Axe — rises, returns to height, then flies forward; pierces enemies, larger hitbox, still slow | Lightning — rays in 8 diagonal directions from Arthur; thin beams with gaps | Wide arcs for awkward angles; the hardest weapon to love |
| Tri-Blade (JP: Cross Sword) | Rises briefly, returns, then darts sideways and returns; 2 on screen; appears from Quest 5 of loop 1 onward (per Japanese reference) | Shuriken (光輪のクロスソード in Japan) — follows much the same path and pierces enemies | Nuclear — explosion above Arthur spreads left and right; screen-wide but low power | Strong against most bosses except Quest 2's (per Japanese reference); real anti-air value |
| Goddess's Bracelet | Short-range light orb; power decays with distance; no rapid fire; range grows with armor tier; in Golden armor it erases enemy shots | — (no enchanted form) | — (no magic) | Mandatory for Sardius; must be carried through the end of Quest 7 in loop 2 |
General verdicts that follow from the table: the Dagger family is the best all-round line; the Crossbow family owns the air and the chest game; the Torch and Axe are the traps for the unwary — powerful on paper, awkward in the arcs this game actually gives you.
6. Quests and Bosses
Every boss is weak in the head unless noted. Boss names below use the Japanese names (transliterated) with the confirmed English names where they exist — the final boss is Sardius in English releases and Samael in the Japanese version; the spellings "Sydius/Saldos" seen in some machine-translated pages are errors.
| Quest | English name / Japanese name | Sections | Boss | Notes |
|---|---|---|---|---|
| 1 | The Dead Place / 呪われた墓場~暗黒の密林 | Haunted Graveyard; Forest of Fear | Cockatrice | Giant bird; stretches its neck, spits eggs that hatch Mini-Wings; killing it clears its eggs and chicks too. It blocks low passes by extending a leg |
| 2 | The Rotting Sea / 幽霊船~狂気の海 | Graveyard of Ships; Sea of Despair | Storm Cesaris | Giant barnacle monster riding a tornado; fires spiral shell missiles across the wave heights. Face is the weak point |
| 3 | Vermilion Horror / 溶鉱炉~溶鉱の塔 | Crucible of Flame; Towers of Molten Steel | Death Crawler | Giant caterpillar; circles Arthur at speed and fires shots from off-screen. Head is the weak point |
| 4 | The Ghoul's Stomach / 魔物の腹 | Inside a colossal dormant monster (2 sections; no chests in the second, forced-scrolling half) | Hydra | Three-headed dragon in the heart; each head spits fire; periodically splits into dragon-men and relocates — invulnerable while split |
| 5 | The Deep Chill / 永久凍土の森~氷壁地帯 | Ice Forest; Ice Wall (JP text: snowfield) | Beel Aroken | Ice-armored fiend; sheds its lower body, flies, throws boomerang arms and freezing shots. Head is the weak point |
| 6 | The Castle of the Emperor / 魔帝の居城 | Single section, 5-minute limit | Astaroth | Revived demon lord; eye lasers and belly-mouth flames. Head is the weak point |
| 7 | Hallway of Ghouls / 妖魔回廊 | Single section; boss rush format | Astaroth, then Nebiros | Nebiros appears the moment Astaroth falls: longer belly flames, full-body giant lasers. Clear it in loop 2 without the Bracelet and you are sent back to Quest 6 |
| 8 | The Throne Room / 魔帝サマエルの部屋 | Final stage; loop 2 + Bracelet only | Sardius (JP: Samael) | Too tall to hit from the ground — ride the saucer platforms from his abdomen to reach his head while he scatters radial lasers |
7. Habits That Keep You Armored
- Commit, then correct. You cannot steer a jump once it starts. Walk to the edge, jump once with intent, and keep the double jump in reserve for the correction — or spend both early only when the landing is guaranteed.
- Never pick up a weapon blind. A chest weapon replaces what you hold. If your current line (say, Magic Dagger) outclasses the unknown, the "upgrade" is a downgrade. Check the matrix before you grab.
- Play stages as chest routes. The ladder rewards a no-hit run through a stage's chests more than any single item. Learn where the first four chests of each Quest live before you optimize anything else.
- Charge magic is also a shield. Magic makes Arthur invincible while it fires. In Golden armor, a charged spell is an escape tool as much as an attack — Seek, with the longest invincibility, is the extreme case.
- The Bracelet changes your spacing. In loop 2's endgame you must fight Quests 6–7's bosses at orb's length. Practice close-range Bracelet spacing before Quest 7, not during it — and remember its range is longest in Golden armor, which is one more reason the ladder matters.
- Red Arremer Aces are a weapon check. They read and dodge ordinary shots. Homing (Magic Crossbow) or piercing volume (Magic Dagger) turns the series' worst regular enemy into a routine one.
Who It's For
Players who like mastery more than momentum: memorizers, route-planners, and anyone who finds a fixed jump arc and a published chest sequence more inviting, not less. If your favorite action games are the ones that fit in a notebook of tables, this is the 16-bit summit of that style. If you need checkpoints, saves, or steering in mid-air, approach with eyes open — there is no save; a full clear is a single sitting, twice.
How to Play It Today
- Nintendo Switch Online / Nintendo Classics: included in the Super Famicom / Super NES Nintendo Classics library (added September 6, 2019, per Japanese records) — the easiest legitimate route today.
- Original cartridge: Super Famicom and SNES carts are common on the second-hand market.
- Game Boy Advance — Chō Makaimura R / Super Ghouls 'n Ghosts (2002): adds an Arrange Mode with remixed stages and bosses from earlier series entries, in which the Bracelet is available from the first loop — a genuinely different route to Sardius, not just a port.
- Compilations: the SNES version appears in Capcom's classic collections on later hardware (PlayStation/Saturn Capcom Generation 2 in Japan; Capcom Classics Collection on PS2/Xbox and Reloaded on PSP).
Find the original Japanese cartridge
Disclosure: The Rakuten and Yahoo! Shopping links are standard shopping links. Enkeisha does not earn a commission from purchases made through these links.
Find original hardware editions on eBay
As an eBay Partner Network affiliate, Enkeisha may earn a commission from qualifying purchases made through these links.
Search eBay listings (affiliate link)
Check the language, region, hardware compatibility, condition and authenticity before buying. Search results may include reproductions; links do not endorse individual sellers.