Super Akumajo Dracula (Super Castlevania IV, Super Famicom) — Eight Directions, Eleven Stages, One Whip: The Deep Strategy Guide
The first Castlevania let Simon Belmont whip in exactly one direction: forward. Super Akumajo Dracula — released overseas as Super Castlevania IV — rebuilds the same journey around a whip that cracks in eight directions, dangles loose as a shield, and latches onto rings to swing across chasms. It is a retelling of Simon's 1691 assault on Dracula, expanded from six stages to eleven, from the garden outside the castle walls to a four-boss gauntlet at the top of Dracula's tower. This is a deep strategy guide to the Japanese Super Famicom original: the full stage map (it is strictly linear — there are no alternate routes), every sub-weapon costed and compared, the whip system and its upgrades, every documented hidden room, a boss table for the whole climb, the password system in full, and a clearly separated account of how the Japanese version differs from the overseas Super Castlevania IV.
Quick Facts
| Item | Detail |
|---|---|
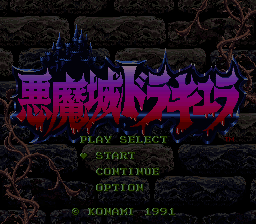
| Japanese title | 悪魔城ドラキュラ (Akumajō Dracula — "Demon Castle Dracula"; note the Japanese title carries no "Super") |
| English title | Super Castlevania IV |
| Platform | Super Famicom (Japan) / Super Nintendo Entertainment System (overseas) |
| Release date (Japan) | 31 October 1991 |
| Release date (North America) | December 1991 |
| Release date (Europe) | 23 November 1992 |
| Developer | Konami |
| Publisher | Konami |
| Director | Masahiro Ueno (credited in-game as Jun Furano) |
| Producer | Kazumi Kitaue |
| Composers | Masanori Adachi, Taro Kudo |
| Genre | Stage-based action platformer |
| Media | 8 Mbit ROM cartridge of this article |
| Save system | Password (no battery backup) |
| Players | 1 |
| Series position | The series' first Super Famicom / SNES entry; a retelling of the first Castlevania — Simon Belmont, Transylvania, 1691 — expanded to eleven stages |
Overview
One hundred years of peace end, Dracula rises again, and Simon Belmont takes the hereditary whip, the Vampire Killer, through eleven timed stages to the Count's chamber. The structure is the classic one — side-scrolling stages (called Blocks), candles to whip for hearts and items, a sub-weapon carried one at a time, and a boss at the end of almost every stage, whose defeat drops a Magic Crystal that restores Simon's health and banks a time bonus — but the controls underneath it are new:
- An eight-direction whip. Simon aims the whip with the control pad, including straight up and diagonally down, and can steer in mid-air — a deliberate break from the Famicom games' fixed jump arcs and forward-only whip.
- A linear road, honestly told. Unlike Castlevania III, there are no route forks and no alternate stages in this game (branching stages were considered during development and not included). What the cartridge hides instead is rooms: three concealed side areas and a final pre-Dracula cache, covered in Strategy Essentials §4.
- A password, not a battery. Progress is kept with a name entry and a 4×4-grid password that returns you to the start of the stage you reached — with none of your earned power-ups (§6).
Why It Still Matters
This is the game that modernised the series' feel without changing its grammar. Director Masahiro Ueno, who also led the programming, has said he wanted a pure action game in the mould of the first Castlevania; the team's answer was to keep the structure — candles, hearts, sub-weapons, stairs, a boss per stage — and loosen the body inside it. The eight-way whip, the limp-whip shield, mid-air steering, jumping onto and off staircases partway up, and moving while crouched all exist to remove the Famicom games' most resented deaths: the enemy one pixel above the whip's line, the jump committed a frame too early. It is also an early Super Famicom showcase that still shows off: the Mode 7 rotating room in Stage 4, multi-layer scrolling, and a soundtrack by Masanori Adachi and Taro Kudo that mixes new pieces ("Theme of Simon Belmont" among them) with arrangements of series standards — a score later issued on its own and, decades on, on vinyl. It remains the reference point for "classic" Castlevania: the version of the formula later collections lead with.
Highlights
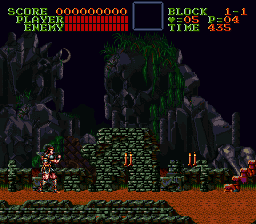
- The whip is three tools. A aimed weapon in eight directions; held down, a loose chain you wave with the control pad to swat projectiles (Death's sickles are the exam question); and a grapple that snaps onto rings and hooks to swing pits, gear shafts and treasure vaults.
- A mid-boss hiding in Stage 4. Puweyxil, the skull master, guards the rotating room — one of two bosses in a single stage, before Koranot closes it.
- A stage with no boss, on purpose. Stage 5, the castle courtyard, is the shortest stage in the game — a breather and a threshold before the castle proper starts at Stage 6.
- The most generous secret in the series. Miss the invisible platforms left of Dracula's staircase and you fight him with whatever you carried in; find them and the game refills everything — health, 99 hearts, the best sub-weapon, a full whip (§4).
Strategy Essentials
1. The Stage Map — Eleven Stages, No Branches
The road is a single line. "Blocks" are the sub-sections inside each stage; the counts that matter for planning are the boss (or bosses) and where the stage's character changes.
| Stage | Area | Blocks and character | Boss |
|---|---|---|---|
| 1 | The Outer Walls | 1-1 the garden and outer wall (walk either side of the fence); 1-2 the ruined castle and ring-swinging practice; 1-3 the haunted stable | Rowdain |
| 2 | Outer Grounds | Forest of grabbing hands and spiders; then the swamp and bridges — Medusa is met part-way through, not at the end — then a final descent fighting the river current | Medusa (mid-stage) |
| 3 | The Lake | Underground cave (the hidden room is here, §4); waterfall climb past mermen; sunken ruins at the top | Orphic Vipers |
| 4 | Spinning Tales | False floors that flip under a jump; Puweyxil as mid-boss; the Mode 7 rotating room (hang from the centre ring); crumbling and rising block shafts | Puweyxil (mid), Koranot (end) |
| 5 | The Courtyard | The castle approach: harpies dropping fleamen, an overgrown vineyard, whip- and sword-skeletons on the stairs to the door. Short, and no boss | — none — |
| 6 | The Haunted Hall | Castle entry halls and axe knights; swinging then falling chandeliers (the hidden stair is in 6-2, §4); grabbing ghost-hands to crawl under; a circle of flying coffins; the dining hall | The Dancing Spectres |
| 7 | The Middle Castle | The library: floating books as platforms, blood skeletons; then the basement, where paintings reach out and grab. Beating the boss opens a trap floor into Stage 8 | Sir Grakul |
| 8 | The Dungeon | The trap stage: spike beds and spike swings, dripping poison/acid, appearing-and-vanishing platforms. The stage is the fight; the boss is a relief | The Monster |
| 9 | The Treasury | Crumbling jewel platforms, treasure chests everywhere, suction wind-holes (one is the hidden room, §4) | Zapf Bat |
| A | The Clock Tower | Gears to ride, rings on chains, falling gears from above; the boss waits in front of the clock face | Akmodan II |
| B | Tower of Fiends and Dracula's Chamber | A collapsing bridge; a stair tower climbed while a spiked wheel/saw chases from below; floating-platform climbs; then four bosses in a row and Dracula's stairs (with the hidden cache beside them, §4) | Slogra, Gaibon, Death, then Dracula |
Stage 1 Outer Walls → 2 Outer Grounds → 3 The Lake → 4 Spinning Tales
→ 5 Courtyard (no boss) → 6 Haunted Hall → 7 Middle Castle → 8 Dungeon
→ 9 Treasury → A Clock Tower → B Tower of Fiends → Dracula

Hidden detours (all optional, all rejoin the same stage):
  3-1 breakable wall → bonus room · 6-2 floor stair → bonus room
  9-2 suction tunnel → bonus room · Stage B left of the stairs → full refill
Because there is no branching, a "route" decision in this game is really an inventory decision: which sub-weapon you carry through each stage door, and how many hearts you arrive with. The tables below are built around that.
2. The Whip: Upgrades and Actions
Upgrade path. The whip has three strengths. Each power-up item taken from a candle raises it one step, and the game is generous with them — Stage 1 alone offers both upgrades in its opening areas, so learn the full moveset early.
| Form | How | Effect |
|---|---|---|
| Leather whip | Starting form | Shortest reach, lowest power |
| Chain whip (short) | 1st power-up | Stronger; the standard for most of a run |
| Chain whip (long) | 2nd power-up | Stronger still, and visibly longer — the reach that makes upward and diagonal boss work safe |
Action essentials.
| Action | Input idea | Where it earns its keep |
|---|---|---|
| Eight-direction whip | Control pad + whip | Up for bats and Medusa heads, diagonal-down in mid-air for enemies on stairs and ledges below, straight up under Zapf Bat and Gaibon |
| Limp whip ("brandish") | Hold the whip button, then steer with the control pad | Much weaker per touch, but continuous: it destroys projectiles — the standard answer to Death's sickles and Dracula's split fireballs — and worries small enemies you cannot line up |
| Ring swing | Whip a ring/hook and hold | The only way across Stage 1's pit, the rotating room's centre in Stage 4, gear shafts in Stage A and the Treasury's ceiling routes in Stage 9. Release at the swing's peak |
| Stair jumps | Jump onto or off a staircase part-way | Lets you bail out of the series' classic stair ambushes instead of climbing into them |
| Crouch-walk | Crouch and move | Under the grabbing ghost-hands in Stage 6, and under low spike swings in Stage 8 |
3. Sub-Weapons — All Five, Costed
One sub-weapon is carried at a time, found in candles, and thrown with the dedicated sub-weapon button. Hearts are ammunition: a small heart is +1, a large heart +5. The Double Shot (II) and Triple Shot (III) items, also found in candles, let you throw two or three sub-weapons in succession — they multiply whatever you currently carry, so pick up the sub-weapon first and the multiplier second whenever a candle order lets you choose.
| Sub-weapon | Hearts | Flight and reach | Best role |
|---|---|---|---|
| Dagger | 1 | Fast, straight ahead, screen-wide; weakest of the five | Ground and same-height targets; cheap filler. Any other sub-weapon usually replaces it on sight |
| Axe | 1 | Lobbed in a high arc, falls back down; slow but powerful | Anti-air and anything above you: floating bosses (Gaibon's flight, Zapf Bat's split form), enemies on ledges overhead |
| Holy Water (Fire Bomb) | 1 | Short lob, bursts where it lands and leaves a flame patch | Ground control and ground bosses — the pinned-target killer. The textbook answer to Akmodan II's teleport landings (§5); nearly useless against fliers |
| Boomerang (Cross) | 1 | Flies across the screen and returns, hitting on both legs | The best all-rounder and the usual boss weapon — above all Dracula, whose head sits exactly at its flight line (§5). Keep it once found |
| Stopwatch | 5 | No projectile: freezes ordinary enemies briefly | A stage tool, not a boss tool — it does not affect bosses. Buys safe passage through Medusa-head corridors and the rotating room's platforming |
Reading the table as a route plan: carry the Boomerang by default; swap to Holy Water before ground bosses you can pin (Akmodan II above all); take the Axe when the stage's threat is overhead (Stages A and B's climbs, Zapf Bat); treat the Stopwatch as a 5-heart toll for one bad room, and the Dagger as a placeholder.
4. Hidden Rooms and Hidden Items
Whip walls and floors as a habit — this game's secrets are structural. The three hidden routes and the recurring wall-meat are documented across multiple guides; where published counts disagree (the Stage 9 chest), this guide says so instead of picking a number.
| Where | Secret | How to open it / condition |
|---|---|---|
| Stage 1 (stable approach) | Meat in a breakable wall on the low route | Take the low path at the high/low split and whip the end wall |
| Stage 3-1 (cave) | Hidden bonus room: hearts, money bags and meat | Descending the short vertical shaft, whip away the wall of out-of-place square pillars on the left, guarded by bone pillars nearby |
| Stage 6 (before the boss) | 1UP in the upper right wall at the end of the hall section | Whip the upper part of the right wall before climbing to the Dancing Spectres |
| Stage 6-2 | Hidden stair down to a candle-filled bonus room | In the hall of falling chandeliers, whip the floor beneath the third chandelier (near the axe knight) repeatedly until the floor crumbles |
| Stage 9 (treasury) | Large meat from a treasure chest | Jump on the same chest over and over — guides disagree on the exact count (255 vs 256 jumps), so just keep jumping until it drops |
| Stage 9-2 | Hidden bonus room full of treasure | On the upper platform by a shaking snapper casket, let the suction wind-hole pull you in instead of fighting it |
| Stage B (Dracula's stairs) | The full refill: health restored, 99 hearts, Boomerang, fully upgraded whip, Triple Shot | Do not climb the stairs. Jump left off the platform onto an invisible platform, jump left again to the screen's edge; the items rain down (big hearts, meat, Boomerangs, then Double and Triple Shot). Return by holding up-right to climb the invisible stair back |
| Various (Stages 6, 7, 8…) | Meat and large hearts inside breakable walls | A pattern, not a one-off: the walls behind the Stage 7 statue area, beside the Stage 6 axe-knight platform and behind the Stage 8 skull dragon all hide food. Whip any wall that ends a dead-end |
5. Boss Table
"Answer" is the reliable tool, not the only one. Bosses cannot be frozen by the Stopwatch. Every boss drops the Magic Crystal on defeat — except where the stage continues, as with Medusa and Puweyxil, who are met mid-stage.
| Boss | Stage | The fight in one line — and the answer |
|---|---|---|
| Rowdain | 1 | A skeletal knight on a skeletal horse, breathing fireballs, then fighting on foot with a dropping jump attack. Fight from the left platform, whip horse and rider, never stand under the jump; one fake death at the end — hit him once more |
| Medusa | 2 (mid-stage) | Throws snakes and fires petrifying shots. The Boomerang is the fight: throw it repeatedly, whip the snakes, and stay crouched to duck the stone shots |
| Orphic Vipers | 3 | Twin serpent heads at the top of the ruins: one breathes three spreading fireballs, the other a single flame stream. Camp the upper-right platforms, throw sub-weapons, whip whichever head comes close, watch your footing over the water |
| Puweyxil | 4 (mid-boss) | A giant skull that drops from the ceiling, licks at you, and shakes bricks loose when hit. Stand beside the platforms and whip continuously — whip the falling bricks too |
| Koranot | 4 | A huge rock golem that sheds falling blocks and throws them. Stand between the first two falling blocks, then stay left, whip and throw, keep dodging the rain |
| The Dancing Spectres | 6 | A ghostly dancing pair who alternate gliding approaches with arrow volleys and sword rushes. Keep moving in a figure-eight between the room's levels, whip as they pass; the rush is hard to dodge cleanly, so out-damage it |
| Sir Grakul | 7 | An armoured knight: axe throws, ground-slam flame waves, then a sword phase once the axe is lost. Stay on the far-left ledge, whip at range, jump the axe and the flame wave; the sword phase plays the same |
| The Monster | 8 | Frankenstein's monster walks at you throwing bottles. Whip each bottle in mid-air before it lands — unbroken bottles mean no flame floors, no clones, no flame splits, and an easy fight |
| Zapf Bat | 9 | A bat made of gold and jewels, shedding harmful gems. Stand underneath and whip upward; late in the fight it splits into three small bats — switch to the Boomerang or Axe and keep moving |
| Akmodan II | A | A mummy teleporting around the clock face, throwing bandages and fireballs. Holy Water is the answer: throw it where he will materialise, and always stand on the opposite structure (clock hands vs side platforms) from where he appears |
| Slogra | B (1st of the gauntlet) | A spear-beaked fiend who dive-bombs your position. He is invulnerable while descending in his green form — wait for him to land and turn, then whip. The pillars are your safe landmarks; after he loses the spear he swipes instead, so jump the pillars rather than duck |
| Gaibon | B (2nd) | A giant winged demon: swoops, fireballs from above, ground slams that drop ceiling debris; midway he turns red and switches to triple fireball volleys. Never linger directly underneath; whip the fireballs you cannot dodge |
| Death | B (3rd) | The Grim Reaper circles, spawning sickles, diving, and dragging you toward him. The limp whip is the defence — let it dangle and steer it to shred the sickles, whip Death as he passes, and walk against the drag |
| Dracula | B (final) | Teleports around the throne room; only his head takes damage. Arrive via the §4 cache with the Boomerang and Triple Shot and throw at head height. Whipping his large fireball shatters it into small ones — clear those with the limp whip. Mid-fight, his circling fire orbs turn into meat when whipped: heal before finishing him. Late patterns add chasing flame pillars and a lightning finale — keep throwing between his appearances |
6. The Password System and the Second Quest
The cartridge is ROM-only — there is no battery — so the password is the save system.
- Name entry first. Starting a game takes you through an "Enter Your Name" screen; the password system is tied to that name-entry flow, inherited from Castlevania III. The widely published passwords assume the name is left blank — enter a name and those published grids will not work.
- How you get a password. Lose all your lives, choose End at the game-over prompt, and the game displays your password.
- What the password is. A 4×4 grid filled from four symbols: blank, Large Heart, Axe, and Holy Water (the bottle). To resume, choose Continue on the title screen and reproduce the grid.
- What it remembers — and what it does not. The password remembers which stage you reached and which difficulty loop you are on (first quest or the harder second quest unlocked by clearing the game). It does not carry your inventory: per the manual, you restart the stage "with none of your previously earned bonuses or power-ups" — no hearts stockpile, no sub-weapon, no whip upgrades, no score bonuses. Rebuild from the stage's own candles (Stage 1's generosity is the model: every stage re-offers its upgrades).
- Mid-Stage B checkpoints. Published password sets include separate entries inside Stage B, up to a Dracula-only start — useful, because Stage B contains four boss fights and the §4 cache is the intended preparation for the last one.
7. Japanese Version vs. Overseas Super Castlevania IV — Kept Separate
Everything above describes the Japanese original. The overseas release is structurally the same game — no stage, boss or gameplay-system differences are documented — but its presentation was edited for the Western market:
| Area | Japanese Akumajō Dracula (this article's version) | Overseas Super Castlevania IV |
|---|---|---|
| Title | Simply Akumajō Dracula — the "Super … IV" branding is overseas-only | Super Castlevania IV |
| Font | A darker, stylised font for menus and the status display | A different, brighter font (green-tinted in the status display) |
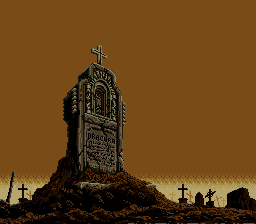
| Religious imagery | Crosses stand on tombstones, including the introductory graveyard; Dracula's tombstone is legibly inscribed "Dracura" | Tombstone crosses removed; the "Dracura" inscription replaced with an unreadable smudge. (The Rosary item kept its cross) |
| Title screen | Blood drips from the game logo | The dripping blood was removed |
| Stage 8 (Dungeon) | Pools, drips and waterfalls of red blood | The same liquids recoloured green, reading as slime or acid — a palette change the director was asked to make for the English version |
| Stage 6 statues | The hall's statues are topless | Redrawn wearing tunics |
| Gameplay | — | No structural differences documented: same stages, bosses, sub-weapon costs and password system; the differences are presentational |
Who It's For
- Players who bounced off the Famicom games' stiffness. Same formula, forgiving body: eight-way aim, steerable jumps and stair jumps make this the gentlest on-ramp to classic Castlevania — still the one the collections lead with.
- Boss-run and inventory planners. Eleven stages, no branches, one carried sub-weapon: the whole game is a sequence of "what do I bring through this door" decisions, and the boss table above is the checklist.
- Secret hunters with limited patience. No cryptic progression anywhere — but three hidden rooms, a wall-food habit to build, and one invisible-platform leap of faith in front of Dracula.
How to Play It Today
- Castlevania Anniversary Collection (Nintendo Switch, PlayStation 4, Xbox One, PC; released in 2019) includes Super Castlevania IV, and a post-launch update added the Japanese versions of the included games — so the Japanese Akumajō Dracula itself, the version this guide covers, is playable there. This is the straightforward route to either version.
- Super NES Classic Edition (2017) includes the overseas version built in — a legitimate route if you already own the mini console.
- Virtual Console releases of the overseas version appeared for Wii, Wii U and New Nintendo 3DS — legitimate if already purchased, though those storefronts no longer sell new copies.
- Original cartridge. The Super Famicom cartridge is the original-hardware way to play the Japanese version; note it needs Super Famicom (or compatible) hardware.
- Cartridges and related retro items:
Find the original Japanese cartridge
Disclosure: The Rakuten and Yahoo! Shopping links are standard shopping links. Enkeisha does not earn a commission from purchases made through these links.
Find original hardware editions on eBay
As an eBay Partner Network affiliate, Enkeisha may earn a commission from qualifying purchases made through these links.
Search eBay listings (affiliate link)
Check the language, region, hardware compatibility, condition and authenticity before buying. Search results may include reproductions; links do not endorse individual sellers.