Soul Blader (Soul Blazer) — Every Lair You Seal Gives the World Back a Life: Quintet's Rebuilding RPG, Taken Apart
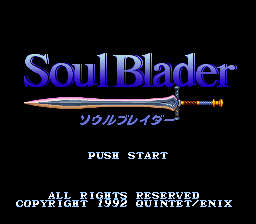
Most action RPGs measure progress in levels and loot. Soul Blader — released overseas as Soul Blazer — measures it in neighbours. The world has been emptied: every person, animal and plant was traded away, one gold piece per soul, and their souls are locked inside the monster lairs scattered through the dungeons. Seal a lair and someone comes back — a village chief, a dog, a dolphin, a tulip that talks in its sleep. Talk to who you freed, and the way forward opens. This guide covers the original Japanese Super Famicom version of 1992 in depth: how the lair-and-restoration loop really works, all seven areas and their bosses, the full sword, armour and magic ladders with their level gates, and the game's strangest dungeon — a world inside a painting, whose boss you must fight long before you own the sword that could hurt it properly.
Quick Facts
| Item | Detail |
|---|---|
| Original title | Soul Blader (ソウルブレイダー) |
| Overseas title | Soul Blazer |
| Platform | Super Famicom / SNES |
| Release (Japan) | January 31, 1992 |
| Release (North America) | November 27, 1992, as Soul Blazer |
| Release (PAL) | January 27, 1994 |
| Developer | Quintet |
| Publisher | Enix |
| Director / programmer | Masaya Hashimoto |
| Producer | Yasuyuki Sone |
| Scenario | Tomoyoshi Miyazaki |
| Music | Yukihide Takekawa (of Godiego) |
| Genre | Action RPG |
| Cartridge | 8 Mbit (1 MB), LoROM, ROM + RAM + battery (SRAM save) |
| Structure | Seven areas: six inhabited regions to restore, then the World of Evil |
| Key collectibles | Six coloured Stones (Brown, Green, Blue, Silver, Purple, Black); eight Master's Emblems (A–H) |
| Series position | First work of the unofficial "Soul" (Quintet) trilogy, followed by Illusion of Gaia (1993) and Terranigma / Tenchi Souzou (1995) |
Two naming notes before the guide proper, because this game is documented under two sets of names. The first boss is Solid Arm in the Japanese version and Metal Mantis overseas; the final magic is God Bird in Japanese and Phoenix overseas. Where a name matters, this article gives the Japanese version's name first. The villain is Deathtoll in both traditions (デストール in Japanese), and the kingdom is Freil.
Overview
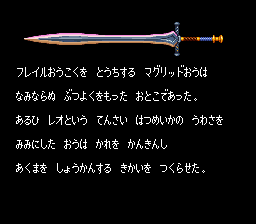
King Magridd of Freil wanted gold — enough gold to buy the world. He imprisoned the inventor Dr. Leo and forced him to build a machine that could summon a demon, then accepted the demon Deathtoll's bargain: one piece of gold for every living soul in the kingdom. Life vanished one creature at a time, flower by flower and bird by bird, until the kingdom was an empty husk of monster lairs — and the king himself was destroyed by the monsters he had invited in. The Master sends a heavenly servant down in human form: a warrior who can speak with every living thing, and whose job is to free every trapped soul and face Deathtoll.
Play is top-down, real-time action across seven areas. Each of the six inhabited areas pairs a surface settlement — initially deserted — with dungeons beneath or around it. The settlements are rebuilt soul by soul: nothing about a town is scripted to return at a story beat; every returning resident, animal, building and plant corresponds to a specific monster lair you sealed. Freed souls are not decoration. They staff the tool shop, turn the waterwheel that powers the mine elevator, hand over the items and Souls (see below) that the next dungeon demands, and talk — Leo's dog, dolphin, snail and doll among them, carrying the story of what Magridd did to their master.
Around you orbits a companion Soul, a ball of light that casts your magic and grants special abilities. Five Souls join over the journey — the Soul of Magician who arrives with your first spell, the Soul of Light (a mole) who lights dark floors, and the Shield, Detection and Reality souls met later. Magic does not use MP: it consumes GEMs, the golden orbs monsters drop, and if you fall in battle you lose every GEM you are carrying unless you are equipped with the Strange Bottle. Levels come from ordinary experience points, and they matter beyond stats — every sword in the game has a minimum level, and the best sword in the game cannot be equipped at all until level 24.
Each area is anchored by a Shrine (ほこら), the Master's foothold. Stepping into one fully restores your HP; there you save, travel between areas, and take warp tiles — one down to the settlement, and, as you earn them, one to a mid-point and one to just before the area's boss. The rhythm the game teaches is therefore a triangle: dungeon, town, shrine — fight, talk, recover — repeated until an area's leader is free and its Stone is yours.
Why It Still Matters
This is where the unofficial trilogy begins. Japanese sources call Soul Blader, Illusion of Gaia and Terranigma the "Soul (or Quintet) trilogy," and this is the first panel — the ideas the later games refine are all here in rougher, more mechanical form: a wounded world, a divine servant who falls for mortal life, resurrection as gameplay. The connections are more than thematic. The hidden boss of Illusion of Gaia is this game's first boss, Solid Arm, and the later game's dialogue nods back at him; the fire-bird attack you earn for the finale here, God Bird, has its counterpart in Gaia's Firebird; and a dog named Turbo appears in all three games. A former Enix USA producer has noted the three were not produced as one connected series — the trilogy is a fan grouping — which makes the echoes feel less like continuity and more like a small studio worrying the same questions three times.
It also matters because of what it is not: it is not available. The game has never been re-released in any form — no remake, no port, no place in the Nintendo Switch Online Super Famicom / SNES library as of this writing. A game about restoring a world one soul at a time survives, for now, only on its original cartridges. And its restoration loop has aged unusually well: in 1992, "the town visibly rebuilds as a direct result of your dungeon work, person by person" was a genuinely new sensation, and Japanese reviewers at the time singled out exactly that — Famitsu's cross review gave it 32/40 and a Gold Hall of Fame place, praising the pleasure of sealing a lair and watching a new piece of the world open.
Highlights
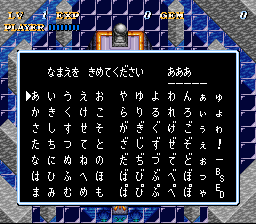
A new game begins by asking you to name the hero. Once the adventure starts, talk to the people you free to help rebuild each settlement.
Restoration you can walk through. Every lair sealed is a face, a house, a waterwheel, a bridge. Progress is not a number going up; it is a mining town repopulating around you, and the game makes you go back and talk to your progress, because the freed souls hold the keys — sometimes literally — to what is next.
Leo's Painting. The first area's boss does not live in the mine. He lives inside a painting hanging in the village chief's house, in a world Leo painted before he vanished — and the boss is made of metal, in a game where the anti-metal sword is four areas away. See Strategy Essentials; it is the game's signature early wall, and its most memorable idea.
Equipment as keys, not just stats. Swords are typed — one for metal bodies, one for spirits — and armour is functional: the set that lets you walk the sea floor, the set that halves your magic's GEM cost, the set that lets you walk in space. Changing equipment is changing what the world allows you to do.
Leo's world, in miniature and in dreams. The painting is not a one-off. Later you will shrink into Leo's tabletop model towns, and throughout the game the Dream Rod lets you step into the dreams of sleepers — a girl, a tulip, a mushroom — to learn what the waking world cannot tell you. The game's imagination keeps finding new containers for worlds.
Strategy Essentials
The loop: how a lair rebuilds a town
Everything in Soul Blader runs on one procedure, taught in the Trial Room at the start and repeated, with variations, for the whole game:
[Monster lair — active]
   Monsters emerge from the lair, a FIXED number per lair.
        ↓  Defeat every monster the lair sends out
[Monster lair — spent]
   The lair loses its power. STEP ON IT to seal it.
        ↓  One of four things happens:
   • A trapped soul is freed → a person / animal / plant / building
     returns to the settlement above
   • The terrain changes → a path, staircase or door opens
   • A treasure chest appears
   • A NEW lair appears nearby → the dungeon extends itself
        ↓
[Return to the settlement and TALK]
   Freed souls give items, hints, new Souls and story progress.
   A blocked route in the dungeon is usually a conversation
   you have not had yet in the town.
        ↓
[The area boss, at the dungeon's depth]
   Defeat it → the area's leader is freed → talk to the leader
   → receive the area's Stone → the next area opens.
Rules that follow from the loop:
- A lair is not cleared until you step on it. Killing the last monster only spends the lair; the seal — and the soul — happens when you stand on the tile. Lair colours tell the story in the overseas guides' terms: active, spent and ready, sealed.
- Sealed lairs stay sealed. Their monsters never respawn, which makes every dungeon finite and every sweep permanent. (A few monsters are "wild" rather than lair-born and do reappear when you change screens — they are for GEMs and experience, not progress.)
- Talk after every sweep. The single most common way to be stuck in this game is not a hard fight; it is an unfreed conversation. If a dungeon route is blocked by an object, a person you freed probably knows how to move it.
- Death is a GEM tax. Falling costs you all carried GEMs (the Strange Bottle, once found, prevents this). GEMs are your magic fuel, so a death before a boss can quietly disarm you — bank progress at the Shrine, which also fully heals you on entry, before long pushes.
- Your item slot is a decision. Only one item is equipped at a time, and the candidates compete: the Power Bracelet (attack up), the Shield Bracelet (damage down), the Super Bracelet later (sword and armour strength up), and the Medical Herb — which, equipped, refills your HP when it reaches zero. Boss guides for this game are largely advice about which of these to have equipped, and when to swap mid-fight. Treat the swap as a core skill.
The seven areas, in order
| # | Area | Main dungeons / places | Boss | Stone | Field notes |
|---|---|---|---|---|---|
| 1 | Grass Valley (鉱山町グラスバレー), the mining town | Trial Room; the mines west and east (the "Underground Castle" of overseas guides); Leo's Painting | Solid Arm (Metal Mantis overseas) | Brown | Learn the loop here. Free the waterwheel keeper to power the mine elevator. Leo's Brush, found in the eastern mine, is the key to the Painting (next section). |
| 2 | GreenWood (グリーンウッドの森) | Lostside marsh; Water Shrine; Fire Shrine; Light Shrine | The Three Statues (fire, water and lightning statues in the Light Shrine) | Green | An animals' refuge built by Leo's dog Turbo. The Delicious Seeds from the Water Shrine trade to a squirrel for the Psycho Sword. Take the Soul of Light (the mole) before the Light Shrine's dark floors. Heated traps in the Fire Shrine are what the cold armour is for. |
| 3 | St. Elles (セントエルズの海底), the seabed | The seabed floor; the Marine Shrine; islands — the southern isle, the Rockbird reef, volcanic Durean, stormy Blester; the Ghost Ship | The Skull (on the Ghost Ship) | Blue | You walk the sea floor itself, and without the Bubble Armor you take damage doing it — it is found in this area's early going, so prioritise it. Mermaid statues point the way through the shrine. A freed dolphin, Leo's Lue, matters here. |
| 4 | Mountain of Souls (山の精霊のすみか) | Snowy slopes and the Aurora Ridge; ice slopes and the Laynole ice field; the road to the underground lake; Lake Lune | Poseidon (at Lake Lune) | Silver (from Nome the snail) | Ice floors slide; the Mushroom Shoes stop the slipping. The ice field is two-part — expect to return to the settlement mid-area and come back by a new entrance. Poseidon is a step up: guides rate him among the harder bosses, fought from three footholds as he moves underwater. |
| 5 | Dr. Leo's Laboratory (レオの研究所) | The laboratory and its two basement floors; the two model towns; the Power Room | Tin Doll (in the Power Room) | Purple (from Marie the doll) | The lab where Leo was forced to build the summoning machine. The Zantetsu Sword is here — the game changes once you have it (see the revisit list below). Shrink into the model towns; use catnip leaves to move the cats and reach the mouse hole for the Spark Bomb magic. Heated traps return with a faster cycle — swap to the cold armour to cross. |
| 6 | Magridd Castle (マグリッド王の城) | Torture Room; castle underground; the left and right towers; the prison; the corridor to the dock; the airship | Demon Bird (on the airship; some guides call it the Demon Falcon) | Black (from King Magridd) | Cards gate the towers — the Platinum Card for the left tower, the VIP Card for wider access. The Spirit Sword is won here, opening the spirit-typed revisits. Leo is in the prison. Do not board the airship without the Super Bracelet, which guides treat as close to mandatory for the bird. |
| 7 | World of Evil (魔界) | One continuous dungeon; the Dazzling Space (幻惑の空間); Deathtoll's Shrine | Deathtoll (two forms) | — | Opened by all six Stones. No settlement, no one to free — the whole area is the dungeon. The Soul Blade and Soul Armor are hidden here, and both are required, not optional: see the endgame checklist. In the Dazzling Space your HP drains away unless the right armour is equipped. |
A structural caution: areas are revisitable — the Shrine network lets you travel back freely — and the game expects you to return to earlier areas with later swords (next section). "Finished" an area means its boss and Stone, not its last lair.
Leo's Painting: the world inside the picture
Leo was a painter as well as an inventor, and his brush and paintings survive him in Grass Valley. One painting — the item list for the overseas version records its title as "The World of Evil" — hangs in the village chief's house at the top of the village steps. Equip Leo's Brush (found in a chest in the eastern mine) and approach the painting, and you are pulled inside it.
Treat the painting as Grass Valley's true final dungeon, because that is what it is:
- It holds the area boss and the area's leader. Solid Arm waits at the painting's deepest point; the village chief's soul is imprisoned with him. Beat the boss, free the chief, return and talk to him in his house, and the Brown Stone is yours.
- You will not clear it in one visit. Some of the painting's lairs are guarded by metal-bodied monsters your early swords cannot kill. Seal what you can, take the boss, and leave the rest — the painting keeps. Those lairs are a mid-game errand, listed in the revisit table below.
- The boss is the game's first real lesson in equipment typing. Solid Arm is a metal monster. The sword that defeats metal, the Zantetsu Sword, is in Dr. Leo's Laboratory — Area 5. You cannot fetch it first; the game's order forbids it. So the intended fight is an endurance fight with your starting-class sword: the established approach in boss guides is to lure the boss to one side, ride the central conveyor, and strike as it approaches — one hit per pass, sword thrust held out — with a Medical Herb equipped for when the attrition turns. It is slow, it is meant to be slow, and it teaches you to read a boss's movement instead of trading blows.
- It sets the pattern for Leo's other containers. The painting is the first of the game's "worlds inside Leo's works": later come the two model towns on his laboratory tables, and, by a different item, the dreams entered with the Dream Rod. When this game wants a self-contained world with its own rules, it reaches for something Leo made.
Swords: a ladder of levels and types
There are eight swords. Each has a required level — you can own a sword and still be unable to equip it — and most carry a special property that matters more than the strength number.
| Sword | Req. level | Strength | What it is for |
|---|---|---|---|
| Sword of Life (いのちの剣) | 1 | 1 | Your starting sword, from the Master. The Trial Room and first mine are tuned to it. |
| Psycho Sword (サイコソード) | 5 | 2 | Temporarily paralyses monsters it cannot kill outright — the early answer to metal bodies: stop them and pass, since you cannot cut them yet. Traded from a GreenWood squirrel for the Delicious Seeds. |
| Critical Sword (クリティカルソード) | 11 | 3 | Listed as able to defeat a monster in a single blow — a chance-based killer rather than a stat stick. Found in the St. Elles area. |
| Lucky Blade (ラッキーブレード) | 15 | 4 | Raises the chance of larger GEM drops. A farming sword: equip it when magic fuel matters more than one point of damage. |
| Zantetsu Sword (斬鉄剣) | 16 | 6 | The type key for metal. The only sword, until the Soul Blade, that can damage steel-bodied monsters. Found in Dr. Leo's Laboratory — and the moment you own it, three earlier areas reopen (see revisits). |
| Spirit Sword (ヨミの剣) | 19 | 8 | The type key for spirits. Damages the incorporeal monsters no other sword (bar the Soul Blade) can touch. Won in Magridd Castle. |
| Recovery Sword (リカバーソード) | 22 | 10 | Restores your HP as you defeat monsters. Earned not in a dungeon chest but back in Grass Valley, from the painting revisits (below) — the game paying you for thoroughness. |
| The Soul Blade (ソウルブレード) | 24 | 12 | The strongest sword, hidden in the World of Evil. Damages metal, spirits and the breakable trap objects only it can destroy — and it is the only sword the God Bird / Phoenix magic will work with. Required for the finale. |
The thinking the table teaches: raw strength is the least interesting column. The game's hard gates are the two type keys (Zantetsu at 16, Spirit at 19) and the Soul Blade's level-24 lock. If a monster takes no damage, do not grind — check its type; the answer is a different sword, and if you do not own that sword yet, the lair is a bookmark, not a wall.
Armour: defence you wear, permissions you equip
Eight armours, in the order the game hands them out. Defence figures follow the same item lists as the swords.
| Armour | Defence | Special property — why you equip it |
|---|---|---|
| Iron Armor (てつのよろい) | 1 | No special property; simply your first defence. Found in Grass Valley. |
| Ice Armor (コールドアーマー; "Cold Armor" in Japanese) | 2 | Cross heated floors and fire traps without damage. The Fire Shrine and the laboratory basements are its workplace — keep it forever; the traps come back faster later. |
| Bubble Armor (あわのころも) | 3 | Lets you walk the sea floor at St. Elles without taking damage. A permission, not a preference, in Area 3. |
| Magic Armor (まほうのよろい) | 4 | Halves the GEM cost of your magic. The economy armour: with it, expensive spells become habits. |
| Mystic Armor (しんぴのよろい) | 6 | Lengthens your invincibility after taking a hit. Quietly excellent against bosses that hit in patterns. |
| Light Armor (ひかりのよろい) | 8 | Weak monsters can no longer damage you at all. Backtracking through early areas becomes a stroll. |
| Elemental Mail (also listed as Elemental Armor) | 10 | Protects you from damage floors/zones. Late-game floors are its reason to exist. |
| Soul Armor (ソウルアーマー) | 12 | Lets you walk in space. Found in the World of Evil and required there: the Dazzling Space drains the HP of anyone not properly equipped, and the finale expects this armour with the Soul Blade. |
Note the design: half of this list is terrain permission. When an area hurts you just for standing in it — sea floor, heated floor, dazzling space — the game is not asking for more defence; it is asking whether you found, and equipped, the right armour.
Magic: eight spells, paid for in GEMs
Equip one spell at a time. Your orbiting Soul casts it, spending GEMs dropped by monsters.
| Magic | GEM cost | Effect and where it earns its keep |
|---|---|---|
| Flame Ball (フレイムボール) | — (see note) | A single fireball in the direction you face, from the Soul of Magician in the Trial Room. Your first spell; tight corridors limit it. |
| Light Arrow (ライトアロー) | 8 | Shots in all four directions at once from the orbiting Soul. Guides consistently rate it the most useful all-round spell in the game. From the Fire Shrine. |
| Magic Flair (マジックフレア) | 8 | Hold to charge a ring that stays where released and hits what touches it. A placed trap, for doorways and lair mouths. From a mermaid in St. Elles. |
| Rotator (ローテイター) | 1 (then drains while held) | The Soul spins rapidly around you, cutting what it passes. Costs a trickle of GEMs per second while held — the bat answer in the Mountain of Souls. Chest in the Laynole area. |
| Spark Bomb (スパークボム) | 8 | The Soul lays four bombs along its path, which explode shortly after. Small radius; a specialist's tool. From the mouse in Leo's Laboratory, reached by moving the cats with catnip leaves. |
| Flame Pillar (フレイムピラー) | 20 | Four pillars of fire laid in the Soul's path, harming what touches them for as long as they stand. The expensive close-quarters option. Won by a spirit-typed revisit to the Light Shrine after the Spirit Sword. |
| Tornado (トルネード) | 8 | A tornado that flies about damaging enemies — good against crowds. Won by a metal-typed revisit to Leo's Painting after the Zantetsu Sword. |
| Phoenix / God Bird (ゴッドバード) | 2 | Not cast with the magic button: once learned, every swing of the Soul Blade sends a phoenix flying. Requires all three Red-Hot items (Mirror, Ball and Stick) taken to the king in the Mountain of Souls — and only works with the Soul Blade equipped. This is the finale's key, not a spell of convenience. |
References give different costs for Flame Ball, so its GEM cost is left blank.
Two economy rules tie the magic system together: GEMs are lost on death (unless the Strange Bottle is equipped), and the eight Master's Emblems (A–H), hidden one to an area across the whole game, are the completionist's long thread — the item lists sum up a complete set as making you an expert in magic. Chase them on revisits, not on first passes.
The revisit list: what the type-key swords reopen
The game's second half quietly rewrites its first half. When a sword changes what you can kill, old areas pay out:
| New sword | Go back to | What was waiting |
|---|---|---|
| Zantetsu Sword (Area 5) | Leo's Painting, Grass Valley | Three metal-guarded lairs (Japanese guides' count). Sealing them frees ivy back in Grass Valley; climb it for the Recovery Sword and Master's Emblem A. The first lair also reveals the chest holding the Tornado magic. |
| Zantetsu Sword | Fire Shrine, GreenWood | Three more lairs: a small bird freed, and a chest with the Strange Bottle — the item that stops death taking your GEMs. Japanese guides also note a fairy here that can be asked for 1 EXP repeatedly; treat that as a curiosity, not a levelling plan. |
| Zantetsu Sword | Durean, the volcanic island (St. Elles) | One lair, an armoured guardian among them — freeing the mermaid there starts the Red-Hot item chain that ends in the God Bird / Phoenix. |
| Spirit Sword (Area 6) | Light Shrine, GreenWood | The spirit-ball lair that no earlier sword could touch: it reveals the chest with the Flame Pillar magic, and frees a bird whose errand in the village leads onward. |
And a forward-looking habit that costs nothing: every boss is one-time. There is no rematch and no practice mode, so the Shrine save before a boss door — with a full heal on entry, remember — is the only checkpoint etiquette this game asks of you.
Endgame checklist: before Deathtoll
The World of Evil opens when the six Stones are offered up, but opening is not readiness. Guides agree on the kit:
- Level 24 or better. The Soul Blade cannot be equipped below 24, and without it there is no God Bird and no damaging Deathtoll. If you are short, experience comes from the lairs you skipped — the revisit list is a levelling plan in disguise.
- The Soul Blade, from a chest in the World of Evil's second area, and the Soul Armor, from the Dazzling Space — both found inside the final area, so explore it fully before walking into the shrine at its heart.
- God Bird / Phoenix learned: all three Red-Hot items collected and taken to the king in the Mountain of Souls. With the Soul Blade equipped, your sword swings themselves become the attack the finale is built around.
- A Medical Herb equipped for the fight itself, and the best bracelet you own ready to swap — the two-form Deathtoll fight is the game's last lesson in its one-item-slot rule.
Who It's For
Play it if you like your action RPGs legible: finite dungeons, a progress system you can see standing in the town square, and equipment that changes what the world permits rather than merely inflating numbers. It is a kind game to completionists — everything is findable by sweeping lairs and talking — and an essential one for Quintet followers, as the first draft of everything Illusion of Gaia and Terranigma would do.
Think twice if you need mechanical depth in combat itself: the swordplay is simple, the first boss is a deliberate war of attrition, and the backtracking revisits — charming as bookkeeping — are mandatory for the best gear. Players who bounce off "talk to everyone again" as a progression mechanic will bounce off the whole design, because that is the design.
How to Play It Today
There is, as of this writing, no modern way to buy this game: it has never been re-released in any form, and it is not in the Super Famicom / SNES Nintendo Classics library on Nintendo Switch Online in the major regional catalogues — check the current line-up, as catalogues change, but do not plan around it appearing. The practical route is an original cartridge: the Japanese Super Famicom Soul Blader (the version covered here), the North American SNES Soul Blazer, or the PAL release. Cartridge saves depend on a battery now more than three decades old, so a battery check — or a save strategy that tolerates loss — is worth it before a full restoration run.
- Original Super Famicom / SNES cartridge:
Find the original Japanese cartridge
Disclosure: The Rakuten and Yahoo! Shopping links are standard shopping links. Enkeisha does not earn a commission from purchases made through these links.
Find original hardware editions on eBay
As an eBay Partner Network affiliate, Enkeisha may earn a commission from qualifying purchases made through these links.
Search eBay listings (affiliate link)
Check the language, region, hardware compatibility, condition and authenticity before buying. Search results may include reproductions; links do not endorse individual sellers.