Ogre Battle: The March of the Black Queen — The Strategy RPG That Judges How You Liberate
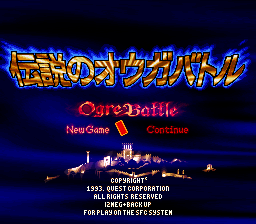
Most strategy games ask whether you won the battle. Ogre Battle: The March of the Black Queen asks who did the liberating, how long you lingered collecting taxes afterwards, and what the people thought of you — and remembers all of it until the ending. Released for the Super Famicom in 1993 by Quest, it is a real-time tactical RPG in which you never swing a sword yourself: you build squads, send them across a living map, and watch a hidden reputation meter decide what kind of ruler you are becoming.
Scope: This article covers only the original Super Famicom / SNES version (1993). The PlayStation (1996) and Sega Saturn (1996) ports, Ogre Battle 64 (1999) and Tactics Ogre differ in places; differences are flagged as notes only. In the English SNES release the reputation below is labelled Reputation; later saga games call the same idea the Chaos Frame, so this guide writes "Chaos Frame (Reputation)".
Quick Facts
| Item | Detail |
|---|---|
| Original title | 伝説のオウガバトル (Densetsu no Ogre Battle) |
| English title | Ogre Battle: The March of the Black Queen |
| Platform | Super Famicom (SNES outside Japan) |
| Release (Japan) | March 12, 1993 |
| Release (North America) | May 1995, published by Enix America |
| Developer / Publisher (Japan) | Quest |
| Genre | Real-time tactical RPG / simulation RPG |
| Director / designer / writer | Yasumi Matsuno |
| Art | Akihiko Yoshida; art direction by Hiroshi Minagawa |
| Music | Masaharu Iwata, Hitoshi Sakimoto, Hayato Matsuo |
| Cartridge | 12 Mbit, LoROM; ROM + RAM + battery (SRAM save) |
| Players | 1 |
| Series position | Ogre Battle Saga, Episode Five; first game released in the series |
| Title origin | Two Queen songs from Queen II: "Ogre Battle" and "The March of the Black Queen" |
Overview
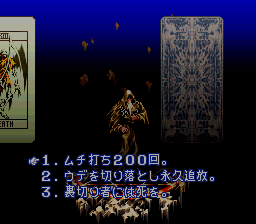
Twenty-five years after the sage Rashidi murdered King Gran Zenobia and helped Empress Endora's Holy Zeteginean Empire overrun the continent, the last Knights of Zenobia raise a Liberation Army. You are its Opinion Leader, shaped before the first battle when the seer Warren reads your character through tarot questions: your answers set the Lord's starting statistics and first squads.
On the strategy map, time flows in real time through day and night. You deploy units from your base for a cost, give each a destination — a town, a temple, an enemy squad, an empty square where something might be buried — and watch them march as banners while enemies do the same. When units meet, an automated skirmish follows: each character attacks a set number of times by class and row, following your tactic (Best, Strong, Weak or Leader), and the side dealing more damage wins. You cannot move soldiers mid-battle; your power lies beforehand — composition, formation, equipment, terrain, timing — plus one intervention: a tarot card you have earned.
Every character has Alignment (ALI, 0–100) and Charisma (CHA), both drifting according to whom they personally kill; the army has the Chaos Frame (Reputation), shown as a meter at the top-right of the screen. Towns pay tribute at noon daily, funding deployment costs charged at deployment and again every noon: a large army is a daily bill. Liberated towns and temples yield information, shops, recruits and a tarot card; hidden towns, Chaos Gates and buried treasure reward a fast flying unit sent to comb the map's corners. The campaign can be finished without clearing every stage, and special characters have their own joining conditions, so no two first playthroughs quite agree on what happened.
Why It Still Matters
This is the founding work of Yasumi Matsuno's career and of the Ogre Battle Saga — presented as "Episode Five" of a planned saga whose earlier episodes were never made. Nearly everything Matsuno became known for is here in embryo: a war told from the liberators' side that keeps asking whether liberation and occupation look different to the people underneath; political factions instead of a single dark lord; morality encoded as arithmetic. Tactics Ogre (1995) took the same world down to a grid, and Final Fantasy Tactics (1997) carried the lineage further — but the questions were asked first, and at army scale, here. No later game kept this exact mix of real-time movement, automated battles and reputation set by which squad liberates a town; Ogre Battle 64 reworked rather than repeated it.
Highlights

- Liberation is a verb with an author. The same town, freed by paladins or by ninja and undead, moves your reputation in opposite directions. You must keep "presentable" units whose job is to be seen freeing people.
- A lord made by tarot. Warren's opening reading builds your Opinion Leader and starting army, and the Lord's ALI and CHA gate class changes, recruitments and endings.
- Day, night and terrain are unit properties. High-ALI characters fight better by day, low-ALI by night; each monster family favours different ground and sky lanes.
- Secrets at every scale. Buried treasure on unmarked squares, hidden offshore towns, Chaos Gates opening bonus stages, a witch recruited only through a favour chain spanning several stages, and a bonus scenario reached by entering the name FIRESEAL (English version).
Strategy Essentials
1. The Chaos Frame (Reputation) — How Liberation Is Scored
The Chaos Frame is a 0–100 value never shown as a number during play — only as a meter; the exact figure appears after the ending. Work in thirds: top third (about 67–100) high, middle neutral, bottom third (about 0–33) low.
The core rule: every town has a morale value, compared against the entering unit's average ALI. Comfortably above it, the unit liberates the town and reputation rises; well below it, the unit effectively occupies it and reputation falls — though the town is yours and pays tribute. Roshian Temples and hidden towns do not move the meter in the same way.
| Action / event | Effect | Notes |
|---|---|---|
| Liberate a town with average ALI above the town's morale | Rises | Keep dedicated high-ALI liberation units; route every ordinary town through them. |
| Take a town with average ALI below the town's morale | Falls | Held and paying, but read as occupation. Low-ALI kill squads fight in the field, never enter towns. |
| A liberated town or temple is retaken | Falls | Garrison or screen important towns. |
| Your base (HQ) is taken | Falls; stage failed | Never leave the base's approach unwatched on a large stage. |
| Days pass — tribute collected every noon (the "tax" pressure) | Falls gradually | Idling, farming weak enemies for days, or lingering on a revisit read as a taxing army. Finish promptly. |
| Story choices (helping petitioners, forgiving foes, refusing cruel options) | Rises or falls | Helping Posha's request helps you; forgiving Gilbert or Deneb trades a reputation cost against a character worth more. |
| Tarot drawn on liberation — Lovers / Temperance | Rises | The draw is automatic. (In battle, Lovers instead turns enemy allegiance.) |
| Tarot drawn on liberation — Devil / Death | Falls | A long pattern of clean liberations outweighs unlucky draws. |
| Tarot drawn on liberation — Fortune | Random, about −3 to +3 | A coin toss; do not plan around it. Most other draws adjust ALI, CHA or stats. |
Reading your position: judge the meter across a whole stage, not one liberation. Recruitments are the other tell — several characters and items require high reputation, while Deneb can only be recruited at low reputation (bottom third). Doctrine: split the army by function — high-ALI liberation units that touch towns; low-ALI fighters that intercept enemies between towns and never enter one; a fast flying scout for temples, gates and treasure.
2. Endings — Counting Stated Explicitly
The commonly cited total is 13 endings, used here. It counts male/female variants separately (Emperor/Empress; Hierophant/Priestess; Sun/Moon) and includes Fortune, earned by clearing the bonus scenario Dragon's Haven, not the final stage. Merge the gender pairs and the same set is 10 distinct verdicts — why some lists say 10. "Almost full" = top range; "half" = middle; "almost empty" = bottom range. The three Mystic Treasures are the Brunhild, the Mystic Armband and the Grail; the 12 Zodiac Stones are gathered across the campaign, several from special characters and optional stages.
| # | Ending | Reputation | Other conditions |
|---|---|---|---|
| 1 | World (best) | Almost full (near maximum in most successful runs) | All 12 Zodiac Stones, all 3 Mystic Treasures, recruit all special characters except Galf. |
| 2 | Emperor | Almost full | Male Lord; all 3 Treasures, without the full World set. |
| 3 | Empress | Almost full | Female Lord; all 3 Treasures, without the full World set. |
| 4 | Hierophant | Almost full | Male Lord; recruit Rauny. |
| 5 | Priestess | Almost full | Female Lord; recruit Tristan. |
| 6 | Sun | Almost full | Male Lord; no higher-priority condition met. |
| 7 | Moon | Almost full | Female Lord; no higher-priority condition met. |
| 8 | Chariot | Around half | Recruit Tristan. |
| 9 | Hanged Man | Around half | Do not recruit Tristan. |
| 10 | Death | Almost empty | Lord's CHA 30–60. |
| 11 | Tower | Almost empty | Lord's CHA below 30. |
| 12 | Devil | Almost empty | Recruit Galf. |
| 13 | Fortune | Separate route | Clear Dragon's Haven (FIRESEAL entry in English; also reachable late via Fogel). |
Planning for World: (1) protect reputation from stage one — high-ALI liberators only, finish promptly; (2) recruit everyone offered (needing high reputation at several points, and the HEROSTAR for the late dragoons) while deliberately not recruiting Galf; (3) track Stones and Treasures as a checklist — several sit behind Chaos Gates, hidden temples and post-stage revisits; (4) guard the Lord's ALI/CHA by fighting equal- or higher-level enemies. Doing only (1) still lands in the Sun/Moon tier.
3. Class Change — Level, ALI and CHA Gates
Class change is free between stages, but a character enters only a class whose level, ALI range and — for most leader-capable classes — CHA requirements they currently meet. Human classes are divided by sex and never cross. ALI figures are the standard published thresholds for the original; CHA is a guide band, because published CHA thresholds are the least consistently reported numbers in the game's documentation — read "high" as: regularly finish equal- or higher-level enemies, which raises CHA.
| Line | Progression | Level / ALI / CHA guide | Role |
|---|---|---|---|
| Male — knightly | Fighter → Knight → Paladin | Knight: Lv 5+, ALI 50+, CHA moderate. Paladin: Lv 15+, ALI 70+, CHA high | Paladin adds a third front-row attack and back-row Healing — the anti-undead answer. Core of liberation units. |
| Male — blade | Fighter → Samurai → Samurai Master | Samurai: Lv 7+, ALI 50+. Master: Lv 15+, ALI 70+; CHA moderate → high | Back-row Iainuki: a powerful strike costing the user some HP. |
| Male — shadow | Fighter → Ninja → Ninja Master | Ninja: Lv 6+, ALI below 50. Master: Lv 15+, ALI 30 or lower | Ninja's three front-row attacks are unique among first promotions; Master's ninjutsu hits all targets. Keep out of towns. |
| Male — wild / magic | Fighter → Beastman/Wildman lines; Wizard lines | Mid-tier, roughly Lv 6–12, ALI-band gated (brutes and wizards: low-to-mid ALI; wizards need strong INT growth) | Brutes trade defence for power; wizards are back-row artillery. Neither liberates. |
| Female — holy | Amazon → Cleric → Shaman → Monk | Cleric: early (about Lv 5+), high ALI. Shaman: Lv 10+, ALI 60+. Monk: Lv 18+, ALI 70+; CHA rising to high | A cleric's "attacks" heal the unit. Shaman heals three times per battle; Monk is the premier healer. |
| Female — priestess | Amazon → Valkyrie → Muse | Valkyrie: mid-tier, high ALI. Muse: Lv 15+, ALI 70+ | Spear and lightning; as a Muse, lightning hits all enemies. |
| Female — arcane | Amazon → Witch / Archer lines | Mid-tier, ALI-band gated (Witch: low-to-mid ALI; Archer: broadly available) | Witch: back-row status/elemental magic. Archer: back-row physical damage. |
| Demi-human & monsters | Hawkman → Eagleman; Hellhound → Cerberus; Gryphon → Opinincus; Octopus lines; Golems (via Doll Master) | Level-gated; no CHA gate of consequence | Flight (hawkmen, gryphons): scouting, gates, offshore towns. Monsters are the safe home for collapsed-CHA characters. |
| Dragons | Young Dragon → elemental dragons (Red/Black/Silver…) → upper dragons (Platinum/Tiamat class) | Level-gated; branch shaped by ALI and terrain fought on | Takes 2 slots (large); repays with bulk and breath attacks. Special case: an Undead Ring on a Tiamat creates a Zombie Dragon — item-driven, not a menu promotion. |
| Undead & special | Skeleton/Ghost lines; Pumpkin; Angel; Devil; Lich/Vampyre lines | Mostly recruited, charmed or item-created | Undead fall only to white-attribute attacks (cleric magic, white weapons, certain tarot) — so neutral undead are the controlled ALI/CHA training targets below. Deneb's Garden's Lv 1 Pumpkins are the reverse tool: fighting them crashes ALI/CHA on purpose. |
How ALI and CHA move: only the character landing the killing blow changes — killing a higher-level enemy, or one of lower ALI/CHA than you, raises your ALI/CHA; killing a lower-level enemy, or one of higher ALI/CHA, lowers them; fleeing lowers CHA. Tarot kills are the exception: their experience and stat change go to the Lord. Hence: a unit parked in a town farming weaker waves bleeds ALI/CHA away, while undead neutrals (Pogrom Forest early; Balmorian Ruins, Antalia later), finishable only with a white weapon, are the deliberate steering tool.
4. Stage Structure — Campaign, Gates and the Buried Layer
Counting, stated plainly: 25 main stages on the campaign path (the standard reference figure, including branch variation — you need not clear them all), 4 hidden stages via Chaos Gates, and 1 bonus scenario (Dragon's Haven) outside the campaign count. Castle of Warren is a tutorial sometimes counted as an extra stage — how totals of 29, 30 or 31 appear elsewhere.
| Phase | Representative stages | Demands / notes |
|---|---|---|
| Opening | Castle of Warren (tutorial); Sharom Border/Sharom; Sharom District; Pogrom Forest; Lake Jannenia | Liberation with the right unit. First recruits: Lans (from the start); Canopus and Gilbert (Sharom District — Gilbert must be forgiven, with reputation to support it). Pogrom Forest's undead teach white-attribute rules. |
| Witch & old kingdom | Deneb's Garden; Slums of Zenobia; Island Avalon; Kastolatian Sea; Diaspola | Deneb's chain: forgive her, revisit her, Black Pearl, Golden Bough bought later in Diaspola, Glass Pumpkin, recruit only at low reputation. Lyon's fee (Slums) drops sharply if you return after clearing. Aisha's route starts at a hidden temple on Island Avalon. |
| Middle war | Balmorian Ruins; Valley of Kastro; Fort Allamoot; City of Malano; central stages | Rauny (Kastro: southern temple at high reputation); Saradin (Balmorian Ruins, via HEROSTAR and the Bell). Fort Allamoot's Chaos Gate, in the south-western desert, is famously easy to miss. |
| Sky & far front | Sky stages via Brunhild and Chaos Gates (Shangrila / Temple Shalina routes); Muspelm; Organa; Antalia; Antanjyl; the Tundra | Slust (Muspelm) and Fenril (Organa) join only with the HEROSTAR held, reputation at roughly two-thirds or higher, and Lord ALI above 69 at their fights. Antalia's high-level undead are the late ALI/CHA workshop. |
| Endgame | Shiguld; Zeteginean; final stage vs. Rashidi | Fogel (Shiguld) joins under the same conditions. The final stage sends effectively unlimited enemy units: an advance under pressure, not a map to clear. Boss stages end via the Leader tactic — only the boss leader must fall. |
| Hidden stages | Four stages, each opened by the Chaos Gate hidden on its parent map | Zodiac Stones, top-tier shops (the 50,000-Goth Charm enables the daytime werewolf/vampyre recruitment trick in Antalia and Antanjyl) and World-ending recruits. Budget a flying scout for gate-hunting. |
| Bonus scenario | Dragon's Haven | New game named FIRESEAL (English version), or reached late by refusing Fogel's aid after Shiguld. Self-contained; clearing it awards the Fortune ending. |
Hidden-layer habits. (1) Treasure hunting: revisit cleared stages and stand on unmarked squares to uncover buried treasure, including items found nowhere else. Revisits reset the stage's day counter, so sweep fast, with flyers. One random treasure weapon (Euros) feeds a late item chain — save before a sweep and reload if the drops refuse to cooperate. (2) Hidden towns/temples sit on offshore islands and map corners: items, story, recruits — but no reputation movement. (3) Tarot economy: liberation cards are a limited stock; all-target damage cards are boss insurance, and Lovers in battle can turn an enemy unit's non-leader members to your side. (4) Recruiting depends on the recruiter: a town's hires vary with the asking unit's class and ALI — check with a high-ALI leader, a Beastmaster and a Dragonmaster.
5. Unit Building — Five Slots, Two Rows, One Daily Bill
| Rule | Detail | Consequence |
|---|---|---|
| Squad size | Up to 5 small characters; a large character (dragon, gryphon, golem, octopus…) counts as 2 slots | Real units: 5-small, 3-small + 1-large, or 1-small + 2-large. Each large character deletes an attacker or healer — pay only when it brings flight or an all-target attack. |
| Rows | Attacks and attack counts differ by front / back row | Front: Paladin, Knight, Samurai, Ninja. Back: casters, archers, clerics — usually stronger there. A cleric heals from either row. |
| Leader | Leader-capable classes require CHA; leader identity affects recruiting | Durable, high-CHA leaders on liberation and boss units. Wandering neutrals join a leader whose CHA outweighs theirs. |
| Movement | One flyer does not make a ground unit fly; dedicated flying units (hawkmen, gryphons, wyverns, angels, devils) move as Low Sky / High Sky | One purpose-built flying unit per stage for temples, gates, offshore towns. Sea units own water maps. |
| Tactics | Best / Strong / Weak / Leader targeting | Default Best; Leader for bosses; Weak for stragglers. Healing does not count in the damage comparison deciding a battle. |
| Cost | Goth up front and again at noon daily, per character; advanced/large classes cost far more | The noon bill is the real difficulty dial: a small elite army finishing in two days is cheaper and better reputed than a large cheap army taking five. |
| ALI grouping | Mixing very high- and low-ALI members averages away liberation value and class plans | Build in ALI bands: high-ALI liberators, mid-ALI generalists, a low-ALI strike unit that never enters towns. |
Starter templates: a liberation unit (Lord or Paladin leader, two Paladin/Knight front-liners, a Valkyrie or Muse, a Cleric/Shaman behind); a strike unit (Ninja Master-class leader, front-row damage, back-row Wizard — field interceptions only); a scout unit (a gryphon or two hawkmen plus one light attacker). Specialisation beats five identical all-rounders.
Who It's For
Play the original if you want the strategy RPG that treats public opinion as a combat stat — building an army as an institution, with presentable liberators, deniable kill squads and a payroll, has no real equivalent on the cartridge shelf. It is also essential archaeology for Matsuno's later work, at a scale Tactics Ogre and Final Fantasy Tactics never attempted. The honest costs: battles are automated once joined, reputation is never a number, and a World-ending run is a long checklist campaign. For direct control of every sword swing, start with Tactics Ogre — then come back.
How to Play It Today
-
Original cartridge: The Super Famicom cartridge is the version described here, and its only physical form. It saves to a battery now over three decades old — confirm the save holds before a long campaign.
-
Virtual Console (legacy): Wii Virtual Console (Japan 2008; North America and Europe 2009) and Wii U Virtual Console (Japan 2013). Those storefronts are closed to new purchases — an option only for libraries already owned. Do not confuse these with the separate PlayStation and Sega Saturn ports (both 1996 in Japan; PlayStation also reached North America via a different publisher): distinct versions, outside this article's scope.
-
Later games are not this game: Tactics Ogre and its remakes, and Ogre Battle 64, are saga sequels with different systems — none of the tables above transfer unchanged.
Find the original Japanese cartridge
Disclosure: The Rakuten and Yahoo! Shopping links are standard shopping links. Enkeisha does not earn a commission from purchases made through these links.
Find original hardware editions on eBay
As an eBay Partner Network affiliate, Enkeisha may earn a commission from qualifying purchases made through these links.
Search eBay listings (affiliate link)
Check the language, region, hardware compatibility, condition and authenticity before buying. Search results may include reproductions; links do not endorse individual sellers.