Rockman X2 (Mega Man X2) — The Race for Zero's Parts: Weakness Chain, Every Heart, Sub Tank and Armor Part, and the Hidden Shoryuken
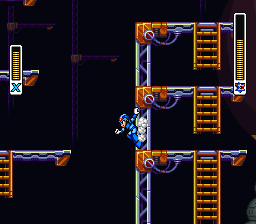
Six months after X destroyed Sigma, the war is not over — it has changed shape. A trio calling themselves the Counter Hunters (the X-Hunters overseas) has built a new body for the fallen Zero, split it into three parts, and issued X a challenge: duel us for them. Rockman X2, released overseas as Mega Man X2, is therefore two games at once: a familiar eight-boss action platformer, and a timed rescue running underneath it, because if you clear all eight Maverick stages before you win the duels, the parts are gone for that playthrough. This guide covers the original Japanese Super Famicom version of 1994 in depth: the full weakness chain and a recommended order, all eight Life Ups (Heart Tanks), all four Sub Tanks, all four Armor Parts, the Counter Hunter appearance rules and Zero Part conditions, and the two great payoffs — Giga Crush and the hidden Shoryuken.
Quick Facts
| Item | Detail |
|---|---|
| Original title | Rockman X2 (ロックマンX2) |
| Overseas title | Mega Man X2 |
| Platform | Super Famicom / SNES |
| Release (Japan) | December 16, 1994 |
| Release (North America) | January 1995 |
| Release (PAL) | October 18, 1995 |
| Developer | Capcom |
| Publisher | Capcom (Laguna Video Games in PAL regions) |
| Producer | Tokuro Fujiwara |
| Music | Yuki Iwai |
| Genre | Action / platformer |
| Cartridge | 16 Mbit (2 MB), LoROM, with Capcom's Cx4 custom chip |
| Structure | Opening stage, eight Maverick stages in any order, Counter Hunter stages, then the final stages |
| Key collectibles | 8 Life Ups (Heart Tanks), 4 Sub Tanks, 4 Armor Parts, 3 Zero Parts |
| Series position | Second game in the Rockman X / Mega Man X series, sequel to Rockman X (1993) |
A naming note that matters throughout this guide: the Japanese and overseas versions name the same things differently. The three duelists are the Counter Hunters in Japan and the X-Hunters overseas; two of the eight special weapons also change name — Morph Moth's weapon is Scrap Shoot in Japan and Silk Shot overseas, and Flame Stag's is Rushing Burner in Japan and Speed Burner overseas. Boss names differ most of all, so every table below gives the Japanese name first and the overseas name alongside it. This article treats the Japanese Super Famicom original as authoritative.
Overview
X, now leading his unit after Sigma's defeat, storms a Reploid factory in the opening stage — and finds control chips marked with Sigma's insignia still being distributed. Eight powerful Mavericks rise at once, and behind them stand the three Counter Hunters: Violen, the power type who holds Zero's body part; Serges, their leader, who holds Zero's head part and is said to have built the new body; and Agile, the swordsman who holds Zero's leg part. Dr. Cain holds only Zero's control chip and cannot rebuild a body for it — so the Hunters' parts are the only body there is.
The core loop is the series standard, refined. X can dash from the start of the game this time. Clear a Maverick's stage in any order, take its special weapon, and use that weapon against the Maverick weak to it. Hidden in the eight stages are the permanent upgrades that define an X game: one Life Up per stage, four Sub Tanks, and four Light Capsule Armor Parts — Head, Body, Arm and Foot — that rebuild X into the Second Armor. The Cx4 chip inside the cartridge handles wireframe and rotation effects the base hardware could not, most visibly in the giant opening-stage boss and the wireframe final encounter.
Layered over that loop is the duel system. After you defeat your second Maverick, the Counter Hunters appear on the stage-select map inside stages you have not yet cleared. Each stage contains a hidden second boss room; enter it while a Hunter is occupying that stage and you fight that Hunter instead of proceeding as normal. Win, and you take his Zero Part. That race — and the fact that it can be lost — is what makes X2's structure different from its predecessor's.
Why It Still Matters
X2 is the game where the X series' grammar settled. Several things later entries treat as standard begin here: dash available from the first minute, a giant boss in the opening stage, optional bosses intruding into the selectable stages, and a weakness hit visibly staggering every one of the eight main bosses. It is also the most structurally honest of the early X games about a difficult idea — that a rescue can fail. Most contemporaries would have made Zero's return a cutscene. X2 makes it a routing problem, and lets you reach the finale having failed it, with a different fight waiting for you there.
It matters technically, too. The Cx4 was Capcom's own answer to the enhancement-chip race: an in-cartridge chip doing arithmetic for wireframe graphics and sprite rotation. When a wireframe head materialises in the finale, that is not the Super Famicom being clever — that is the cartridge helping. And narratively, X2 sets the series' long arc in motion: Zero's rebuilt body, complete with the beam saber that becomes his signature weapon from the next game onward, exists because Serges built it here.
Highlights
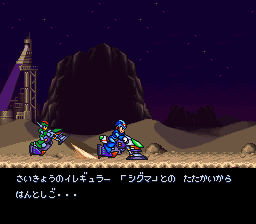
The duel clock. The Counter Hunters move between uncleared stages each time you finish or exit a stage, and their positions are shown on the map. Planning a route is therefore not just "which weakness next?" but "which weakness next, and whose duel does that stage currently hold?" No other early X game asks both questions at once.
A second armor worth routing for. Each part changes how you move or fight in a way stages immediately test: an air dash, a double charge shot, a screen-clearing counter that charges as you are hit. The parts are also keys — two of them are hidden behind another boss's weapon, so collection order is a puzzle in itself.
Vehicles that are levels, not cutscenes. The mining Ride Armor (which can hover, and shrugs off spikes) and the auto-running Ride Chaser bike each carry a stage section — and each is also an item-collection tool. The hardest Life Up in the game is not behind a boss; it is behind a jump you make out of a Ride Armor, mid-flight.
A hidden move as a completion certificate. The Shoryuken is not found; it is certified. The capsule that teaches it only exists for a player who has already collected everything else and arrives unhurt. See Strategy Essentials for the exact conditions — and for the points on which guides genuinely disagree.
Strategy Essentials
The weakness chain and a recommended order
The eight Mavericks form a single loop: each weapon is the next boss's weakness. The order below starts with Wire Sponge — the standard first pick, beatable with the X-Buster — and then follows the loop so that you always arrive holding the next boss's weakness.
| Order | Boss (JP / overseas) | Stage | Weak to | Weapon you win |
|---|---|---|---|---|
| 1 | Wire Hetimarl / Wire Sponge | Weather Control Center | Sonic Slicer (from Overdrive Ostrich) — use the X-Buster on a first visit | Strike Chain |
| 2 | Wheel Alligates / Wheel Gator | Dinosaur Tank | Strike Chain | Spin Wheel |
| 3 | Bubbly Crablos / Bubble Crab | Deep-Sea Base | Spin Wheel | Bubble Splash |
| 4 | Flame Stagger / Flame Stag | Volcanic Zone | Bubble Splash | Rushing Burner (Speed Burner overseas) |
| 5 | Metamor Mothmeanos / Morph Moth | Robot Scrap / Robot Junkyard | Rushing Burner / Speed Burner | Scrap Shoot (Silk Shot overseas) |
| 6 | Magne Hyakulegger / Magna Centipede | Central Computer | Scrap Shoot / Silk Shot — a hit can also sever his tail and remove its attacks | Magnet Mine |
| 7 | Cristar Mymine / Crystal Snail | Energen Crystal | Magnet Mine — it can also pry him out of his shell | Crystal Hunter |
| 8 | Sonic Ostreague / Overdrive Ostrich | Desert Base | Crystal Hunter | Sonic Slicer |
Ostrich --Sonic Slicer--> Hetimarl --Strike Chain--> Alligates
   ^                                                    |
   |                                                 Spin Wheel
   |                                                    v
Mymine <--Magnet Mine-- Hyakulegger <--Scrap Shoot-- Mothmeanos
   ^                                                    |
   |                                                 Rushing Burner
   +-- Crystal Hunter -------- (loop closes)      Stagger
                                                        ^
                                                     Bubble Splash
                                                        |
                                                     Crablos
Two honest qualifications. First, this is the weakness order, not the collection order: several items below require weapons from later in the loop, so a 100% run backtracks regardless of the order you choose. Second, Wire Sponge also takes notable damage from Rushing Burner / Speed Burner, which is why some routes leave him later; the loop above simply gives every other boss his weakness on first arrival.
Life Ups (Heart Tanks): all eight
Each Life Up raises X's maximum energy. There is exactly one per Maverick stage.
| Stage (boss) | Where it is | What you need / how to reach it |
|---|---|---|
| Weather Control Center (Hetimarl / Sponge) | At the very start: climb the left wall of the opening screen into a small hidden alcove | Nothing — the easiest one in the game |
| Dinosaur Tank (Alligates / Gator) | After the Ride Armor section, up the ladder: the tank sits on a ledge over a spike-lined wall | In practice, the Air Dash plus a charged Rushing Burner / Speed Burner to cross to it |
| Deep-Sea Base (Crablos / Crab) | In the Sea Canthller area: climb the right wall to an inlet above the water, then dash-jump left to a floating platform and on to the ledge | No special weapon; the jump and the platform are the test |
| Volcanic Zone (Stagger / Stag) | Halfway up the rising-lava climb inside the volcano, in an alcove on the left, sealed by a barrier | Charge a shot to destroy the barrier as you climb, grab the tank, and keep climbing ahead of the lava |
| Robot Scrap (Mothmeanos / Moth) | At the start, outside the building: freeze the disc-throwing enemy and use it as a step up the building's wall to the roof, then go right | Crystal Hunter |
| Central Computer (Hyakulegger / Centipede) | Through a passage in the ceiling at the end of the opening searchlight section | Reach it without being spotted by any searchlight — then use a charged Rushing Burner / Speed Burner to reach the ceiling block and climb in. Being spotted changes the blocks and closes the route |
| Energen Crystal (Mymine / Snail) | Early on: board the Ride Armor, go back left, and drop through the gap between the slopes, hugging the left wall to a small ledge | The Ride Armor's hover dash-jump to the left, eject from the armor mid-flight, then Strike Chain to the far wall and climb — guides also describe a variant using Giga Crush's lift instead of the Strike Chain. Widely treated as the hardest Life Up in the game |
| Desert Base (Ostreague / Ostrich) | On a spike-covered ledge near the end of the Ride Chaser section | Ride the Ride Chaser across the spike pit and take the tank without crashing into the wall beyond it |
Sub Tanks: all four
Sub Tanks store spare life energy — energy pickups collected at full health fill them — and can be used at any time. There are four, each in a different stage, and note that no stage contains both a Sub Tank and an Armor Part capsule: the eight stages split four-and-four.
| Stage (boss) | Where it is | What you need / how to reach it |
|---|---|---|
| Weather Control Center (Hetimarl / Sponge) | After the second weather crystal, above the rising platforms over the spikes: take the first platform up to the left wall and stay on the highest platforms to the last one | The Air Dash makes the crossing straightforward |
| Deep-Sea Base (Crablos / Crab) | Past the Life Up area, in the section with the robotic jellyfish: on a ledge to the left, above the water's surface | Charged Bubble Splash — its underwater jump boost, and hopping on the water's surface, are how you get up there. Because Bubble Splash is this stage's own boss weapon, this is normally a revisit item |
| Volcanic Zone (Stagger / Stag) | At the very start: the beetle enemy is meant to be tricked into smashing breakable blocks — instead, lure it up to the top of the slope and use its back as a platform to dash-jump left to an otherwise unreachable cliff ledge | Nothing but patience with the lure |
| Central Computer (Hyakulegger / Centipede) | After the moving, crushing block section: through a small gap in the ceiling | Stand on the raised platform/block and use an Air Dash combined with a charged Rushing Burner / Speed Burner to reach the ceiling opening |
Armor Parts: all four
| Part | Stage (boss) | Where it is | Effect |
|---|---|---|---|
| Head Part | Energen Crystal (Mymine / Snail) | After the Magna Quartz mid-boss and the downhill slide: slide down the left wall of the first pit into a hidden passage holding the capsule | The Item Tracer: sends out a cursor that points to hidden passages and items. Its gauge never depletes. It tells you where a secret is, not how to open it |
| Body Part | Robot Scrap (Mothmeanos / Moth) | Just after entering the building: use Spin Wheel to cut through a section of floor and drop to the capsule below | Reduces damage taken, and enables Giga Crush (next section) |
| Arm Part | Dinosaur Tank (Alligates / Gator) | In the first vertical passage inside the tank: the capsule sits in an opening at the top of a beam from the ceiling | The Double Charge: a fourth charge level that fires two charge shots in sequence, and lets X charge special weapons. Easiest to reach with the Foot Part's Air Dash; Strike Chain and Giga Crush routes are also described in guides |
| Foot Part | Desert Base (Ostreague / Ostrich) | Past the spike pit that holds the Life Up: blocks that Spin Wheel can destroy conceal the capsule | The Air Dash: a horizontal dash in mid-air. You cannot also dash-jump in the same jump — one or the other |
A note on the Body Part's numbers: Japanese and overseas references consulted for this guide differ on the size of its damage reduction, so this guide states the effect without a percentage rather than print a figure the sources do not agree on.
Giga Crush: the Body Part's second gift
Giga Crush is not a weapon you find; it arrives with the Body Part. Its rules are unlike every other weapon in the game:
- A dedicated gauge fills as X takes damage from enemy fire. Ordinary special weapons refill between stages; the Giga Crush gauge does not — what you carry out of a stage is what you carry in.
- At a full gauge, firing it unleashes a screen-wide attack that damages everything on screen and empties the gauge completely.
- Because bosses have post-hit invincibility, its value against them is limited; its real work is clearing a crowded room — and, unexpectedly, item routing: the small lift it gives X in mid-air is one of the described alternative ways to reach both the Arm Part capsule and the Energen Crystal Life Up above.
Treat it as a resource that combat against you charges. Deliberately banking a full gauge before a hard room — and not wasting it on a corridor — is one of X2's quiet skills.
The Counter Hunters and Zero's parts
Appearance conditions — the rules every source agrees on:
- The Hunters reveal themselves after you defeat your second Maverick. From then on, the stage-select map marks which stages they occupy, among the stages you have not yet cleared.
- Their positions change as you clear or exit stages, so the map must be re-read before every stage choice.
- A Hunter is fought in a hidden second boss room inside the stage he occupies. If no Hunter occupies the stage, the room is empty or unreachable.
- The window is finite: if all eight Mavericks are defeated before a Hunter is beaten, that Hunter disappears and his Zero Part can no longer be obtained on that playthrough.
| Counter Hunter (X-Hunter overseas) | Zero Part held | Weakness in the stage duel | Notes |
|---|---|---|---|
| Violen | Body part | Bubble Splash — Sonic Slicer is also listed as effective in damage charts | The power type: a huge chained iron ball, fought in a room where the ball's bounce is the whole fight |
| Serges | Head part | Bring Sonic Slicer and Speed Burner to give yourself options in the first fight. In his return fight he rides the Serges Tank, whose cannons one Giga Crush can destroy | The Hunters' leader, and the one said to have built Zero's new body |
| Agile | Leg part | Magnet Mine | The speed type: a swordsman whose duel is about not chasing him. He returns in a flying form, the Agile Flyer |
What the parts decide. Recover all three before the eight Mavericks are gone, and Dr. Cain rebuilds Zero with them: the boss fight against a Maverick-controlled Zero in the final stages is avoided, and Zero arrives as an ally instead. Miss even one, and the Hunters take the control chip — you will fight the rebuilt Zero as a boss. Either way you meet all three Hunters again in powered-up forms in their own stages (Neo Violen, the Serges Tank, and the Agile Flyer), so "winning the duels" and "clearing the fortress" are separate accomplishments.
The Shoryuken: conditions for the hidden technique
Following the first game's hidden Hadoken, X2 hides the Shoryuken — a flaming rising uppercut, usable only on the ground at full health, strong enough to decide a boss fight with one clean hit. It is taught by a capsule in Counter Hunter Stage 3, in a hidden room reached as follows: at the point where ladders go both up and down, lure a bat enemy in from the left, freeze it with Crystal Hunter, and use it as a step to the upper ladder; cross the spike corridor above with Air Dashes and a charged Rushing Burner / Speed Burner; then, at the long drop, slide down the left wall into the hidden passage.
Requirements for the Shoryuken capsule
- All 8 Life Ups collected
- All 4 Sub Tanks collected
- All 4 Armor Parts collected
- Arrive at the capsule with a full health bar — take no damage on the spike corridor, or top up with a Sub Tank before the drop
References differ on whether the Sub Tanks must be full. Fill them before the attempt. To use Shoryuken at full health, stand on the ground and, while facing right, press forward, down, down-forward and then fire. Passwords do not retain the move.
Who It's For
Play it if you like action games whose challenge is routing as much as reflexes: a weakness loop to optimise, a duel clock running over it, and a completion checklist — 8, 4, 4, 3 — that fits on an index card and reorganises every stage you revisit. It is also the essential middle chapter for anyone following Zero's story: his modern design, his saber and his second life all start here.
Think twice if you dislike backtracking on principle. Two Armor Parts require another boss's weapon, the Deep-Sea Sub Tank effectively requires its own stage's boss weapon, and the full-health Shoryuken run is deliberately unforgiving. X2 respects your planning more than your time — go in expecting revisits to be the game, not a flaw in it.
How to Play It Today
The straightforward modern route is Mega Man X Legacy Collection (2018; Rockman X Anniversary Collection in Japan) for Nintendo Switch, PlayStation 4, Xbox One and PC, which collects X through X4 and lets you play X2 in its Japanese or overseas form — the naming tables above are your translation key between them. Earlier reissues existed on Wii, Wii U and New Nintendo 3DS Virtual Console, services that have since closed to new purchases, so for most players today the choice is the Legacy Collection or an original cartridge. The original Super Famicom cartridge is the version covered here; being a password game, it at least asks nothing of a decades-old save battery — there is no battery save to lose.
- Original Super Famicom / SNES cartridge:
- Mega Man X Legacy Collection (Switch / PS4 / Xbox One / PC):
Find the original Japanese cartridge
Disclosure: The Rakuten and Yahoo! Shopping links are standard shopping links. Enkeisha does not earn a commission from purchases made through these links.
Find original hardware editions on eBay
As an eBay Partner Network affiliate, Enkeisha may earn a commission from qualifying purchases made through these links.
Search eBay listings (affiliate link)
Check the language, region, hardware compatibility, condition and authenticity before buying. Search results may include reproductions; links do not endorse individual sellers.