Mega Man X (Rockman X): The 16-Bit Leap That Taught a Robot to Dash, Climb, and Grow
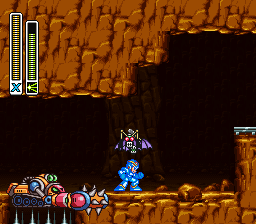
Wall-jumps, a dash that rewrites every jump, and armour hidden across eight interlocking stages — Mega Man X rebuilt a familiar formula for the Super Famicom around exploration, growth, and secrets that reward a second visit to every stage.
| Quick facts | |
|---|---|
| Japanese title | ロックマンX (Rockman X) |
| Western title | Mega Man X |
| Platform | Super Famicom / Super NES |
| Release | December 17, 1993 (Japan) |
| Developer | Capcom |
| Publisher | Capcom |
| Genre | Action platformer |
| Cartridge | 12-megabit (1,572,864 bytes) |
Overview
A century after Dr. Light sealed away X — a robot able to think and worry for himself — Dr. Cain uses X as the template for a new generation of thinking machines, the Reploids. When Maverick Hunter commander Sigma turns renegade, X volunteers to hunt the eight Maverick bosses who followed him.
The structure is familiar — an opening stage, eight freely selectable boss stages, then a multi-part fortress — but the moveset is transformed. X can slide down walls and kick off them to climb, and the first armour capsule, sitting on the main path in Chill Penguin's stage, adds a dash that permanently changes every jump and boss fight. Stages also hide Heart Tanks that extend the life gauge, Sub Tanks that store spare health, and three further armour capsules, so no stage is truly finished on the first clear. Progress is kept with passwords, and Ride Armor mechs appear in several stages for short, powerful set pieces.
Why It Still Matters
Mega Man X was the classic series' first 16-bit entry and the start of its own long-running series. It solved the hardest sequel problem: feeling new without abandoning what worked. The dash and wall-kick made movement itself a skill, hidden upgrades turned stage select into a treasure map, and defeating one boss could change another boss's stage. The opening highway even teaches without text, using an unwinnable first meeting with Vile to show why growing stronger is the point.
Highlights
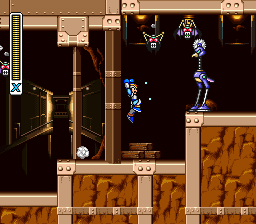
- Movement is the real upgrade. The dash and wall-kick are simple to learn and bottomless to optimise; boss rooms and vertical shafts alike assume you will chain them together.
- Stages that change each other. Freeze a factory, flood a forest pit, cut a power plant's power — your boss order leaves fingerprints on stages you have not visited yet (see below).
- Secrets with a long memory. Almost every collectible needs a tool from somewhere else — a weapon that pulls items toward you, a helmet that breaks blocks, a rival beaten in another stage — so the game trains you to revisit familiar ground.
- A fortress that pays everything off. Sigma's stages remix all eight bosses, introduce new fortress bosses, and end with a final form that only one weapon can reliably hurt.
Strategy Essentials
The eight Mavericks: weakness chart
Every boss hands over a weapon, and every weapon is another boss's weakness. The eight form a single closed loop.
| Boss | Weapon you earn | Weakness | Notes |
|---|---|---|---|
| Chill Penguin | Shotgun Ice | Fire Wave | The usual first target; beatable with the X-Buster, and his stage holds the Dash capsule |
| Spark Mandrill | Electric Spark | Shotgun Ice | Shotgun Ice freezes him repeatedly |
| Armored Armadillo | Rolling Shield | Electric Spark | Electric Spark strips his armour plating |
| Launch Octopus | Homing Torpedo | Rolling Shield | Beware his whirlpool pull |
| Boomer Kuwanger | Boomerang Cutter | Homing Torpedo | Homing shots track a teleporting boss |
| Sting Chameleon | Chameleon Sting | Boomerang Cutter | He turns invisible and drops from the ceiling |
| Storm Eagle | Storm Tornado | Chameleon Sting | A fight on an airship wing; mind the wind at the edge |
| Flame Mammoth | Fire Wave | Storm Tornado | Storm Tornado reaches a boss who fills the room |
The weakness loop (text diagram)
Fire Wave ──▶ Chill Penguin ──▶ Shotgun Ice ──▶ Spark Mandrill ──▶
Electric Spark ──▶ Armored Armadillo ──▶ Rolling Shield ──▶ Launch Octopus ──▶
Homing Torpedo ──▶ Boomer Kuwanger ──▶ Boomerang Cutter ──▶ Sting Chameleon ──▶
Chameleon Sting ──▶ Storm Eagle ──▶ Storm Tornado ──▶ Flame Mammoth ──▶
Fire Wave ──▶ (and the loop closes)
Read each step as: weapon beats boss, earning the next weapon. Following the loop from Chill Penguin gives the standard weakness order: Chill Penguin → Spark Mandrill → Armored Armadillo → Launch Octopus → Boomer Kuwanger → Sting Chameleon → Storm Eagle → Flame Mammoth. Many players also make early detours into Storm Eagle's and Flame Mammoth's stages just to collect their capsules and tanks, then return better equipped.
Stage interactions: beating one boss changes another stage
| Defeat this boss first | Stage that changes | What changes |
|---|---|---|
| Chill Penguin | Flame Mammoth (Factory) | The lava cools and solidifies, so you can walk on it — also how you safely reach that stage's Heart Tank |
| Launch Octopus | Sting Chameleon (Forest) | A pit before the cave fills with water; the buoyancy lets you reach the Heart Tank hidden below |
| Storm Eagle | Spark Mandrill (Power Plant) | The crashed airship cuts the power: the stage goes darker and the electric floor hazards stop |
Do not treat Flame Mammoth's stage as fully explorable before Chill Penguin is beaten, and leave Sting Chameleon's pit until after Launch Octopus.
Heart Tanks (8) — permanent life-gauge extensions
One in each Maverick stage; each permanently extends your maximum health.
| Stage | Location | Requirement / how to get it |
|---|---|---|
| Chill Penguin | On the roof above the cave, inside an igloo | Dash-jump up above the cave; melt the igloo with Fire Wave |
| Spark Mandrill | High ledge past the first Mega Tortoise | Wall-climb and dash-jump across, or pull it in with Boomerang Cutter |
| Armored Armadillo | Ledge in the digging section, after the second mine-cart ride | Destroy the digging machine before it breaks the rock holding the tank; Fire Wave helps |
| Launch Octopus | Far-right room of an underwater cavern below the stage | Sink the missile ship on the surface, ride it down, defeat the sea snake |
| Boomer Kuwanger | Small ledge outside the tower, just before the entrance | Pull it in with Boomerang Cutter |
| Sting Chameleon | Bottom of the pit just before the cave | Defeat Launch Octopus first so the pit is flooded; break the blocks at the bottom and jump across |
| Storm Eagle | Roof of the building at the start | Ride the starting platforms to the top and dash-jump left |
| Flame Mammoth | Bottom-right end of the cooled-lava area | Defeat Chill Penguin first so the lava is solid; walk to the far end |
Sub Tanks (4) — stored health, usable at any time
Sub Tanks fill as you collect spare life energy and can be emptied later to refill your health. Once found, they are permanent.
| Stage | Location | Requirement / how to get it |
|---|---|---|
| Storm Eagle | Inside the glass-windowed tower on the upper route near the start | Shoot through the windows and destroy the enemy inside |
| Spark Mandrill | Low dead end, visible behind a wall on the bottom route | Stay low via the ladders; pull it through the wall with Boomerang Cutter |
| Armored Armadillo | Behind the first digging machine that bursts through the cave wall | Trigger it, stay on the wall and let it pass underneath, then collect the tank behind it |
| Flame Mammoth | High on the far-left wall of the large lava-floor room | Work up and left past the 1-Up and dash-jump to the wall; requires the Foot Parts |
Armour capsules (4) — Dr. Light's upgrades
| Part | Stage | Location and requirement |
|---|---|---|
| Foot Parts (Dash) | Chill Penguin | Directly on the main path mid-stage; cannot be missed. Grants the Dash |
| Head Parts (Helmet) | Storm Eagle | Drop on the far side of the tall mesh wall mid-stage, dash-jump to the ledge, shoot the flammable containers. Requires Foot Parts |
| Body Parts (Armor) | Sting Chameleon | Climb right of the pit near the start, go above the cave, beat the mini-boss (aim for its eye). Requires Foot Parts. Halves damage taken |
| Arm Parts (Buster) | Flame Mammoth | In the lava-floor area near the start, break the blocks above the first platform and climb. Requires Foot and Head Parts. If missed, Zero gives it to you after the Vile fight in Sigma Stage 1 |
Hidden move: the Hadouken
| Item | Stage / location | Conditions |
|---|---|---|
| Hadouken | Armored Armadillo — ledge above the boss gate, at the very end of the stage | Collect everything else first: all 8 Heart Tanks, all 4 Sub Tanks, all 4 armour parts, and all 8 boss weapons. Ride the final mine cart as it flies off the track, dash-jump to the wall above the gate, and collect the life energy there. Drop into the pit and repeat the trip several times until Dr. Light's capsule appears on that ledge |
To use it, stand on the ground with a completely full life gauge and input ↓ ↘ → + Shoot — the Street Fighter fireball motion. It destroys most bosses in a single hit, but it stops working the moment you take damage, and it does not finish Sigma's final form in one hit.
Sigma's fortress: the short version
The fortress mixes new bosses with rematches against all eight Mavericks, using the same weaknesses as before. Enter each boss with Sub Tanks filled.
| Fortress boss | Weakness | Notes |
|---|---|---|
| Vile (Stage 1) | Rolling Shield | If you still lack the Arm Parts, Zero gives them to you after this fight |
| Bospider (Stage 1) | Shotgun Ice | Hit the core when it reaches the ground |
| Rangda Bangda (Stage 2) | Chameleon Sting | A wall face; take out the eyes first |
| D-Rex (Stage 3) | Boomerang Cutter | A two-part charging tank |
| Velguarder (Stage 4) | Shotgun Ice | Sigma's fast, wall-jumping hound |
| Sigma, first form (Stage 4) | Electric Spark | A fast duel against Sigma's beam blade |
| Wolf Sigma, final form (Stage 4) | Rolling Shield | Ride the claw hands up to the head; Rolling Shield hurts this form reliably |
Losing to any of the last three bosses sends you back to Velguarder, so start that stretch with all four Sub Tanks filled.
Who It's For
- Classic-series players who want to see where the faster, more exploratory sequel line began.
- Completionists: a compact 100% hunt — 8 hearts, 4 tanks, 4 capsules, and one very smug hidden fireball.
- Anyone who enjoys routing as gameplay — planning is half the fun.
How to Play It Today
- Mega Man X Legacy Collection (Switch, PS4, Xbox One, PC) — the modern standard; includes Mega Man X through Mega Man X4.
- Nintendo Classic Mini: Super Famicom / SNES Classic Edition — the mini console includes Mega Man X among its built-in titles.
- Original Super Famicom cartridge — a common, characterful way to play the Japanese original on real hardware.
Find the original Japanese cartridge
Disclosure: The Rakuten and Yahoo! Shopping links are standard shopping links. Enkeisha does not earn a commission from purchases made through these links.
Find original hardware editions on eBay
As an eBay Partner Network affiliate, Enkeisha may earn a commission from qualifying purchases made through these links.
Search eBay listings (affiliate link)
Check the language, region, hardware compatibility, condition and authenticity before buying. Search results may include reproductions; links do not endorse individual sellers.