Lufia II: Rise of the Sinistrals — The RPG Where the Puzzles, the Anger Gauge and a 99-Floor Cave Steal the Show
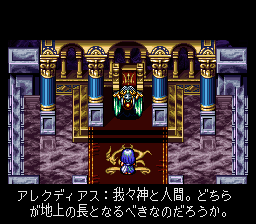
Most RPGs of 1995 sent you down dungeons to fight whatever jumped out of the dark. Lufia II: Rise of the Sinistrals — Estpolis Denki II in Japan — removed the random battles inside its dungeons and replaced them with hundreds of puzzles built from a growing toolbox of arrows, bombs, hooks and hammers, then bolted on two systems that still feel modern: equipment whose real value is the special attack sealed inside it, and a self-contained 99-floor roguelike cave that resets your party to level 1 and dares you to climb back out.
Scope of this article: This article covers only the original Super Famicom / SNES version (1995). The Nintendo DS remake, Lufia: Curse of the Sinistrals (2010), rebuilds the game as an action RPG with a heavily revised story and different systems — its dungeon tools, battles and side content do not work the way described here. Everything below, including the Ancient Cave rules and the Capsule Monster tables, follows the original throughout.
Quick Facts
| Item | Detail |
|---|---|
| Original title | エストポリス伝記II (Estpolis Denki II; officially rendered "Biography of Estpolis II") |
| English title | Lufia II: Rise of the Sinistrals (released as simply Lufia in Europe and Australia) |
| Platform | Super Famicom (Super Nintendo Entertainment System outside Japan) |
| Release date (Japan) | February 24, 1995 |
| Developer | Neverland |
| Publisher | Taito (Japan); Natsume (North America); Nintendo (PAL regions) |
| Genre | Role-playing game (RPG) with heavy puzzle elements |
| Cartridge size | 20 Mbit (2.5 MB) |
| Save system | Battery-backed save RAM (64 Kbit) |
| Director / writer | Masahide Miyata |
| Music | Yasunori Shiono |
| Playable party | Up to 4 characters in battle, plus 1 Capsule Monster as a computer-controlled fifth member |
| Battle system | Turn-based commands; no random encounters inside dungeons (see Overview) |
Overview
Lufia II is a prequel, set 99 years before Lufia & the Fortress of Doom (Japanese coverage often rounds this to "about a century"). It tells the story the first game only knew as legend: how the swordsman Maxim of Elcid and his companions fought the Sinistrals, four godlike beings — Daos of Terror, Gades of Destruction, Amon of Chaos and Erim of Death — when they first descended on the world. The mysterious Iris sets Maxim on the road, and over the journey he is joined by his childhood friend Tia, the wandering warrior Guy, Selan, commander of Parcelyte's army, Dekar, bodyguard to the prince of the Bound Kingdom, the elven archer Artea, and, for a stretch, the inventor Lexis. The ending leads directly into the opening of the first game.
The moment-to-moment structure is what sets it apart. On the world map, battles are random encounters in the usual way. Inside dungeons there are no random encounters at all: monsters are visible on the map, they move only when you move (one step of yours is one step of theirs), and touching one starts a turn-based battle on the spot. That single decision turns every dungeon corridor into a small tactical puzzle — you can dodge, corner or deliberately freeze enemies in place with your tools — and it frees the game to fill its rooms with switch, block and pillar puzzles instead of combat filler.
Two further systems run through everything. Nearly every piece of equipment carries an IP skill, a special move paid for out of a gauge that fills as you take damage, so gear choice is a tactical build, not just a stat line. And scattered around the world are seven Capsule Monsters, one per element, which fight beside you as an uncontrollable but tireless fifth member and can be raised, class by class, by feeding them items. Both systems are covered in full in Strategy Essentials below.
Why It Still Matters
Start with the Ancient Cave. Years before "roguelike" became a marketing word on console, Lufia II shipped a complete one inside a story RPG: 99 randomly generated floors, permadeath-style item rules, and rewards designed to be carried between runs. It is not a bonus room; for many players it became the main game, complete with its own speedrunning culture, and it is unlocked not by finishing the story but simply by reaching a mid-game town.
Then there is the design lesson of the IP system. Modern action RPGs love "weapon skills"; Lufia II was already forcing the same trade-off in 1995 — a newer, stronger sword, or an older one whose IP skill halves a boss's HP? Because IP is earned by being hurt, the system also quietly rewards aggressive play over turtling: the party that never takes damage never gets to use its best moves.
Reception has aged well. The game took a perfect 10/10 in Famitsu's reader cross review in Japan, and IGN placed it 34th on its Top 100 SNES Games of All Time. It is routinely named, alongside its puzzles, as the high point of the series.
Highlights
- Dungeons you can see. Visible, step-based monsters mean exploration is a puzzle in itself: stun an enemy with an arrow to hold a corridor, slip past a patrol, or pick your fights when IP and HP are low.
- A toolbox, not a key list. Each new field tool (sword, arrow, bomb, hook, hammer, fire arrow) re-opens earlier dungeons and re-frames later ones; late dungeons combine several tools per room.
- Equipment as a move list. With IP skills attached to weapons, armour, helmets and accessories, two parties with identical stats can play completely differently.
- A fifth member you raise, not command. Capsule Monsters act on their own, fully recover after every battle, and evolve through five classes based purely on what you feed them.
- Side systems with teeth. The casino on Forfeit Island, and the eight Dragon Eggs: collect all eight, find the Egg Dragon, and choose one of four wishes — the eggs then scatter to random dungeons to be hunted again.
- Post-game modes that respect your time. Clearing the game unlocks Retry mode (4× experience and gold); clearing Retry unlocks Gift mode, a cave-only mode where you choose your own party (see below).
Strategy Essentials
Three systems carry this game, and none of them is fully explained by it. They are worth learning in this order: tools first, because everything in the dungeons runs on them; the Ancient Cave second, because it re-uses the other two systems under its own rules; then IP and Capsule Monsters, which decide how strong your party actually is.
1. Dungeon Puzzles — Match the Tool to the Gimmick
Maxim's field skills are used with the tool button in dungeons. Every tool also stuns monsters on the field, which is half of its job: a stunned monster holds still while you reposition, push blocks or cross its patrol route. Puzzles reset when you leave the room, and one skill exists purely to rescue a botched attempt.
| Tool | Where you get it | What it does | Typical gimmicks it answers |
|---|---|---|---|
| Sword | From the start (basic action) | Swing to cut grass and bushes, strike nearby switches and objects | Switches hidden under bushes; grass concealing floor switches; striking levers and devices at arm's length |
| Arrow | From the start | Fires in a straight line to the edge of the screen; stuns monsters | Distant switches across pits and water; holding a monster in place from a safe distance |
| Bomb | Alunze Castle basement | Place a bomb that explodes after you have taken 6 steps | Cracked walls and weakened blocks; wooden crates; multi-tile floor puzzles where the blast timing and your position both matter |
| Hook | Gordovan West Tower | Fires like an arrow; if it catches a pole or pillar across a gap, it pulls you over | Wide pits with a pole on the far side; reaching chests and levers on isolated platforms |
| Hammer | Flower Mountain | Sends a shockwave along the ground that strikes things out of arm's reach; can crush rocks and weakened walls; stuns monsters | Pillars and stakes you cannot stand next to; cracked rock blocking a path; activating a switch on the far side of a barrier |
| Fire Arrow | Phantom Tree Mountain | An arrow wreathed in flame; burns bushes, including whole rows at once | Bushes beyond pits or fences; rows of bushes hiding switches, where a normal sword swing cannot reach |
| Reset | Secret Skills Cave, near Elcid | Resets the current puzzle to its starting state | Any room you have made unsolvable — pushed a block into a corner, lit tiles in the wrong order. Learn it early; it is the game's own undo button |
How to think about a stuck room. (1) Inventory the room first: floor switches want weight (a block, a pot, sometimes a stunned monster's position), wall switches want a projectile, cracked textures want a bomb or the hammer, and a pole across a gap is the hook's signature. (2) Check what the room is teaching: almost every dungeon introduces one new interaction with its newest tool, then combines it with older ones. (3) If a solution needs a tool you do not have yet, it is not a solution — several dungeons deliberately show you treasures to come back for. (4) When truly stuck, leave and re-enter to reset the room, or use Reset, rather than fighting the state you created.
2. The Ancient Cave — A 99-Floor Roguelike Inside the RPG
The Ancient Cave (いにしえの洞窟 in Japanese) lies north of Gruberik and can be challenged from around the middle of the game, once you can travel by ship. It is a side dungeon with its own rules, entirely separate from the main quest's difficulty.
The rules of a run
| Rule | Detail |
|---|---|
| Floors | 99 floors, randomly generated on every entry; stairs only go down — there is no way back up |
| Party | Your current party of four, plus your Capsule Monster. In Gift mode (below) you choose the party yourself |
| Starting state | Everyone — Capsule Monster included — starts at level 1, with no equipment, no items and no spells, except 10 Potions handed to you at the entrance |
| What you may bring in | Only items previously found in the cave's blue treasure chests (41 kinds exist) may be carried in and out freely |
| Red chests | Ordinary equipment, items and spells found in red chests work only inside the cave and are handed back when you leave — except Iris Treasures |
| Field skills | Your dungeon tools do not work inside the cave; spells must be re-found in red chests during the run |
| Saving | You cannot save inside the cave during normal play |
| Ways out | Use a Providence (found in red chests on floor 21 or deeper); be defeated (you return to the entrance but lose the blue-chest items found on that run); or clear floor 99 |
What you are actually hunting. Blue-chest items are the cave's permanent progression: top-class weapons and armour that make the next run easier, and several of them — the Gades Blade above all — are close to mandatory for the bottom floors. Scattered in red chests are the Iris Treasures: nine collectible items (sword, shield, helmet, armour, ring, jewel, staff, pot and tiara) that cannot be equipped or used, but can be taken out and delivered to the woman in the basement of Gruberik's tavern, who displays them for you.
Floor 99. At the bottom waits the cave's master, a giant jelly (called the Master in most English guides). It does not attack — instead, you must deplete its HP within three turns. This is an IP exam, not a level exam: the standard approach is to arrive with full IP gauges, open with the Dekar Blade's Fatal Blow to halve its HP, and follow with multi-hit skills such as the Gades Blade's Octo-strike. Beating it earns the Ancient Key, which opens the door at the cave entrance to three chests (Brill Helm, Dragon Ring, Light Jewel) — and in most listings the jelly itself counts as the tenth Iris Treasure, completing the set of nine items above.
Retry and Gift modes. Finish the game once and the file-select screen gains Retry: a story replay with 4× experience and gold (the bonus does not apply inside the cave). Finish Retry and you gain Gift: a mode that plays only the Ancient Cave, but lets you assemble any party you like around Maxim — the intended way to take the cave apart with your dream team.
3. The IP System — Your Equipment Is Your Move List
IP (often expanded as "Ikari Points") is the yellow bar beneath HP and MP. It fills as the character takes damage — the larger the share of HP lost, the larger the gain — and, crucially, healing does not drain it. A character's Guts (GUT) stat governs how fast the bar grows. Every weapon, armour piece, helmet and accessory carries exactly one IP skill, which spends a fixed percentage of the bar when used.
Two consequences shape all equipment decisions. First, a weaker item with a great IP skill routinely beats a stronger item with a useless one, especially for boss fights. Second, because IP is charged by being hit, front-row attackers who soak damage are also your IP batteries — plan who gets hit, not just who hits.
Representative high-value IP skills (costs are the percentage of the IP bar consumed):
| IP skill | Equipment | Cost | Effect | Where to get the equipment |
|---|---|---|---|---|
| Octo-strike | Gades Blade | 100% | Eight consecutive attacks (targets at random) | Defeat Gades in Gordovan West Tower — a fight the story expects you to lose, so winning is itself the prize; the blade also appears as an Ancient Cave blue-chest treasure |
| Fatal Blow | Dekar Blade | 100% | Deals damage equal to about half of one enemy's current HP | Chest in the Karlloon North Shrine |
| Wave Motion | Dual Blade | 100% | Fully restores the user's HP and MP and raises all of the user's attributes | Maxim's ultimate sword, obtained in the final sequence on Doom Island |
| Phoenix | Pearl Armor | 100% | Fully restores the entire party, including fallen members | Obtained in the final sequence on Doom Island, around the battle with Amon |
| Arctic Freeze | Freeze Sword | 88% | Ice damage (×1.5) to all enemies | Chest in the Shrine of Vengeance (the Zirco Flail and Air Whip carry the same skill) |
| Dragonfire | Dragon Blade | 88% | Damage (×1.5) to all enemies, especially effective against dragons | Sold on Forfeit Island — priced as an endgame purchase |
| Thunderball | Thunder Ax | 65% | Thunder damage (×3) to one enemy | Chest in the North Dungeon |
| Buster Attack | Camu Jewel | 51% | Fire damage to all enemies | Ancient Cave blue-chest treasure |
The boss-fight pattern these create: walk in with full bars, spend the 100% skills in the first turns (Fatal Blow is worth most while the boss is still at full HP), and treat Phoenix as a second life for the whole party rather than a heal. Note that fraction-based skills such as Fatal Blow are affected by row position — use them from the front row.
4. Capsule Monsters — Feed Them Right, and They Evolve
Seven Capsule Monsters wait at fixed hiding places around the world, one for each element. One at a time fights beside your party as a fifth member. You cannot order it, target it with spells or items, or heal it — but it fully recovers after every battle, shrugs off most status ailments, and needs no MP. Its staying power in a fight depends on its Guts: a battered Capsule Monster may flee the battle, but it loses nothing by doing so.
Each monster has both a level (gained in battle like yours) and a class (raised by feeding). Classes run 1 to 4, plus a hidden fifth form, the Master class. Feeding works like this:
- The monster's status screen shows the item it currently craves and a growth gauge of 32 bars. Feeding an item fills 1–8 bars depending on the item; fill all 32 to class up.
- Each class step has a minimum item value: roughly 200 G or more for class 1→2, 1,000 G or more for 2→3, and 5,000 G or more for 3→4 (values as documented for the original version). Feeding the craved item is the reliable way to fill the gauge.
- Do not overfeed luxuries. Feeding items far above the minimum makes the monster "spoiled" — its craving jumps to expensive items and cheap food stops working until you correct it with a run of cheap feeds. The economical method is to feed many items just above each tier's minimum.
- A Magic Fruit fills 8 bars at any class; a fruit of the monster's own element fills 1. Items you feed (fruits excepted) later turn up for sale at the pawn shop on Forfeit Island, so feeding is rarely a total loss.
- Master class: first raise the monster to class 4 and fill the gauge until it wants nothing more. Then drop it back to the class listed in the table and feed it the listed fruit — the fruit of the opposing element (the neutral Jelze is the exception, taking a Secret Fruit). A Master-class monster is locked in that form; feed it its own element's fruit to return it to class 4 (for Jelze, another Secret Fruit).
| Capsule Monster (default name) | Element | Where to find it | Master form | Master-class requirement |
|---|---|---|---|---|
| Jelze | Neutral | Foomy Woods — a lone tree on the world map, west across the mountains from Sundletan | Gold Fox | Class 4 + Secret Fruit |
| Blaze | Fire | Ruby Cave, past the four levers | Firebird | Class 3 + Charm Fruit |
| Flash | Light | North Dungeon, north of the Bound Kingdom (B3) | Unicorn | Class 2 + Dark Fruit |
| Gusto | Wind | Tower of Sacrifice (4F) | Sky Dragon | Class 4 + Earth Fruit |
| Sully | Earth | Summit of Flower Mountain | Centaur | Class 4 + Wind Fruit |
| Darbi | Dark | Capsule Monster Shrine, on the island west of Barnan | Red Dragon | Class 2 + Holy Fruit |
| Zeppy | Water | An underwater cave southwest of Parcelyte | Fish Head | Class 3 + Flame Fruit |
(Order is the order you can first meet them. English default names and fruit names above are the English version's own; the Japanese version uses different names for the same monsters and items — see the companion Japanese article. Class numbers, places and pairings are identical.)
Choosing which monster to raise: Flash's Master form can heal the party, which no other Capsule Monster does as well, and inside the Ancient Cave — where your monster also restarts from its initial state and must be fed from whatever the cave provides — a self-sufficient monster is worth several levels. Raise at least one monster to class 4 before a serious cave run.
Who It's For
Play this version if you like your RPGs with a puzzle game's density — if a dungeon full of switches sounds better than a dungeon full of random battles — or if you are interested in design history: visible step-based encounters, equipment-bound special attacks and an in-cartridge roguelike all sit in this one 1995 release. If you specifically want real-time action combat and a reworked story, the DS remake is the different game you are looking for; go in knowing it is a re-imagining, not this game with new paint.
How to Play It Today
- Original cartridge: The Super Famicom cartridge is the only way to play this exact original version, and it is common on the Japanese second-hand market. Check the battery-backed save before a long playthrough — a cartridge of this age may need its save battery replaced.
- Later official version (different specifications): The Nintendo DS remake, Lufia: Curse of the Sinistrals (2010), is an action RPG with a substantially revised story. It is a legitimate way to meet these characters, but none of the systems in this article — tools, IP costs, cave rules, capsule classes — carry over unchanged.
- What to avoid assuming: As of November 2026, the original version has no standard modern download release; features described in coverage of the DS remake do not exist in the Super Famicom original.
Find the original Japanese cartridge
Disclosure: The Rakuten and Yahoo! Shopping links are standard shopping links. Enkeisha does not earn a commission from purchases made through these links.
Find original hardware editions on eBay
As an eBay Partner Network affiliate, Enkeisha may earn a commission from qualifying purchases made through these links.
Search eBay listings (affiliate link)
Check the language, region, hardware compatibility, condition and authenticity before buying. Search results may include reproductions; links do not endorse individual sellers.