Ganbare Goemon 2: Kiteretsu Shōgun Magginesu — Three Heroes, Six Areas, and the Debut of a Giant Robot: A Deep Strategy Guide
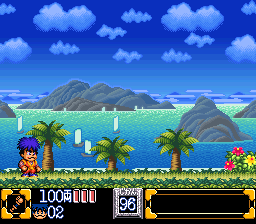
A foreign general who loves Japan too much has stolen Edo Castle, bolted it into a flying fortress, and set an army of bunny-suited scientists loose from Okinawa to Hokkaido. Ganbare Goemon 2: Kiteretsu Shōgun Magginesu (Konami, 1993) is the game that rebuilt the series around that joke: the long, town-fused stages of its predecessor give way to a world map of short action stages, separate towns, themed castles, and — for the first time — first-person duels between giant clockwork robots. It is also where Sasuke, a boss in the previous game, becomes a playable hero. This guide maps all six areas, the three very different heroes, every castle and Impact boss, and the ryō economy that decides whether you arrive at those bosses equipped or broke.
A note on names and versions: This article describes the original Japanese Super Famicom cartridge, so Japanese names lead throughout. Do not confuse this game with The Legend of the Mystical Ninja: that is the overseas name of the previous Super Famicom game, Ganbare Goemon: Yukihime Kyūshutsu Emaki (1991). Goemon 2 itself was never officially released outside Japan. Nothing below is borrowed from its neighbours: Yae is not a playable character here (she joins the playable cast in Ganbare Goemon 3), and the interconnected two-era world of that sequel does not exist yet — this game is strictly a world-map, area-by-area structure.
Quick Facts
| Item | Detail |
|---|---|
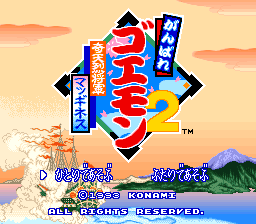
| Japanese title | がんばれゴエモン2 奇天烈将軍マッギネス (Ganbare Goemon 2: Kiteretsu Shōgun Magginesu, roughly "Goemon 2: The Very Strange General Magginesu") |
| Platform | Super Famicom (Japan only) |
| Release date (Japan) | December 22, 1993 |
| Developer | Konami |
| Publisher | Konami |
| Genre | Action-adventure |
| Players | 1–2 (simultaneous co-op, with drop-in) |
| Cartridge | 16 Mbit, LoROM FastROM; battery-backed save — three travel-diary files (see Strategy Essentials §4) |
| Series position | Second Super Famicom Ganbare Goemon; eighth mainline entry overall |
| Playable characters | Goemon, Ebisumaru, Sasuke — all three selectable from the start (a series first for Sasuke) |
Overview
After rescuing Princess Yuki, Goemon and Ebisumaru win a holiday at the Ryūkyū Resort — a holiday that turns out to have been rigged. The clockwork ninja Sasuke arrives with the news: the Westerner Magginesu (full name Magginesu Kasu Teira), a former missionary turned obsessive Japanophile, has seized Edo Castle, converted it into the airborne fortress "Magginesu Castle," and flown off with it. His Marble Five — five identical scientists in bunny costumes, distinguished only by coloured armbands — hold a themed castle in each region of Japan and are digging up the country from below as well.
The Wise Old Man of Iga hands the trio his life's work, the giant clockwork mecha Goemon Impact, and the chase runs the length of Japan from south to north across six areas. The structure is new for the series. Where the previous game fused town and action into one long stage per region, Goemon 2 separates everything onto a world map in the manner popularised by Super Mario World: short, timed side-scrolling road stages; top-down towns that are their own map nodes; a castle at the end of even-numbered areas; and, in odd-numbered areas, a two-part Goemon Impact stage instead of a conventional finale. Branching routes, fake goals, and hidden paths to a secret amusement-park area reward players who do not simply rush right.
Combat keeps the series formula — a melee weapon that powers up via lucky-cat pickups, plus a projectile sub-weapon that literally spends your money — but the details change in ways Strategy Essentials covers: the shared bomb sub-weapon of the previous game is gone, armour now also protects your weapon level and knockback, consumables can no longer be stockpiled in multiples, and dashing is now a button input rather than a purchasable sandal upgrade.
Why It Still Matters
This is the game where the modern Goemon formula crystallised. Sasuke's promotion from boss to playable hero completed the trio that would anchor the series, and Goemon Impact's debut — a running, coin-spitting giant robot fought from a first-person cockpit — became its signature set piece, returning in game after game. The tone shifted with them: broader, sillier, full of reader-suggested gags from the contemporary manga serialisation, and built around Magginesu's castles as parodies of sumo, kabuki, washoku cuisine and old Japanese toys.
It was also originally a Japan-only release that overseas reviewers still sought out and praised on import — a reputation that has kept it near the top of most retrospective rankings of the series, and the natural second stop after its predecessor for anyone working through the Super Famicom entries in order.
Highlights
- Three genuinely different heroes, from the first minute. No unlocking, no mid-game recruitment: Goemon, Ebisumaru and Sasuke are all selectable at the start, with different speed, reach, weapons, sub-weapon costs — and even different starting purses (see §3).
- The Goemon Impact stages. A forced-scrolling running section to stock up on oil, coin bullets and pipe bombs, followed by a first-person giant-mecha duel of punches, guards and charged shots. Three full Impact duels, plus a finale that turns the machine against you.
- Castles as cultural parodies. A sumo castle, a kabuki castle, a washoku castle and a kokeshi/toy castle, each guarded by one of the Marble Five — and one boss who cannot be hurt at all and simply has to be outlasted.
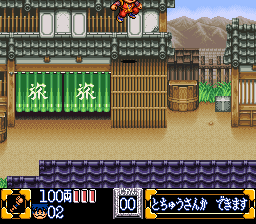
- A town layer with teeth. Shops, restaurants, inns that double as save points, bathhouses that can raise your maximum life, fortune-tellers, dice gambling, arcades — and townspeople you must not hit, on pain of fines and endless guards. One arcade even contains a playable stage of Konami's shooter XEXEX.
Strategy Essentials
1. The six areas: how the journey is built
Every area mixes the same four node types. Road stages are timed side-scrollers: smash the goal tanuki statue that drops at the finish to clear, and bank bonus ryō for time remaining — but check §6 for the fake-goal trap. Towns are untimed top-down nodes for shopping, healing, information and saving (§2). Castles end Areas 2, 4 and (in a different sense) 6, and also appear in Areas 1 and 3 before their Impact finales. Impact stages close Areas 1, 3 and 5. Cleared road stages and exited towns can be re-entered; castles and Impact stages cannot be replayed once cleared.
| Area | Region / theme | Castle boss (on foot) | Impact duel | Notes |
|---|---|---|---|---|
| 1 — "A Giant Clockwork Mecha Appears" | Ryūkyū → Kyūshū | Sumo Robo (Marble Red) in Sumo Castle | Senshūraku, the sumo giant mecha | Receive the conch from the Wise Old Man in Satsuma village; the Impact is entrusted to you here |
| 2 — "Showdown: Kabuki Returns" | Chūgoku / Shikoku | Kabuki Returns in Kabuki Castle | — none — | First forced-scrolling road stage; a fork where clearing either branch suffices; the travel pass (§2) is mandatory to pass Konami Town |
| — Karakuri World | Shikoku (hidden) | — | — | Secret amusement-park area reached via the hidden route through Kishū Pass; every mini-game in one place, and the gateway to the post-game extra stage |
| 3 — "Terror of the Giant Spinning Top" | Kinki → Chūbu | Tasogare Ichigō, the shadow-play mecha, in Washoku Castle | Sharekobe, riding a giant spinning top | A route fork at Akufuku village (via Ise Shrine or not); ride a transforming dragon across Dragon God Lake |
| 4 — "Secret of the Edo Castle Ruins" | Kantō → Tōhoku | Mask Ninja in Kokeshi Castle | — none — | Hagure Town returns, modelled on the previous game's first stage; a fork at the castle ruins (surface or underground workshop); one road stage loops back if you take the wrong goal |
| 5 — "Pursuit! The Marble Five" | Hokkaidō | — no castle — | Mikoshi Tengu, from the underground factory | Two snow-mountain road stages; the chairlift only moves if you bought the lift ticket beforehand |
| 6 — "The Very Strange General Magginesu" | Magginesu Castle (the stolen, airborne Edo Castle) | Hyottoko-maru (mid-boss, plaza); the Magginesu Robo double; then the hijacked Goemon Impact as final boss | — the Impact is the enemy here — | The "town" half is hostile and hides required passages; four turrets copy the earlier castles — clear one in each half |
The flow, in text form:
Ryūkyū / Kyūshū ── Sumo Castle ── IMPACT: Senshūraku
        │
Chūgoku / Shikoku ── Kabuki Castle          (hidden: Karakuri World)
        │
Kinki / Chūbu ── Washoku Castle ── IMPACT: Sharekobe
        │
Kantō / Tōhoku ── Kokeshi Castle
        │
Hokkaidō ── (no castle) ── IMPACT: Mikoshi Tengu
        │
Magginesu Castle ── Magginesu double ── FINAL: Goemon Impact (hijacked)
2. Towns: what each building is for
Towns have no timer, but you only unlock the onward route by leaving through the exit. Money and items are held per character — switching heroes means switching purses and inventories (the four stamps needed for a hidden post-game stage are the sole exception).
| Facility | What it does | Strategy note |
|---|---|---|
| General store (yorozuya) | Sells carried items: rice balls (see below), armour and helmets, the 1UP "big-crowd bag," and special items in specific towns | Prices no longer rise with repeat purchases, unlike the previous game — but you can no longer hold multiples of the same consumable; you may trade up or down a rank before the old one is used up |
| Restaurant (meshiya) | Regional dishes restore life | The straightforward heal when an inn's tiers are overkill |
| Inn (yadoya) | Rooms in three grades — Matsu / Take / Ume; better rooms restore more life. This is also where you write the travel diary (save) | Save here, not at the castle door — see §4 |
| Bathhouse (sentō) | Fully restores life; entering at full life raises maximum life instead (life can reach 5 gauges this way, or via a golden lucky cat hidden in a pot) | Goemon must use the men's bath and Ebisumaru the women's; Sasuke may use either. A full-life bath is the cheapest max-life upgrade in the game |
| Fortune-teller | A paid, random fortune | Bad draws are not free entertainment: one result surrounds you with pickpockets, another sends four hostile grandmothers after you |
| Dice house | Bet on dice, high or low; win and your stake doubles | Refuses your bet if winnings would push you past the 9,999-ryō cap — gamble earlier, not when rich |
| Arcade (yūgijō) | Paid mini-games; the line-up differs by town | Speed picture-matching and Bazooka Battle (both also playable 1-vs-2P). XEXEX stage 2 is playable only in Karakuri World, and pays no prize — it is there for the love of it |
| Part-time job office | The floor-wiping race (zōkin-gake race): a pseudo-3D time trial, pay scaled to how much dirt you wipe | A repeatable, risk-free income source (§5). Courses differ by location (Karakuri World, Hagure Town, Magginesu Castle keep); also playable in 2P |
| Ōedo Tourist | Paid warp to a town you have already visited | Low value in this game — the world map itself already allows free movement between unlocked nodes |
Special items worth hunting down (sold only in specific stores, some only after you hear about them in conversation): the travel pass (tegata) — not optional: Area 2 cannot be passed without it, and once owned it also lets you bail out of a cleared stage from the pause menu; the lift ticket, without which Area 5's chairlift stands still; the snakeskin, which halves sub-weapon cost; and the glove, which halves sub-weapon charge time.
Carried-item priorities. Rice balls are your insurance: they trigger automatically when life empties — plain restores 1 gauge, ume 3 gauges, sake (salmon) a full refill. Armour (straw cloak / iron / gold) absorbs 1 / 3 / 5 hits outright, and helmets (straw hat / iron / gold) do the same for projectiles; both additionally stop hits from downgrading your weapon, and armour also removes knockback. Buy in that order of need: a rice ball first, then the best armour you can afford, then a helmet before projectile-heavy castles.
3. The three heroes, and how 2-player really works
All three heroes start with 3 life gauges and can be re-selected freely between stages. Weapon level rises one step per lucky cat (two steps maximum), and drops a step when you take a hit (unless armoured) or touch a thief in town. Crucially, powered-up status, extra lives and max-life gains are not saved — they reset when you reload, while your cleared routes, money and items persist.
| Goemon | Ebisumaru | Sasuke | |
|---|---|---|---|
| Role | All-rounder | Slow powerhouse | Speed specialist |
| Mobility | Average | Lowest speed and jump | Highest speed and jump |
| Main weapon | Pipe (kiseru) → golden pipe → flaming chain pipe | Paper fan → big fan → temper fan | Kunai slash → kunai throw → twin kunai throw |
| Sub-weapon (cost per shot) | Coin throw — 2 ryō | Shuriken, boomerangs back — 4 ryō | Firecracker bomb, short lobbed arc — 8 ryō |
| Charged sub-weapon | Super Coin: 3 piercing coins at once | Homing shuriken ×3 | Super firecracker: bursts repeatedly where it lands |
| Starting money | 100 ryō | 150 ryō | 50 ryō |
| Watch out for | Chain pipe's reach is shorter than it looks and leaves an opening; adjust chain length with button press length | Shuriken cannot reach beyond its return point | Enemies killed by thrown kunai drop no coins or items — farm with the slash, not the throw; no upward attack while jumping |
Two-player rules. A second player can drop in at any time from the title or mid-game by pressing Start on controller 2, choosing any hero. A fallen player revives on the spot; if one player game-overs, they can borrow a life and return as long as the survivor holds at least 2 spare lives. Co-op has one move solo play lacks: piggyback (onbu) — one hero crouches, the other jumps on top, and movement and attacking split between them. The rider's sub-weapon transforms and strengthens, with the effect depending on the pairing (for example, Goemon riding Ebisumaru fires spreading coins, while riding Sasuke fires five piercing coins at once; Sasuke riding Ebisumaru can steer his super firecracker with the D-pad). Impact stages are co-operative too: in the running section player 2 gets a coin beam, and in the duels both players move cursors and split attacking and guarding duties.
4. Saving: the travel diary, and what it does not keep
Progress is saved only by staying at an inn and writing in one of the three travel diary files — the cartridge's battery backup (ROM type ROM+RAM+battery) exists for exactly this. Plan shopping and saving together: the inn is also a heal, so the natural rhythm is arrive in town → shop → rest and save → take the road stage.
Continuing after a game over restarts you from the area map with items intact but money halved (never below your starting amount). Because weapon power, max life and spare lives all reset on reload (§3), a save made while powered up is worth less than it looks — spend a powered-up state on the castle in front of you rather than banking it.
5. Money (ryō): earning it, and what to buy first
| Source | Yield | Note |
|---|---|---|
| Enemy defeated with your main weapon | 5 ryō coin | The backbone of your income. Sub-weapon kills drop nothing, and Sasuke's thrown kunai drop nothing at all |
| Treasure chest (senryō-bako) in stages | 50 ryō | Always detour for these |
| Townswoman / bonus characters (touch, don't hit) | 50 ryō | Hitting one costs a 100-ryō fine and summons the guards; the cold-tofu character heals 1 gauge on touch instead |
| Clearing a road stage | Bonus scaled to time remaining | Fast, clean clears pay; dawdling to farm inside a timed stage usually does not |
| Floor-wiping job | Scaled to dirt wiped | Repeatable and safe; the reliable grind when a castle has emptied your purse |
| Dice house | Stake doubles on a win | High variance; never gamble the pass money |
| Pickpocket in town | −100 ryō on contact | Hit him quickly and 50 ryō comes back. A thief (different character) instead knocks your weapon down a level — hit him to recover a lucky cat |
Spending priority: (1) the travel pass in Area 2 — progression stops without it; (2) a rice ball, before any luxury — it is a life, bought in advance; (3) armour, then a helmet; (4) the lift ticket before Area 5 and the snakeskin/glove when their towns offer them; (5) bathhouse visits at full life, to push maximum life toward 5 gauges before the late castles. Inns and restaurants are cheap insurance — heal rather than gamble a castle run on one gauge.
6. Bosses: castles, Impact duels, and the finale
| Boss | Where | Counter-play |
|---|---|---|
| Sumo Robo (Marble Red) | Area 1, Sumo Castle | Fought on a sumo ring: its vacuum slaps and charges are meant to push you out — but ring-out works both ways. Knock it off the ring and it falls regardless of remaining health. If you arrive riding a captured enemy mecha, you can fight it mecha-to-mecha |
| Senshūraku (Impact duel) | Area 1 finale | Slaps your coin beam back at you — mix weak punches to intercept and stop it, strong punch to counter its rushes, and spend pipe bombs while it is close. Damage strips its arms, then its head; it keeps charging regardless |
| Kabuki Returns | Area 2, Kabuki Castle | The previous game's Kabuki, cyborg-rebuilt: now permanently airborne on booster feet, with poison breath, flying wigs and bomb drops from its box. Track the flight path and attack as it crosses your level rather than chasing it |
| Tasogare Ichigō (the Puppeteer) | Area 3, Washoku Castle | It cannot be damaged. It attacks with shadow-puppet dogs, cats and birds made real. Survive roughly 100 seconds until the candle burns out; it then surrenders, takes one hit, and explodes. Spend the fight dodging and conserving — rice balls are for surviving this, not for hitting harder |
| Sharekobe (Impact duel) | Area 3 finale | Rides a giant spinning top across the water; destroy the top to force a claw-fighting second phase with hologram feints (the "odabutsu kick"). Do not waste pipe bombs on holograms |
| Mask Ninja | Area 4, Kokeshi Castle | Cycles fox, cat and hyottoko masks, changing its attack pattern with each. Learn the pattern per mask rather than per health bar, and re-time your attacks at every change |
| Mikoshi Tengu (Impact duel) | Area 5 finale | The most armed Impact opponent: barrier reflects sustained coin fire, and as its energy falls it retreats into its hangar, where the fight restarts faster and the barrier no longer reflects. Save pipe bombs for the hangar phase |
| Hyottoko-maru (mid-boss) | Area 6, castle plaza | The game's only mid-boss, but with full-boss damage. Two forms of a wooden boat with legs: cannon fire first, then bombs and mini-daruma from a humanoid upper body |
| Magginesu Robo (the double) | Area 6, keep | A clockwork double of the general in a flying pot: underside laser and umbrella bombs — some umbrellas open instead of exploding and can be used as platforms or laser cover. Beating it reveals the trick: the head comes off |
| Goemon Impact (hijacked) — final boss | Area 6, great keep roof | Your own mecha, stolen while you fought the double, now attacking on foot-scale: punches, coin beam and pipe bombs, while the Marble Five throw bombs from the keep. Reflect those bombs back into Impact's mouth — that is how it takes damage |
| Draculan (hidden) | Virtual Hell extra stage | A Castlevania-parody duel of bats and teleports, unlocked only after clearing the game and beating the hard versions of Karakuri World's four mini-games. A miss there costs nothing — it is an attraction, and lives, items and money are untouched |
Impact duels, the shared grammar. Every duel is two parts. The running section is forced-scrolling: Impact is invulnerable to enemy fire, but its oil (energy) drains constantly — smash obstacles for oil, shoot down enemies for coin bullets, and earn a pipe bomb per set number of kills. Falling in a pit or being crushed costs time and therefore oil, not a life; only oil at zero is a miss. Everything you stock carries into the duel, fought from the cockpit: move the crosshair with the D-pad; coin beam (weak, rapid, costs coins — but shooting down enemy shots refunds 5 ryō each), strong punch (slow, counters rushes), weak punch (fast, up to a 3-hit auto-combo, intercepts shots but cannot stop a rush), pipe bomb (drags the enemy to the impact point for heavy damage; never restocked mid-duel), and left/right guards. Lose, and you may retry the duel immediately — but with low oil and no pipe bombs; re-running the running section is usually the better bargain. On a retry, the Wise Old Man and Yae also alternate advice over the monitor.
Three traps that waste more runs than any boss. (1) Fake goals: some road stages hide a false goal tanuki — its falling sound differs, and smashing it releases only a tanuki and does not clear the stage or connect the next route; one Area 4 stage loops you back a full stage if you take the wrong goal. (2) Hitting townspeople: one careless swing in town turns the music, fines you, and brings endless guards who drop nothing — crouch-walk past crowds with your weapon away. (3) The checkpoint doll: picking up a Korezō-kun checkpoint restarts you mid-stage after a miss, but after a game over its effect survives only if you continue — a save-and-reload discards it.
Who It's For
Players who finished The Legend of the Mystical Ninja and want the sequel that history skipped overseas; co-op pairs looking for a Super Famicom platformer built for two from the ground up, piggyback mechanics and shared robot duels included; and anyone curious about where the giant-robot-versus-giant-robot first-person duel — later a Goemon trademark — actually began. Completionists get a real post-game: a hidden amusement-park area, four stamps to collect, and a high-difficulty extra stage behind the mini-games.
How to Play It Today
This guide covers the original Japanese Super Famicom cartridge. It was later collected with its predecessor on Game Boy Advance as Kessakusen! Ganbare Goemon 1 & 2 (Japan, 2005; note that version removes 2-player co-op and piggyback play, substituting character-switching on Select). Download releases for Wii, Wii U and New Nintendo 3DS Virtual Console followed in Japan, and the game was subsequently included in the Ganbare Goemon! Daishūgō compilation (July 2, 2026, for Nintendo Switch, PlayStation 5 and Steam). An English fan translation has circulated since 2020 for players who need the town conversations and boss advice in English; the action itself is fully playable in Japanese.
Find the original Japanese cartridge
Disclosure: The Rakuten and Yahoo! Shopping links are standard shopping links. Enkeisha does not earn a commission from purchases made through these links.
Find original hardware editions on eBay
As an eBay Partner Network affiliate, Enkeisha may earn a commission from qualifying purchases made through these links.
Search eBay listings (affiliate link)
Check the language, region, hardware compatibility, condition and authenticity before buying. Search results may include reproductions; links do not endorse individual sellers.