Final Fantasy VI (Super Famicom) — Fourteen Heroes, Twenty-Seven Espers, One Broken World: The Deepest Party-Building RPG of the 16-Bit Era
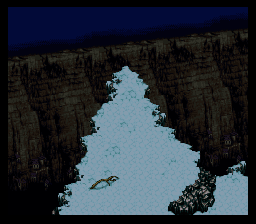
Final Fantasy VI (Super Famicom, April 1994) closes the series' 16-bit trilogy not with a chosen hero but with an ensemble of fourteen — and a villain who actually wins halfway through. Between the opera house, the floating continent and the World of Ruin's open map, its Esper system lets every character learn almost every spell while quietly deciding what their stats become. This guide covers the original Super Famicom version in depth: every Esper, every unique command, the eight dragons, and the tower that needs three parties at once.
A scope note, because version confusion is this game's biggest trap: everything below describes the Super Famicom original only. The Game Boy Advance version adds four Espers (Leviathan, Gilgamesh, Cactuar, Diabolos), the Dragons' Den bonus dungeon and the Kaiser Dragon superboss — none of that exists here, and Kaiser Dragon is therefore deliberately absent from the hidden-boss table. The Pixel Remaster keeps the original roster but changed a few Esper level-up bonuses (notably Odin and Raiden); where that matters, it is flagged.
Quick Facts
| Item | Detail |
|---|---|
| Title (Japan) | Final Fantasy VI (ファイナルファンタジーVI) |
| English title | Final Fantasy VI (released in North America as Final Fantasy III on SNES) |
| Platform | Super Famicom |
| Release (Japan) | April 2, 1994 |
| Developer | Square |
| Publisher | Square |
| Genre | Role-playing game (Active Time Battle) |
| Cartridge | 24 Mbit (3 MB), HiROM (FastROM), ROM + RAM + battery (battery-backed save RAM) |
| Playable characters | 14 (12 in the main story arc, plus 2 hidden) |
| Espers (magicite) | 27 entries listed below; Odin transforms into Raiden, so 26 can be held at once |
| Structure | World of Balance, then the World of Ruin — the second half is largely open-ended |
Overview
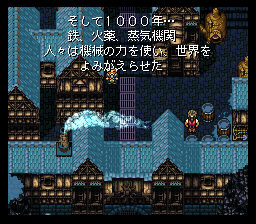
A thousand years after the War of the Magi, the Gestahlian Empire has rediscovered magic by draining it from captured Espers and fusing it with machinery: Magitek. Terra, a young woman with innate magic, is freed from Imperial control by the thief Locke and the Returners resistance — and the story keeps widening around her: the inventor-king Edgar and his martial-artist brother Sabin, the disgraced general Celes, the swordsman Cyan, the wild boy Gau, the assassin Shadow, the gambler Setzer, the blue mage Strago and his granddaughter Relm, and the moogle Mog.
Behind the Empire stands Kefka, a magically infused court mage made powerful and unhinged by the experiments that created him. Midway, the party reaches the Floating Continent to stop him — and fails. Kefka seizes the power of the Warring Triad, remakes the world, and the game restarts a year later in the World of Ruin: Celes wakes alone on a solitary island, and the player — not the plot — decides the order in which the scattered party is found again, or whether some of them are found at all.
Battles run on the Active Time Battle system, but the growth system is the signature. Characters gain levels, yet levels alone raise only HP and MP. Spells and permanent stat growth both come from magicite — the crystallised remains of Espers — equipped one per character. Who holds which stone, and when, is the real character build.
Why It Still Matters
VI is the point where the series' storytelling ambition and its systems ambition peak at the same time. The ensemble structure — no single protagonist, an opera performed mid-game, a second half that trusts the player with an open world — was radical in 1994 and still feels modern. So does its central narrative gamble: the villain wins, visibly and permanently, and the back half of the game is about what people do after the worst has already happened.
Mechanically, the Esper system is the bridge between V's job system and VII's Materia: fixed characters with unique commands on the surface, near-total freedom underneath. Any character can learn nearly any spell; the cost is time, and the subtlety is that the stone equipped at the moment of level-up permanently shapes that character's stats. Two players' Terras are genuinely different characters by the endgame.
It is also, in its original form, a Japan-first artefact: the Super Famicom cartridge is the version all later editions descend from, and several of its quirks — Cyan's Bushido gauge that must charge in real time, Odin as the only source of Speed growth — belong to this version alone.
Highlights
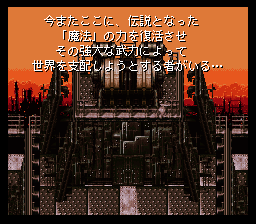
An ensemble with no dead weight by design. Fourteen playable characters, each with a unique command — Blitz inputs, Tools, Slots, Rage, Dance, Lore — and full access to the shared spell list on top.
The villain wins at half-time. The World of Balance / World of Ruin split remains one of gaming's boldest structural moves, and the Ruin half is a genuinely open RPG: most of its content is optional, including most of the cast.
Esper growth as long-term planning. Spell learning rates and level-up bonuses pull in different directions, so building a character is a rota, not a loadout — see the full table below.
A mountain of optional endgame. Eight legendary dragons, a one-on-one Colosseum driven by betting items, an auction house selling Espers, a tower climbed by three parties at once, and a cursed shield that takes 255 battles to become the best shield in the game.
Strategy Essentials
How magicite works — the three rules that run the whole game
- Learning: after battle, the party earns Magic Points (AP). Each Esper multiplies AP by a per-spell learning rate; at 100 points the spell is learned permanently. The same spell often appears on several Espers at very different rates — Bismarck teaches the three basic elemental spells at ×20, three to twenty times faster than the elemental Espers themselves.
- Level-up bonuses: only HP and MP rise automatically. Strength, Magic, Stamina and Speed rise only from the bonus of the Esper equipped at the exact moment of level-up. Levels gained before you have magicite can never receive a bonus — the classic advice to keep levels modest until Zozo pays off all game.
- Summoning: the equipped Esper can be summoned once per battle. Two characters, Gogo and Umaro, can never equip magicite or learn spells — plan around it. Terra and Celes also learn a short personal spell list by level, magicite or not.
Every Esper: location, spells (with learning rates) and level-up bonus — Super Famicom original
⚠ marks a decision that cannot be undone. Spell names use the modern translations; rates and bonuses are the original version's (see the Odin/Raiden note after the table).
| Esper | Where to get it | Spells taught (rate) | Level-up bonus |
|---|---|---|---|
| Ramuh | Zozo — story event after finding Terra | Thunder ×10, Thundara ×2, Poison ×5 | Stamina +1 |
| Kirin | Zozo — same event | Cure ×5, Cura ×1, Regen ×3, Poisona ×4, Libra ×5 | — |
| Siren | Zozo — same event | Sleep ×10, Silence ×8, Slow ×7, Fire ×6 | HP +10% |
| Cait Sith | Zozo — same event | Confuse ×7, Imp ×5, Float ×2 | Magic +1 |
| Ifrit | Magitek Factory — defeat Ifrit and Shiva | Fire ×10, Fira ×5, Drain ×1 | Strength +1 |
| Shiva | Magitek Factory — defeat Ifrit and Shiva | Blizzard ×10, Blizzara ×5, Rasp ×4, Osmose ×4, Cure ×3 | — |
| Unicorn | Magitek Research Facility — story release | Cura ×4, Esuna ×3, Dispel ×2, Protect ×1, Shell ×1 | — |
| Maduin | Magitek Research Facility — story release | Fira ×3, Blizzara ×3, Thundara ×3 | Magic +1 |
| Catoblepas | Magitek Research Facility — story release | Bio ×8, Break ×5, Death ×2 | HP +10% |
| Phantom | Magitek Research Facility — story release | Berserk ×3, Vanish ×3, Gravity ×5 | MP +10% |
| Carbuncle | Magitek Research Facility — story release | Reflect ×5, Haste ×3, Shell ×2, Protect ×2, Teleport ×2 | — |
| Bismarck | Magitek Research Facility — story release | Fire ×20, Blizzard ×20, Thunder ×20, Raise ×2 | Strength +2 |
| Golem | Auction House, Jidoor — win the bidding | Protect ×5, Stop ×5, Cura ×5 | Stamina +2 |
| Zona Seeker | Auction House, Jidoor — win the bidding | Rasp ×20, Osmose ×15, Shell ×5 | Magic +2 |
| Seraph | Tzen — buy from the man hidden behind the trees (3,000 gil in the World of Balance; 10 gil in the World of Ruin) | Raise ×5, Cura ×8, Cure ×20, Regen ×10, Esuna ×4 | — |
| Quetzalli | World of Ruin — Solitary Island beach, after regaining flight | Haste ×20, Slow ×20, Hastega ×2, Slowga ×2, Float ×5 | — (original version) |
| Fenrir | World of Ruin — Mobliz, after driving off Humbaba; a child hands it over | Teleport ×10, Banish ×5, Stop ×3 | MP +30% |
| Valigarmanda | World of Ruin — Narshe; unfreeze it and win the battle | Firaga ×1, Blizzaga ×1, Thundaga ×1 | Magic +2 |
| Midgardsormr | World of Ruin — Yeti's Cave, Narshe; take it from the skull's eye | Quake ×3, Graviga ×1, Tornado ×1 | HP +30% |
| Lakshmi | World of Ruin — Owzer's Mansion, after defeating Chadarnook | Cure ×25, Cura ×16, Curaga ×1, Regen ×20, Esuna ×20 | Stamina +2 |
| Alexander | World of Ruin — Doma Castle, after completing Cyan's dream | Holy ×2, Shell ×10, Protect ×10, Dispel ×10, Esuna ×15 | — (original version) |
| Phoenix | World of Ruin — complete the Phoenix Cave | Raise ×10, Arise ×2, Reraise ×1, Curaga ×2, Firaga ×3 | — |
| Bahamut | World of Ruin — defeat Deathgaze, encountered randomly while flying the Falcon | Flare ×2 | HP +50% |
| Crusader | World of Ruin — defeat all eight legendary dragons (below) | Meltdown ×1, Meteor ×10 | MP +50% |
| Odin | World of Ruin — Ancient Castle; examine the statue in the throne room | Meteor ×1 | Speed +1 |
| Raiden ⚠ | World of Ruin — Ancient Castle; the queen's statue permanently transforms Odin | Quick ×1 | Strength +2 |
| Ragnarok ⚠ | World of Ruin — Narshe weapon shop (bring Locke); choose the magicite or the sword — never both | Ultima ×1 | — |
Reading the table like a planner. The Zozo four and the Research Facility set are story rewards and cannot be missed. The genuinely irreversible calls are only two: ⚠ Odin → Raiden (in this version you are trading the game's only Speed bonus for Strength +2 and the Quick spell — finish your Speed growth and learn Meteor first; later remasters changed both bonuses, which is why other guides disagree with this table) and ⚠ Ragnarok (magicite teaches Ultima at ×1; the sword is among the strongest weapons and can also be wagered and stolen around the endgame — but note the alternative below). Ultima without Ragnarok: the Cursed Shield, fought with for 255 battles, becomes the Paladin Shield, which also teaches Ultima ×1 and can be paired with keeping the sword. Seraph's price is the friendliest missable in the game: miss the 3,000-gil offer before the world ends and the same man sells it for 10 gil afterwards.
Fourteen characters, fourteen commands
| Character | Unique command | How it works, and the practical point |
|---|---|---|
| Terra | Morph (Trance) | Temporarily transforms: roughly double magic power and halved magic damage taken, on a timer fed by Magic Points earned. Save it for boss phases — it is a burst tool, not a stance |
| Locke | Steal (→ Mug with the Brigand's Glove relic) | Many bosses carry unique steals — check before killing. Mug deals damage while stealing and is the efficient default once you have the relic |
| Edgar | Tools | Eight purchasable/findable machines, no MP cost. Auto Crossbow and Drill carry the early game; the Chainsaw (found in Zozo) and Debilitator stay relevant far longer |
| Sabin | Blitz | Fighting-game inputs entered after choosing the command — e.g. Pummel: ← → ←; Aura Cannon: ↓ ↓ ←; the final Blitz, Phantom Rush: ←← ↑↑ →→ ↓↓ ←. A failed input wastes the turn, so learn two or three cold. Several Blitzes scale with Magic, not Strength |
| Celes | Runic | Absorbs the next spell cast (by anyone) into MP, nullifying it. Devastating against magic-heavy bosses; remember it eats your own party's spells too if timed badly |
| Shadow | Throw | Throws weapons and special shuriken for heavy, defence-ignoring damage — at the cost of the item. Stock Fuma Shuriken for bosses. ⚠ At the Floating Continent's escape, wait for him when prompted, or he is gone for the entire World of Ruin |
| Cyan | Bushido | In this version, selecting a technique starts a gauge that charges in real time while the battle continues — high techniques (up to Quadra Slice/Flurry) mean long, exposed waits. Plan the party's turns around the charge; later versions removed the wait |
| Gau | Rage / Leap | On the Veldt, Leap into a monster formation to learn it; Rage then copies a monster's behaviour with its stats and immunities, uncontrollable for the fight. Stray Cat and Tyrannosaur Rages are famous early and late power spikes |
| Setzer | Slots (→ Gil Toss with the Coin Toss relic) | Random reels: healing, damage, or the instant-kill Joker's Death — which can also target the party. The Fixed Dice (found in Daryl's Tomb) ignore defence calculations and make his Fight command endgame-grade |
| Strago | Lore | Blue magic: learns enemy techniques by seeing them used on the party. Mighty Guard, White Wind and Grand Delta headline a list that rewards hunting specific enemies; some Lores are only visible in specific windows |
| Relm | Sketch (→ Control with the Fake Mustache relic) | Sketch copies an enemy move, unreliably; Control simply commands the enemy — the reliable way to make monsters teach Strago Lores or use White Wind on you. (This version's Sketch is also the source of a notorious item-duplication bug — a quirk of the original code, best left as trivia rather than a plan) |
| Mog | Dance | Learns a dance by finishing a battle on each terrain type (eight dances). While dancing he is uncontrollable and the terrain's effects repeat each turn; the Moogle Charm relic (found where you first recruited him) removes random encounters entirely |
| Gogo (hidden) | Mimic | Copies the previous ally's action for free — including spells Gogo cannot learn. Gogo joins in the World of Ruin: let the Zone Eater on Triangle Island swallow the party and explore its belly. Gogo can equip almost anything and set three of the other characters' commands |
| Umaro (hidden) | — (permanent berserker) | Joins in the World of Ruin Yeti's Cave in Narshe — defeat him, then speak to him with Mog in the party. He cannot equip magicite, spells or most equipment and attacks automatically, but with the Rage Ring and Blizzard Orb relics his raw output is formidable |
The World of Ruin: putting the party back together
You begin with Celes alone. Only a small core is required to reach the final dungeon; everything else is optional — and most of the game's best content hides in the optional column.
| Character | Where and how (shortest route) |
|---|---|
| Sabin | Tzen — hold up the collapsing house against the timer |
| Edgar | Figaro Castle — follow "Gerad" from Albrook, then clear the castle's engine room |
| Setzer | Kohlingen pub, then Daryl's Tomb — reward: the Falcon, your airship |
| Relm | Owzer's Mansion, Jidoor (also unlocks Lakshmi) — or found injured in the cave on the Veldt if events differ; check both |
| Strago | Fanatics' Tower foot, after Relm — he is dazed among the cultists |
| Shadow | If he survived: Cave on the Veldt (rescue), then win him back at the Colosseum by betting the Striker |
| Terra | Mobliz — defend the children from Humbaba twice; the second victory also settles Fenrir |
| Locke | Phoenix Cave (two-party dungeon) — reward: Phoenix, and he unlocks Narshe's sealed doors (Ragnarok, Cursed Shield) |
| Mog | Narshe, in the moogle cave where you met him — required for Umaro |
| Gau | Simply walk on the Veldt with a free slot — he leaps back in |
| Cyan | Mt. Zozo — the letter-writing hermit's mountain; his dream in Doma then yields Alexander |
| Gogo / Umaro | See the command table above |
Order advice: Sabin → Edgar → Setzer (flight changes everything) → Terra and Locke's chains (Phoenix Cave teaches the party to split, a rehearsal for the finale) → dragons and towers at leisure.
Bosses that stop parties — and the eight dragons
| Boss / challenge | Where | The direction that beats it |
|---|---|---|
| Vargas | Mt. Kolts (World of Balance) | A scripted lesson: survive until Sabin's cue, then input Pummel (← → ←) — using Blitz correctly ends the fight |
| Ultima Weapon | Floating Continent | Heavy magic and HP-triggered desperation attacks. Runic support, steady healing, and do not dawdle — the continent's escape sequence (and Shadow) follows immediately |
| Humbaba | Mobliz (World of Ruin, twice) | Pure physical punishment plus Bolt spells. Terra's presence resolves the story beat; brute-force parties should bring lightning resistance |
| Chadarnook | Owzer's Mansion | Alternates between a woman form (magic-weak) and demon form (physical-weak) behind a painting. Hit the weakness of the form you see; reward is Lakshmi |
| Deathgaze | World of Ruin skies | Appears randomly while flying; the fight persists across escapes — damage carries over between encounters, so chip it down over several flights. Reward: Bahamut |
| Storm Dragon | Mt. Zozo | One of the eight; wind and lightning barrage. Wind resistance and patience |
| The Eight Dragons (all) | Ice: Narshe snowfields · Red: Phoenix Cave · Storm: Mt. Zozo · Earth: Opera House (flick the switches in the World of Ruin) · Holy: Fanatics' Tower · Blue: Ancient Castle · Gold & Skull: Kefka's Tower | Each drops top-tier equipment and counts toward Crusader. Holy Dragon sits in a tower where only magic is allowed; Gold and Skull effectively guard the finale |
| The Warring Triad | Kefka's Tower | Three separate statues — Fiend, Demon, Goddess — one per party route, each a full boss with instant-death and status tricks. Clear all three to open the way to Kefka |
| Kefka (final) | Top of Kefka's Tower | A multi-tier ascent through a four-part boss statue, then Kefka himself: Fallen One sets the party's HP to 1 — heal instantly or die to the follow-up. Ultima, Phantom Rush and Offering/Genji Glove physical builds are the classic closers |
Hidden systems: Colosseum, auction, and the three-party tower
The Colosseum (World of Ruin, Dragon's Neck). You bet one item; the game names an opponent and a prize, and your chosen fighter battles alone, under AI control — you cannot give orders. The thinking, therefore, is all before the fight: bet only items you can replace, save beforehand, and send a fighter whose automatic behaviour wins — high evasion, status immunity (a Ribbon), and either the Offering + Genji Glove combination (eight physical attacks) or a fixed-damage build. Some bets are jokes at your expense: an Elixir, famously, draws Typhon, whose sneeze simply ends the match. Shadow's return (betting the Striker) is the one story-critical wager.
The Auction House (Jidoor, both worlds). Beyond the two Espers above, the lots rotate through useful relics and joke items; bidding wars have ceilings, so patience beats wealth. The Espers reappear until won — budget for them early, because Golem's summon (a wall that absorbs physical hits for the party) has no spell equivalent.
Kefka's Tower — three parties, one dungeon. The finale splits your roster into three parties advancing in parallel, standing on switches to open each other's paths. Practical composition: twelve characters in three groups of four, each group needing (1) a healer or Reraise access, (2) one heavy physical attacker for magic-resistant enemies, (3) one caster for the Triad statue on its route. Gogo and Umaro are excellent "glue" here precisely because they need no spell support. The tower also contains Gold and Skull Dragons and some of the best equipment chests in the game — explore with all three parties, not just the fastest.
Also on the checklist: the Cursed Shield → Paladin Shield (255 battles; equipping it alongside the Blood Sword and a Ribbon mitigates the misery), the Fanatics' Tower (magic only — bring Umaro's charm equivalents: Berserk-casting on your own fighters is the famous loophole, since berserked characters use Fight), and Cyan's dream in Doma (a solo, surreal dungeon that pays out Alexander).
Who It's For
Players who want the most generous version of a classic formula: a huge cast, near-total build freedom, and a second half that respects your curiosity more than a checklist. It suits series historians completing the 16-bit trilogy in original form, build-optimisers who enjoy planning growth 30 levels ahead, and anyone who prefers discovering a world to being led through it. If you need an English script and modern conveniences first time out, start with the Pixel Remaster — then come back and meet the original on its own terms.
How to Play It Today
As of this writing:
- The original artefact: a Japanese Super Famicom cartridge, in Japanese, on Super Famicom or compatible hardware.
- The first English version: the North American SNES release, titled Final Fantasy III (1994) — same game, period localisation.
- Later ports: PlayStation (1999, in Final Fantasy Anthology outside Japan) and Game Boy Advance (2006) — the GBA version is an expanded edition with four extra Espers and the Dragons' Den; it is not the game this guide describes.
- The modern standard: Final Fantasy VI Pixel Remaster (Windows, iOS and Android from 2022; Switch and PlayStation 4 from 2023; Xbox Series X/S from 2024, as of this writing). Original roster and story, redrawn visuals and rearranged music, some Esper bonuses adjusted (Odin/Raiden) and quality-of-life boosts the original never had.
Find the original Japanese cartridge
Disclosure: The Rakuten and Yahoo! Shopping links are standard shopping links. Enkeisha does not earn a commission from purchases made through these links.
Find original hardware editions on eBay
As an eBay Partner Network affiliate, Enkeisha may earn a commission from qualifying purchases made through these links.
Search eBay listings (affiliate link)
Check the language, region, hardware compatibility, condition and authenticity before buying. Search results may include reproductions; links do not endorse individual sellers.