Super Donkey Kong 3: Nazo no Kremis Island (Donkey Kong Country 3) — The Deep Guide: 85 Bonus Coins, 41 DK Coins, 15 Banana Birds, the Brothers Bear Trades, and the Road to 103%
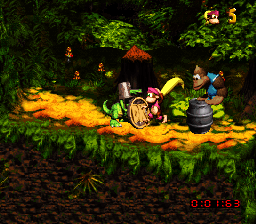
The first two Donkey Kong Country games are races: run left to right, grab what you can, beat the boss. Donkey Kong Country 3: Dixie Kong's Double Trouble! — Super Donkey Kong 3: Nazo no Kremis Island in Japan — is an errand list disguised as a platformer. Donkey Kong and Diddy Kong have vanished on a fishing trip, and Dixie Kong, teaming up with her toddler cousin Kiddy Kong, has to cross the whole Northern Kremisphere to find them: renting boats from Funky, bribing a family of bears, circling four rocks until a lost world rises out of the lake, and collecting three separate currencies of secrets — 85 Bonus Coins, 41 DK Coins and 15 Banana Birds — before the game will call the job done at 103%. This guide is built around that structure. It tables every world, every collectible with its counting method stated out loud (because the totals are famous for being counted two different ways), the full Brothers Bear trading chain, every animal buddy, and every boss including the rematch with Baron K. Roolenstein inside his submarine.
A spoiler note: the boss and completion tables necessarily name the final boss and the hidden world. Plot detail beyond what the tables require is kept to the minimum needed to explain a fight or a trade.
Quick Facts
| Item | Detail |
|---|---|
| Japanese title | Super Donkey Kong 3: Nazo no Kremis Island (スーパードンキーコング3 謎のクレミス島) |
| English title | Donkey Kong Country 3: Dixie Kong's Double Trouble! |
| Platform | Super Famicom / Super Nintendo Entertainment System |
| Release | Japan: 23 November 1996 · North America: November 1996 (published sources differ between 1 and 18 November, so no day is asserted here) · Europe: 13 December 1996 |
| Developer | Rare (Rareware) |
| Publisher | Nintendo |
| Genre | Side-scrolling platformer |
| Series position | 3rd and final entry in the original Super Famicom / SNES Donkey Kong Country trilogy; direct follow-up to Donkey Kong Country 2 |
| Playable pair | Dixie Kong (ponytail Helicopter Spin glide; carries barrels overhead) and Kiddy Kong (heavier and stronger; rolls, throws farther, can Water Skip and crack floors in a team-up throw) |
| Cartridge | 32 Mbit, HiROM FastROM (map mode 0x31), ROM + RAM + battery; Japanese Version 1.1 |
| Players | 1–2 |
| Music | Eveline Fischer |
| Headline totals (SNES original) | 85 Bonus Coins · 41 DK Coins · 15 Banana Birds · 5 cogs · 103% maximum (105% on the TUFST hard-mode code) — counting methods are stated in Strategy Essentials §2, because each total is also published in a second, different-looking form |
Two naming warnings before the tables begin, because most mistakes made about this game are counting mistakes wearing a name tag. First, the shield-carrying Kremling who guards each DK Coin is called Koin — the enemy's name and the prize's name differ by one letter, and confusing them is how "40 DK Coins" and "41 DK Coins" both end up in print: there are 40 Koins and 41 coins, and §2 shows why. Second, everything in this article describes the 1996 SNES/Super Famicom original. The 2005 Game Boy Advance remake adds a whole world and changes every headline total; it is quarantined in §10 and never mixed into the tables above it.
Overview
Months after Donkey Kong Country 2, Donkey Kong and Diddy Kong go exploring the islands — and do not come back. Dixie follows their trail to the Northern Kremisphere, picks up Kiddy at Funky's Rentals, and sets off across a map that is the real break with the earlier games. Where Donkey Kong Country 2 still moved along paths, this game's overworld is open water and open road: you pilot Funky's vehicles freely between worlds, and half the secrets — the Banana Bird caves — are not in levels at all, but hidden around the map itself, behind rocks, waterfalls and patches of empty-looking shoreline.
The structure underneath the tour:
- Seven worlds, then a castle, then a volcano. The campaign runs Lake Orangatanga, Kremwood Forest, Cotton-Top Cove, Mekanos, K3, Razor Ridge and KAOS Kore, each with five regular levels and a boss level (§1). Cotton-Top Cove and Mekanos can be tackled in either order once both are open — the walkthroughs agree on this, and the game does not punish either choice. Hidden under the lake is an eighth area, Krematoa, with five harder levels of its own (§3).
- Bosses pay for your boat. Early boss rewards are the parts Funky needs to upgrade your vehicle — which is why the map opens in stages — while the later bosses pay out Bonus Coins instead (§2). Progress in this game is literally gated by what the last boss dropped.
- Three interlocking hunts. Bonus Coins buy your way into Krematoa. DK Coins buy the Gyrocopter, the only way to reach the last Banana Bird caves. Banana Birds free the Banana Bird Queen — but only after the second Baron fight is also won. No hunt is optional if you want the real ending, and each one unlocks the next (§9).
- The Brothers Bear. Thirteen bears staff the map's cabins, shops and chairlifts. Some sell, some hint, and five of them form a single trading chain that runs the length of the game — a shell bought in the first area is still echoing, three trades later, in a repaired chairlift two worlds away (§5).
- Two Kongs, genuinely different. Dixie's Helicopter Spin is a glide, a weapon and an elevator (in a team-up she can float Kiddy across gaps he could never jump); Kiddy's weight cracks floors, his roll out-ranges her spin, and his Water Skip bounces him across lakes to ledges Dixie cannot reach. Levels are built so that each Kong's trick is the key somewhere — and the DK Coin and bonus placements assume you will swap deliberately, not just play whoever survived.
Why It Still Matters
Donkey Kong Country 3 arrived in November 1996, weeks after the Nintendo 64 had taken the industry's attention, and it has lived in that shadow ever since — the trilogy's lowest seller at roughly three and a half million copies in the commonly cited figures, and the one most often described as "more of the same." That undersells what Rare changed. The free-roaming overworld, the vehicle upgrades, the bear economy and the three-layer collectible structure make this the adventure game of the trilogy: the platforming of the first two games is still here, but embedded in a map that rewards poking at waterfalls and circling suspicious rocks. It is also Dixie's game outright — the only trilogy entry where she leads — and its quiet, lakes-and-forests Northern Kremisphere gives it an identity distinct from the pirate theatrics of Donkey Kong Country 2. If the second game is the trilogy's peak of difficulty, this one is its peak of structure — and structure is what a guide like this one exists to map.
Highlights
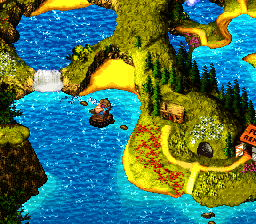
- The Krematoa reveal. A rumour from the least reliable bear on the map turns out to be true: sail a full circle around four rocks in the Lake Orangatanga area and a volcanic lost world rises out of the water. It is still one of the great overworld secrets of the 16-bit era, and Blunder will happily spoil it for you if you visit him enough (§3).
- Koin, the puzzle that repeats 40 times. Every level hides the same small problem — a Kremling holding your DK Coin as a shield, immune from the front — and 40 different level designs for ricocheting a steel barrel into his back (§4).
- Squirt's Showdown. A boss fight fought entirely as Ellie the elephant, duelling a giant slug on a waterfall with mouthfuls of water while the slug tries to hose you off your ledge. The trilogy's strangest boss, and a whole-level argument for its new animal buddy (§7, §8).
- Rocket Rush. The last Krematoa level straps you to a rocket barrel with a fuel gauge and reversed-feeling controls, twice — down, then back up. No bonus barrels, no mercy, and the final cog at the end of it (§3).
- The Banana Queen ending. Fifteen small birds, gathered one riddle and one trade at a time, turn out to be the keys to the game's true finale — and the Queen's revenge on the Baron is the trilogy's best closing joke (§6, §9).
Strategy Essentials
Everything in this section is the core of the guide: the worlds, the collectibles with their counting methods, Krematoa, the Koin method, the bear trades, the birds, the buddies, the bosses, the 103% checklist, and — kept strictly separate — the Game Boy Advance differences. One warning first, because it shapes every table that follows.
Warning — Every headline total in this game has a second, wrong-looking twin in print. Bonus Coins are listed as both 85 and smaller subtotals (74, 75) that count only part of the map; DK Coins appear as both 40 and 41; the GBA remake's totals (98 / 46 / 20) are routinely pasted onto the SNES original. Each table below states its counting method in the table itself, so the numbers can be checked rather than trusted.
1. The worlds — seven, a castle road, and one that rises out of a lake
In campaign order. Every regular world has five regular levels and one boss level; every regular level contains two Bonus Areas (the Krematoa exceptions are in §2) and one DK Coin (§4). Japanese world names are given in the Japanese edition of this guide; level names below are the English ones, which Japanese guides also commonly cite.
| # | World | The five regular levels | Boss level | What the world is for |
|---|---|---|---|---|
| 1 | Lake Orangatanga | Lakeside Limbo · Doorstop Dash · Tidal Trouble · Skidda's Row · Murky Mill | Belcha's Barn | The tutorial lake: mills, boardwalks and the first bear trade (Barnacle's shell, §5). Krematoa's four rocks sit in these waters (§3) |
| 2 | Kremwood Forest | Barrel Shield Bust-Up · Riverside Race · Squeals on Wheels · Springin' Spiders · Bobbing Barrel Brawl | Arich's Ambush | The forest of giant hollow trees. Riverside Race is the game's one race — its record is a bear errand, not a trophy (§5). Beating Arich pays for the Hover Craft |
| 3 | Cotton-Top Cove | Bazza's Blockade · Rocket Barrel Ride · Kreeping Klasps · Tracker Barrel Trek · Fish Food Frenzy | Squirt's Showdown | The swimming world: waterfalls, rapids and the Ellie-only boss. Can be played before or after Mekanos |
| 4 | Mekanos | Fire-Ball Frenzy · Demolition Drain-Pipe · Ripsaw Rage · Blazing Bazukas · Low-G Labyrinth | Kaos Karnage | The factory island: pipes, saws and low-gravity gas. First meeting with KAOS, the robot presented as the Kremlings' new leader. Can be played before or after Cotton-Top Cove |
| 5 | K3 | Krevice Kreepers · Tearaway Toboggan · Barrel Drop Bounce · Krack-Shot Kroc · Lemguin Lunge | Bleak's House | The snow world: toboggan runs and penguin slopes. Blizzard's basecamp here starts the longest bear trade (§5) |
| 6 | Razor Ridge | Buzzer Barrage · Kong-Fused Cliffs · Floodlit Fish · Pot Hole Panic · Ropey Rumpus | Barbos's Barrier | The cliff world: chairlifts (one of them broken — see §5), caves and the underwater Enguarde boss |
| 7 | KAOS Kore | Konveyor Rope Klash · Creepy Caverns · Lightning Look-Out · Koindozer Klamber · Poisonous Pipeline | Kastle KAOS | The Baron's doorstep: conveyor ropes, a lightning-lit tower and a poison-flipped underwater level, ending at the castle (§8) |
| 8 (hidden) | Krematoa | Stampede Sprint · Criss Kross Cliffs · Tyrant Twin Tussle · Swoopy Salvo · Rocket Rush | Knautilus (after all five cogs, §3) | The lost world inside a dormant volcano. No Swanky's Sideshow and no Banana Bird cave — the only world with neither |
THE CAMPAIGN AT A GLANCE

  Lake Orangatanga ──► Kremwood Forest ──► Cotton-Top Cove ──┐
                                          Mekanos ──────────┴─► K3 ──► Razor Ridge ──► KAOS Kore ──► Kastle KAOS
        │
        └── (circle the four rocks) ──► KREMATOA ──► 5 cogs ──► Knautilus ──► Baron K. Roolenstein, again
2. The three hunts — totals, with the counting shown
This is the table the whole game hangs on. Each total is given with its full breakdown, because each is also published in a partial form that looks like a contradiction.
| Collectible | Total (SNES) | Counting method — where they all are | What they buy |
|---|---|---|---|
| Bonus Coins | 85 | 74 outside Krematoa = 70 from the Bonus Areas of the 40 regular levels (35 in the main worlds and five in Krematoa) of worlds 1–7 (2 per level) + 4 awarded by the four later boss fights (KAOS, Bleak, Barbos and the Kastle KAOS fight — the early bosses pay vehicle parts instead). Plus 11 inside Krematoa: its first three levels carry three Bonus Areas each, Swoopy Salvo carries two, and Rocket Rush carries none (3+3+3+2+0 = 11). 74 + 11 = 85 | Boomer's tolls in Krematoa: 15 coins per level for the first four levels, 25 for Rocket Rush — 85 is exactly the toll for all five, with the Krematoa coins themselves funding the last gate |
| DK Coins | 41 | 40 from Koins — one Koin in each of the 40 regular levels (35 in worlds 1–7, 5 in Krematoa), each defeated by the steel-barrel method in §4. Plus 1 awarded for clearing the Knautilus — the only DK Coin with no Koin. Guides that print "40" are counting Koins only; guides that print "41" are counting coins. Both are describing the same game | Hand all 41 to Funky and he builds the Gyrocopter, the only vehicle that can reach the last three Banana Bird caves (§6) |
| Banana Birds | 15 | 13 in secret caves around the map, each freed by repeating the crystal chime sequence (a Simon-style memory game: watch the four crystals flash, play the order back). Plus 2 handed over directly by bears: Barnacle (for the Shell) and Bramble (for the flower) — §5. Of the 13 caves, exactly 3 require the Gyrocopter, which is why the DK Coin hunt gates this one | All 15, plus the Knautilus victory, trigger the Banana Queen ending when you next visit Wrinkly's Save Cave — the birds are kept there as you free them (§6) |
| Cogs | 5 | One per Krematoa level, awarded automatically for clearing the level (a Bear Coin is given instead on replays) | All five, delivered to Boomer, raise the Knautilus in Krematoa's lake (§3) |
| Bear Coins | (currency, not a completion item) | Found throughout levels; spent at Bazaar's store, Barter's buy-back and Swanky's Sideshow | The Shell (5) and the Mirror (50) at Bazaar's are the two purchases the 103% route cannot skip (§5) |
Two habits follow from the arithmetic. First, the game's own flags are the checklist: a level's flag flies straight once its Bonus Areas are done, and a small coin mark appears once its DK Coin is taken — if a flag looks wrong, the level still owes you something. Second, K-O-N-G letters are not in the table on purpose: collecting all four in a level earns an extra life and nothing else. No percentage depends on them in the SNES original, and completion guides that blur them into the 103% requirements are mixing this game up with its successor conventions.
3. Krematoa — finding it, paying for it, and raising the Knautilus
Krematoa is the Lost World, and finding it is a piece of overworld folklore. The bear Blunder, in his booth near Kremwood Forest, insists the lost world is real and — across repeated visits — lets the method slip: in the Lake Orangatanga waters there are four rocks standing in a rough compass pattern, and sailing your vehicle in a complete circle around them makes Krematoa rise from the lake. It can be done as soon as your vehicle can reach the rocks; nothing about the main campaign has to be finished first. The tolls inside are the real gate.
| Step | What it costs / takes | Notes |
|---|---|---|
| Reveal Krematoa | Sail a full circle around the four rocks in the Lake Orangatanga area | Blunder's hints point here. The world appears in the lake and stays appeared |
| Open Stampede Sprint, Criss Kross Cliffs, Tyrant Twin Tussle, Swoopy Salvo | 15 Bonus Coins each, paid to Boomer in Boomer's Bomb Shelter | Boomer takes Bonus Coins only — Bear Coins are useless to him. If you arrive holding enough for several levels, he will happily take payment for as many as you can afford |
| Open Rocket Rush | 25 Bonus Coins | The expensive gate is deliberate: by the guides' arithmetic you hold 74 coins on arrival, the first four levels cost 60, and the 11 coins inside those levels are what carry you past 25 for the last one |
| Clear all five levels | One cog per level | Stampede Sprint is an Ellie-and-Parry stampede; Criss Kross Cliffs is a Bazuka barrel-switching climb; Tyrant Twin Tussle is a Squitter level against paired Kuff 'n' Klouts, an enemy type found nowhere else; Swoopy Salvo turns the Swoopy birds into both platforms and walls; Rocket Rush is the rocket-barrel finale with no Bonus Areas at all |
| Raise and clear the Knautilus | All 5 cogs delivered to Boomer | The cogs reactivate the volcano and the Baron's submarine, the Knautilus, surfaces in the central lake. The fight inside is the Baron rematch (§8) and pays the 41st DK Coin (§2) |
The practical order: do not rush Krematoa the moment it can be revealed. Its levels are the hardest in the game and its reward sequence (cogs → Knautilus → final DK Coin → Gyrocopter → last birds) is the endgame's spine. The comfortable moment is after Kastle KAOS, when the 74-coin purse is complete or nearly so.
4. Koin and the steel barrel — the DK Coin method
There is one Koin in every regular level, standing somewhere off the main path with a DK Coin held up as a shield. He cannot be jumped on, rolled into or hit from the front — his shield turns away everything, including ordinary barrels. The one tool that works is the steel barrel (the metal keg), and the one rule is that he must be hit in the back. Every level is therefore the same puzzle in a new room: find the steel barrel the level has provided, find the wall, pipe, slope or ceiling behind Koin, and arrange the ricochet.
| Situation | The standard solution |
|---|---|
| Koin stands before a wall, with the steel barrel nearby | The textbook case (it is how the first level teaches it): throw the steel barrel over Koin's head so it strikes the wall behind him and rebounds into his back |
| Koin is in a pit or below a ledge | Drop or bounce the steel barrel in from above and behind; several K3 and Razor Ridge Koins are solved by throwing the barrel up a slope and letting it roll back down into him |
| The steel barrel is on the far side of Koin | That is the design, not a mistake: carry or roll it past him (he shoves the Kongs but does not break the barrel), turn, and throw it into the wall behind him from the other side |
| Fully underwater levels | The exception the guides note: in the wholly underwater levels the DK Coin is not fought over in the usual Koin duel — expect to find the coin itself hidden rather than a shield to defeat |
| You missed the throw | Steel barrels do not break on walls. Pick it up and throw again. A missed Koin costs time, never the coin |
| The Knautilus "Koin" | There is none. The 41st DK Coin is simply awarded after the Baron rematch — see §2 for why this is the entire 40-vs-41 controversy |
Learn to read the flags (§2): the coin mark on a level's flag is the difference between "I think I got them all" and knowing which of the 40 rooms to re-enter. And note what Koin is for: he is the reason the DK Coin hunt cannot be skipped or cheesed — every coin is a small, deliberate detour that the level designer placed, timed and walled by hand.
5. The Brothers Bear — the trading chain, whole
The bears are the map's connective tissue. Bazaar sells, Blunder hints, Benny and Björn run the Razor Ridge chairlifts, Boomer (§3) runs Krematoa — and threaded through them is one long chain of errands, plus two standalone favours. Every link below matters to 103%: the chain ends in two Banana Birds reached no other way, and a third trade decodes a third bird's cave.
| # | The trade | Give → Get | What it unlocks |
|---|---|---|---|
| 1 | Bazaar's General Store (by Funky's Rentals) → Barnacle (Lake Orangatanga) | Buy the Shell for 5 Bear Coins → give it to Barnacle → receive a Banana Bird directly | The first bird, available in the opening hour — and the chain's lesson: Bazaar's stock is never decoration |
| 2 | Bazaar → Barter (Barter's Swap Shop, southwest of K3) | Buy the Mirror for 50 Bear Coins → trade it to Barter → receive the No. 6 Wrench | Barter will sell the Mirror back afterwards for 10 Bear Coins — you will need it again (row 4), so keep 10 coins in reserve |
| 3 | Barter → Björn (Razor Ridge) | Give Björn the No. 6 Wrench → he repairs the chairlifts he runs with his brother Benny → ride the lift up | Access to the Clifftop Cache secret cave in Razor Ridge — one of the 13 cave birds (§6) |
| 4 | Bazaar / Barter → Baffle (KAOS Kore) | Show the Mirror to Baffle (buy it back from Barter first if you traded it away) → he deciphers his code → the entrance method for the Sewer Stockpile cave | The KAOS Kore cave bird: at the world's pond, swim a figure-eight around the two rocks and the drainage pipe to open the grate (§6) |
| 5 | Blizzard (K3) → Blue (Cotton-Top Cove) → Bazooka (Mekanos) | Take Blizzard's Present (a birthday gift he cannot deliver) → give it to Blue → Blue hands over a Bowling Ball → give the Bowling Ball to Bazooka as ammunition for his cannon, Big Bessie → Bazooka blasts a route open | Access to the Sky-High Secret cave above Mekanos — one of the 13 cave birds. This is the longest chain in the game: three bears, three worlds, one bird |
| — | Brash (Kremwood Forest) — not an item trade | Beat Brash's record in Riverside Race (his mark is 1:15) → his tantrum shakes a log loose outside, bridging the river | Access to the Arich's Hoard cave — one of the 13 cave birds. The race is easy; knowing it is an errand at all is the secret |
| — | Bramble (his bungalow near Cotton-Top Cove) — not an item trade until the end | Bring Bramble the rare flower (the Flupperius Petallus Pongus) that grows on the path by his bungalow, reachable late in the game → receive a Banana Bird directly | The second of the two bear-delivered birds. Bramble can be visited any time after Mekanos in the GBA version's altered terms — that difference belongs to §10, not here |
Read the chain as a checklist and the map stops being confusing: Shell (5 coins) early, Mirror (50 coins) as soon as Bear Coins allow, the wrench run to Razor Ridge, the present run from K3 back to Cotton-Top Cove and across to Mekanos. Every bird in §6 that is not simply found is hanging off one of these rows.
6. Banana Birds — the 15, and the Queen they free
Fifteen Banana Birds, one mother. The birds were imprisoned by Baron K. Roolenstein — most of them sealed in crystal caves, two of them ending up in bears' hands (§5) — and freeing all of them is how the game's true ending is earned. Freed birds wait at Wrinkly's Save Cave, which is also where the finale is triggered: after the Knautilus victory (§3), visit Wrinkly with all 15 free, and the birds carry Dixie and Kiddy up through the clouds in the northwest of the map to the Banana Bird Queen, still trapped behind the Baron's barrier. The birds' song breaks it, and the Queen settles the score with the Baron personally.
| Bird | Where | How it is reached |
|---|---|---|
| 1 | Bounty Beach (overworld, east of Funky's Rentals) | Secret cave; any vehicle can reach the beach. Crystal memory game |
| 2 | Kong Cave (overworld, northwest of Bazaar's, behind rocks) | Secret cave; needs the Hover Craft or better to cross the rocks |
| 3 | Undercover Cove (overworld, above the waterfall near Kong Cave) | Secret cave; needs the Turbo Ski to ride up the waterfall (or the Gyrocopter) |
| 4 | Belcha's Burrow (overworld, southwest of Bazaar's, across the water) | Secret cave; Gyrocopter required — one of the last three |
| 5 | K's Kache (overworld, island in the northwestern lake) | Secret cave; Gyrocopter required — one of the last three |
| 6 | Hill-Top Hoard (overworld, far northeast cliff) | Secret cave; Gyrocopter required — one of the last three |
| 7 | Smuggler's Cove (Lake Orangatanga, northern beach) | Secret cave; swim under the bridge between the lake's levels to the hidden beach |
| 8 | Barnacle (Lake Orangatanga) | No cave: the Shell trade, §5 row 1 |
| 9 | Arich's Hoard (Kremwood Forest) | Secret cave; opened by Brash's tantrum after you beat his Riverside Race record, §5 |
| 10 | Bounty Bay (Cotton-Top Cove) | Secret cave; swim from the cove's entrance and break through to the bay |
| 11 | Bramble (bungalow near Cotton-Top Cove) | No cave: the flower trade, §5 |
| 12 | Sky-High Secret (Mekanos) | Secret cave; reachable only once Bazooka fires Big Bessie, §5 row 5 |
| 13 | Glacial Grotto (K3) | Secret cave; hidden just west of Blizzard's Basecamp — walk left from his cabin |
| 14 | Clifftop Cache (Razor Ridge) | Secret cave; at the top of the chairlifts Björn repairs, §5 row 3 |
| 15 | Sewer Stockpile (KAOS Kore) | Secret cave; Baffle's decoded method — the figure-eight swim at the pond opens the grate, §5 row 4 |
The pattern is worth naming: five birds test exploration of the overworld itself, three test the vehicle ladder (and the Gyrocopter three test the DK Coin hunt behind it), and the rest test whether you were listening to bears. A player stuck at 14 has almost always missed a conversation, not a cave.
7. Animal buddies — six friends, counted carefully
The buddy roster is usually listed as five or six depending on whether the purple parrot is counted as his own bird. This guide counts six entries: Squawks and Quawks share a species slot in some sources, but they play completely differently — one shoots, the other carries — and a strategy table that merges them would mislead in both directions.
| Buddy | New or returning | What they do | Where they earn it |
|---|---|---|---|
| Ellie the elephant | New in this game (replaces Rambi as the ground mount) | Sucks up water through her trunk and spits it as a projectile; draws barrels toward her and carries them in her trunk; the only buddy who is also a boss weapon. Her one flaw is scripted: she panics and bolts at the sight of Sneeks (the rat enemies) | From the very first level (Lakeside Limbo) onward; the entire Squirt boss fight (§8) is fought as Ellie, and Stampede Sprint in Krematoa is built around her panic — keep her moving and let the stampede do the fighting |
| Enguarde the swordfish | Returning (all three trilogy games) | Underwater speed and a pointed-bill jab, with the chargeable super-dash carried over from the second game; defeats most underwater enemies outright | Most water levels from Tidal Trouble on; the entire Barbos boss fight (§8) is fought as Enguarde — he is not a helper in this game, he is a vehicle with boss duties |
| Squawks the parrot (green) | Returning | Carries the Kongs in flight and spits coconuts/eggs as a projectile — the flying shooter for vertical and autoscroll sections, including red Buzz patrols no one else can clear | Flight sections across Kremwood Forest and beyond, and inside several Bonus Areas (Stampede Sprint's bonuses among them) |
| Quawks the parrot (purple) | Returning, reworked | Flies like Squawks but cannot shoot; instead he can pick up and drop barrels in flight. Every Quawks section is a carrying puzzle, not a shooting one — do not fly him like his cousin | The descent sections where a barrel has to arrive somewhere a Kong cannot throw it |
| Squitter the spider | Returning from the second game | Fires web projectiles at enemies and — his real job — spins web platforms in mid-air, in the direction and at the angle you aim, to cross gaps with no floor at all | Tyrant Twin Tussle in Krematoa is his showcase: the paired Kuff 'n' Klout enemies there are a Squitter problem. Also the answer in several Bonus Areas |
| Parry the parallel bird | New in this game | Flies directly above the Kongs, mirroring their movement — "parallel" is the whole description. He collects out-of-reach items by simply being flown through them, kills Booty Birds on contact, and is killed instantly by almost anything else. Carry him past a No Animal Sign and he converts into a major reward — in Stampede Sprint, he becomes the third Bonus Barrel | Squeals on Wheels onward. Parry sections are protection missions: jump so that Parry clears the Buzz, not so that you do |
The design statement is the same as Donkey Kong Country 2's, sharpened: the Kongs are the generalists, and every hard room in the game is secretly asking which friend the room was built for. If a stretch feels impossible, the crate or barrel for its buddy is nearby and you walked past it.
8. The bosses — eight fights, one Baron, twice
In encounter order. This game has no boss HP displays and guides do not agree on hidden values, so — as in this series of guides generally — no HP figures are printed. What wins each fight is in the table: the form you fight in, the one mechanic the boss is testing, and the agreed counter.
| # | Boss | World / arena | The fight | The agreed counter |
|---|---|---|---|---|
| 1 | Belcha | Lake Orangatanga — Belcha's Barn | A gigantic living barrel in a barn with a pit at each end. Belcha spits barrels at you; each barrel holds a yellow Knik-Knak. The Kongs are being pushed toward their pit; Belcha must be pushed toward his | Stomp the barrel, stomp the Knik-Knak once to flip it, pick it up and throw it into Belcha's mouth. He belches and lurches backward. Repeat until he topples into his pit — work quickly, because his spit rate is the real timer |
| 2 | Arich | Kremwood Forest — Arich's Ambush | A huge red spider bouncing on its web thread above you, spitting venom in arcs | Throw barrels up into its face between bounces. Watch the thread, not the spider: its height pattern tells you when a throw will connect. A patient, rhythmic fight — rushing it is how venom finds you |
| 3 | Squirt | Cotton-Top Cove — Squirt's Showdown | A giant slug on a waterfall, and you are Ellie for the whole fight (§7). Squirt hoses jets of water to push Ellie off her ledge | Draw water from the waterfall with Ellie's trunk and spit it into Squirt's eyes. Reposition between his jets rather than trading shots — this is a footing fight, and the ledge, not your health, is the resource |
| 4 | KAOS | Mekanos — Kaos Karnage | The robot "leader" of the Kremlings: a helmeted machine that attacks with spinning blades and body slams, fought in his factory | Dodge the blade patterns, and punish the moments he lowers and exposes his head to a barrel hit. Treat this first meeting as a rehearsal: everything he does here returns, escalated, at Kastle KAOS |
| 5 | Bleak | K3 — Bleak's House | A giant snowman who turns the boss format into a snowball duel across his yard, popping up from behind snow barriers to throw | Stay mobile behind your own barriers and return snowballs the moment he surfaces to throw. It is a timing duel, not a platforming fight — the Kongs never leave the ground game here |
| 6 | Barbos | Razor Ridge — Barbos's Barrier | A huge spined shellfish underwater, and you are Enguarde for the whole fight (§7). Barbos shelters behind its spines and hazards of the arena | Strike with Enguarde's bill when the shell opens and Barbos is exposed; respect the spines and the Lurchin hazards between openings. Like Squirt, the form is the strategy |
| 7 | KAOS, then Baron K. Roolenstein | KAOS Kore — Kastle KAOS | Two fights back to back. KAOS returns with escalated patterns — and when he falls, the curtain drops: KAOS was a puppet, powered, in the game's darkest joke, by the captive Donkey Kong and Diddy Kong. His master fights in person: the Baron, in a helicopter-pack rig, attacking with electricity and projectiles | KAOS: the Mekanos plan, executed cleaner. The Baron: keep to the safe floor, dodge the electrical patterns, and hit him with barrels when his rig brings him into range. Winning frees DK and Diddy — and pays a Bonus Coin (§2) — but it is not the last Baron fight |
| 8 | Baron K. Roolenstein, again | Krematoa — the Knautilus (after all 5 cogs, §3) | The rematch inside his submarine: the Baron hovers with his propeller pack while the room itself attacks — sparks, fireballs and arcing electricity overhead | The guides' shared warning comes first: do not jump carelessly — the ceiling electricity punishes height, so the fight is won from the floor. When a steel barrel appears, throw it up so it comes down on the device on the Baron's back as he passes the centre. Clear this and the game pays the 41st DK Coin (§2) |
Two structural points are built into this table. First, KAOS is marketed by the game itself as the new leader for two whole worlds, and the reveal that he is a puppet — with the previous games' heroes as his battery — is why the Kastle KAOS fight is two fights instead of one. Second, the Baron must be beaten twice for the ending that matters, and the fights are different tests: the castle tests dodging in open space, the submarine tests restraint in a room where jumping is the hazard.
9. The 103% checklist — what the percentage is actually made of
The game never itemises its percentage on screen, so this table is a checklist, not a formula: published sources consistently describe 103% as the state in which every row below is complete, and the Banana Queen sequence (§6) has been seen. Where guides assign exact per-item percentages, they do not agree with each other, so none are printed.
| Requirement | Target | Section |
|---|---|---|
| All regular levels cleared, all boss levels beaten including Kastle KAOS | 40 regular levels + boss levels (35 + 5 in Krematoa) | §1, §8 |
| All Bonus Coins collected (and Boomer's tolls therefore payable in full) | 85 | §2, §3 |
| All DK Coins collected | 41 — which means the Knautilus must also be cleared | §2, §4 |
| Krematoa found, all five cogs delivered, Knautilus cleared | 5 cogs | §3 |
| All Banana Birds freed | 15 | §5, §6 |
| Banana Queen sequence seen (visit Wrinkly's Save Cave with all 15 birds after the Knautilus) | — | §6 |
| Not required | K-O-N-G letters (extra lives only); Swanky's Sideshow winnings; Bear Coin hoards | §2 |
And the footnote every completionist eventually asks about: entering the code TUFST at the file screen (after the Kong-family button sequence that opens the cheat entry) starts a harder file with the Star Barrels and most DK Barrels removed — and raises the ceiling to 105%. It changes nothing in the tables above except the difficulty of surviving them; a normal file caps at 103% no matter how thoroughly it is played, and a 103% file is a complete file.
10. Version separation — the Game Boy Advance remake is a different game for counting purposes
Everything above is the 1996 SNES/Super Famicom original, verified against the Japanese Version 1.1 cartridge described in the Quick Facts. The 2005 Game Boy Advance remake is a remake, not a port, and its differences are listed here precisely so that none of them leak upward into the tables:
| Element | SNES original (this article) | GBA remake (2005) — do not mix |
|---|---|---|
| Worlds | 7 + hidden Krematoa | Adds Pacifica, a new water world of six levels inserted as the seventh world, between Razor Ridge and KAOS Kore |
| Razor Ridge boss | Barbos | Kroctopus, a new boss; Barbos is moved to Pacifica as its boss |
| Bonus Coins | 85 (Boomer: 15 / 15 / 15 / 15 / 25) | 98 (13 added, from Pacifica's Bonus Areas and Kroctopus; Boomer charges 18 each and 26 for the last) |
| DK Coins | 41 (40 Koins + Knautilus award) | 46, and the Knautilus award is changed to a Bear Coin — all GBA DK Coins come from Koins, so they can all be collected before the Knautilus |
| Banana Birds | 15 | 20 (five added, including birds earned from new Kong bonus games: Funky's, Cranky's and Swanky's) |
| Lake Orangatanga bear | Barnacle, on his island | Barnacle is moved to Pacifica; a new bear, Bachelor, takes the Lake Orangatanga spot |
| Saving / the birds' home | Wrinkly's Save Caves in each world; birds kept at the caves | Wrinkly is consolidated into Wrinkly's Retreat; the other save caves are replaced by Cranky's Dojo, and Swanky's Sideshow becomes Swanky's Dash |
| Bramble's bird | Requires the flower (§5) | Can be earned by visiting Bramble any time after Mekanos is complete — the flower errand is removed |
| Music | Eveline Fischer's original score | A new soundtrack by David Wise replaces it |
Donkey Kong Land III (Game Boy, 1997) is a separate companion game with its own levels and counts, not a version of this one, and is outside this guide entirely.
Who It's For
- Completionists who like a checklist with a map attached. Three interlocking hunts, flags that tell you what you missed, and a percentage that goes past 100 on purpose. If §2's arithmetic pleased you, this game was built for you.
- Series players finishing the trilogy in order. Played after Donkey Kong Country 2, this is the structural experiment of the three — the one that traded pure density for a world to explore — and its ending only makes sense as a finale.
- Dixie fans. Her one leading role in the original trilogy, with the glide that still defines her. Kiddy's weight tricks are the mechanical co-star, but the game is hers.
- Not for: players who want the second game's relentless level-by-level difficulty curve and nothing between levels — the overworld errands are this game, and skipping them means skipping the ending too.
How to Play It Today
- Nintendo Switch — Nintendo Classics (the easy route today). The SNES original was added to the Super Nintendo Entertainment System – Nintendo Classics library on Nintendo Switch on 18 December 2020. This is the 1996 game as described in this article, counts and all.
- Original cartridge. Japanese Super Famicom and North American SNES cartridges save to battery; have an ageing battery checked or replaced by a reputable shop if saves vanish. In Japan the game was also sold through the Nintendo Power cartridge-rewriting service (from 30 September 1997). A second-hand copy is the collector's route:
- Historical download versions — no longer sold. The Wii, Wii U and New Nintendo 3DS Virtual Console releases were the standard route for years; those shops have closed, so old listings are historical only. Do not pay a premium for a machine on the assumption its shop still works.
- The GBA remake (2005) is a legitimate alternative — with §10's counts. If you play it, use a guide written for it: its Pacifica world, 98 Bonus Coins and 20 Banana Birds are not errors in this article, they are a different game.
Find the original Japanese cartridge
Disclosure: The Rakuten and Yahoo! Shopping links are standard shopping links. Enkeisha does not earn a commission from purchases made through these links.
Find original hardware editions on eBay
As an eBay Partner Network affiliate, Enkeisha may earn a commission from qualifying purchases made through these links.
Search eBay listings (affiliate link)
Check the language, region, hardware compatibility, condition and authenticity before buying. Search results may include reproductions; links do not endorse individual sellers.