Clock Tower: The Stalker Horror That Taught a Mansion to Hunt You
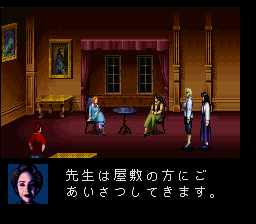
No gun. No sword. Just a cursor, a borrowed mansion, and a small figure with an enormous pair of scissors who can come through almost any door. Clock Tower is the 1995 Super Famicom adventure that helped invent stalker horror — and for almost thirty years, it never officially left Japan.
| Quick facts | |
|---|---|
| Japanese title | クロックタワー (Clock Tower) |
| English title | Clock Tower — no official English version until Clock Tower: Rewind (2024) |
| Platform | Super Famicom |
| Release | September 14, 1995 (Japan only) |
| Developer | Human Entertainment |
| Publisher | Human Entertainment |
| Director | Hifumi Kono |
| Genre | Survival horror / point-and-click adventure |
| Cartridge | 24 Mbit (3 MB), HiROM + FastROM |
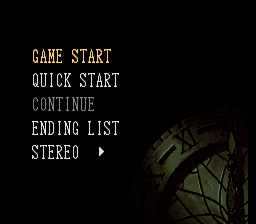
| Save | Battery-backed RAM — Continue option on the title screen |
Overview
Orphan Jennifer Simpson arrives at the Barrows mansion in September 1995 with three fellow orphans — Laura, Anne, and Lotte — to be adopted by the reclusive Simon Barrows. Their escort, Mary, leaves to fetch Mr. Barrows and does not come back. When Jennifer goes to look for her, the lights are out, the other girls are gone, and exploring soon brings her face to face with the Scissorman: Bobby Barrows, a murderous boy carrying scissors almost as tall as he is.
Everything is played through a point-and-click cursor. You point, and Jennifer walks, examines, opens, and picks things up; the shoulder buttons make her run, and a dedicated panic button is your only way to fight back when she is grabbed — she has no weapon, ever. The mansion is a puzzle box of locked wings, shuffled rooms, and keys hidden inside other puzzles, and your choices, discoveries, and even how many of your friends' fates you witness feed into nine endings, ranked S and A through H.
Director Hifumi Kono built the game as a homage to Dario Argento, above all Phenomena (1985); Jennifer herself was modelled on Jennifer Connelly's character in that film, and her movements were digitised from a member of Human's planning staff acting out the scenes.
Why It Still Matters
This is one of the founding texts of survival horror, released the year before Resident Evil — and it reaches the same fear by the opposite route. Where later horror games ration ammunition, Clock Tower removes combat entirely: powerlessness is the mechanic. Its stalker formula — a persistent pursuer, hiding instead of fighting, scripted ambushes mixed with random appearances — became a genre template that horror games still reuse.
It is also a landmark of the Japan-only era. Western players knew it for decades only through reputation and fan translation, which makes its structure easy to misremember as a PlayStation game: the expanded PlayStation port, The First Fear (1997), added full-motion video, a dagger weapon and the enemy it is used on, an extra room, and extra cutscenes. None of that is in the 1995 original covered here. The Super Famicom game finally received its first official English translation in Clock Tower: Rewind in 2024 (see below).
Highlights
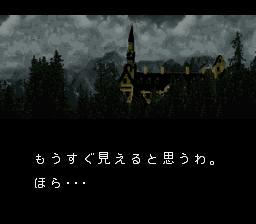
- A pursuer, not a boss. Scissorman appears both at fixed story beats and at random while you explore — out of bathtubs, ceilings, and curtains — and the game switches into an escape state where the only clickable points are hiding places and objects that can drive him off.
- Randomised every run. Key locations swap between two set places, one of two different ritual items appears, and most west-wing rooms change position between playthroughs. A memorised route from a previous run will betray you.
- Stamina you read off Jennifer herself. There is no health bar; her portrait and her stumbling body carry the information (detailed in Strategy Essentials).
- Nine ranked endings. From the early car escape (G/H) to the special S ending, the rank is a report card on what you discovered, whom you helped, and which floor you chose at the very end.
Strategy Essentials
Everything below describes the Super Famicom original only. Where the PlayStation First Fear version (and Rewind's Rewind Mode, which borrows from it) differs — the Cage Key, above all — that is flagged.
The route, wing by wing
The mansion divides into an east wing (where you start), a locked west wing, and the underground. Work it in this order:
| Stage | Where | Objective | Watch out for |
|---|---|---|---|
| 1 | East wing, 1F | Perfume from the master bedroom; check the box in the living room (TV room) for the West Wing Key | Prepare the bedroom hiding spot now (see below) — you will need it soon |
| 2 | East wing, 1F bathroom | The first scripted death and Scissorman encounter | Hide once to end the chase, then keep moving |
| 3 | East wing, 2F corridor | If the living-room box was empty, push the crate to reach the bird's nest for the West Wing Key | The key is in exactly one of these two places — never both, never neither |
| 4 | East wing, storage + kitchen | Pesticide and Black Robe from the storage area; use the Pesticide on the kitchen meat locker to get the Gold Key; take the Ham from the fridge | Take the Ham before any event that can land you in the courtyard cell — it is the price of that route (see endings) |
| 5 | East wing, phone room | Silver Key from the table | The Gold and Silver Keys each open one of two locked doors, and which fits which can swap — try both. If Mary is in the phone room, the key cannot be taken then |
| 6 | West wing (rooms shuffled) | Library / religious study clue first — it decides your ritual-item branch. Then: Ceremony Key from the child's room, Cage Key in the cage room, the hidden room, and your ritual item | West-wing room positions are randomised per run; sweep every door |
| 7 | Ceremony room → underground | Use the ritual item, wear Perfume + Black Robe to pass the guard dog, speak to Lotte by the dog, survive the cradle room, then take the elevator | Skipping Lotte's conversation caps your ending at F (see table) |
| — | Garage (any time, early) | Car Key from the box by the car; use it on the car three times | This ends the game on the spot — it is the G/H branch, not a shortcut |
Key and important-item checklist
Item names vary slightly between translations; locations below are the original's.
| Item | Where it is | What it unlocks / decides |
|---|---|---|
| West Wing Key | Living-room box or 2F bird's nest (random, one of two) | Both west-wing doors — the game's main gate |
| Perfume | Master bedroom dresser | Half of the dog disguise (with Black Robe) |
| Black Robe | Storage area chest / cabinet area (placement varies) | Other half of the dog disguise |
| Pesticide | Storage area | Clears the kitchen meat locker → Gold Key |
| Gold Key / Silver Key | Meat locker / phone-room table | One locked interior door each; the pairing can swap |
| Demon Idol or Scepter (Staff) | Idol: statues in the 2F west corridor. Scepter: behind the music-room curtain. Only one exists per run | Opens the way underground from the ceremony room. Read the library / study clue first — it tells you which branch you are on, and the other item simply is not there |
| Ceremony Key | Child's room chest (after dealing with what guards it) | The ceremony room door |
| Ham | Kitchen fridge | Give it to the prisoner in the courtyard cell — required to turn the cell event into the A-route discovery instead of a dead end |
| Cage Key | On the table inside the cage room (Super Famicom original) | Frees the caged crow — required for endings S and A. In The First Fear and Rewind Mode it is obtained differently, via the added dagger sequence; do not hunt for that here |
| Car Key | Garage box | Early car escape — endings G/H only |
All nine endings — conditions
Conditions only, no story outcomes. Four flags decide almost everything: (1) whether you learn the truth about Mary, and by which route — the hidden room behind the storage room's false wall, or the courtyard cell; (2) whether you free the caged crow; (3) whether you speak to Lotte in the underground and hear how the clock tower works; (4) which floor you select in the final elevator. Item and event placement is partly random, so a flag can occasionally be lost to chance — that is part of the original design.
| Rank | Truth discovered? | Crow freed? | Lotte's hint? | Final choice / route |
|---|---|---|---|---|
| S | Yes — hidden room (examine everything there, the remains last) | Yes | Yes | Elevator to 3F. Additionally requires at least one of Anne / Laura still alive at the end |
| A | Yes — courtyard cell (be taken there, give the prisoner the Ham, escape) | Yes | Not required | Elevator to 3F, without the hidden-room route |
| B | Yes — hidden room | No | Yes | Elevator to 3F |
| C | Yes — hidden room | No | Yes | Elevator to 2F |
| D | No | — | Yes | Elevator to 2F |
| E | No | — | Yes | Elevator to 3F |
| F | Either | — | No — reach the elevator without speaking to Lotte by the dog | Any floor — the rank is already fixed |
| G | — | — | — | Leave by car after witnessing two friends' deaths |
| H | — | — | — | Leave by car after witnessing only one friend's death |
Notes: S is the special ending above A, and the hardest to assemble. Endings A, B, and C are the ones the sequel treats as compatible with its story. Whether Anne or Laura is still alive also changes who appears in the closing scenes of the top endings, beyond the S requirement noted above. The two car endings ignore all other flags — which makes H, perversely, the ending most first-time players meet.
Surviving Scissorman: hiding spots by type
In a chase, interaction changes completely: Jennifer can only run, and only hiding places and repel points respond to the cursor. Learn the types, because specific rooms move around:
| Type | Examples in the original | Reliability notes |
|---|---|---|
| Under a bed | Master bedroom (left bed); west bedroom (left bed) | The master-bedroom bed is only safe after you deal with the parrot: release it, then trap it in the right-hand bed's sheets. With the parrot loose, it gives you away |
| Behind a curtain | Living room / den; music room | Sometimes you wait him out; sometimes Jennifer steps out as he passes — either way you get a head start. Note the music-room curtain is also a place he hides, and where the Scepter branch item sits |
| Lockable bathroom partition | East bathroom (tub area) | Jennifer locks the partition door behind her. Success is random — treat it as a last resort, not a plan; guides disagree about it for a reason |
| Behind / over furniture | Storage area — climb over the cabinets (in a chase she can clamber over without moving the crate first) | Doubles as a repel point: a pesticide canister there can be thrown in his face for a one-time escape |
| Crate in the shed | Courtyard shed | Hides you from Scissorman — but not from Mary. The plank by the shed door works the other way: it is for Mary, not for him |
General rules: prepare hiding spots before you need them (the parrot trap above is the classic example); after a successful hide, leave the room promptly — hiding ends the chase, it does not make the room safe; and never let a chase start on stairs or uneven ground if you can avoid it, because a grab there can kill outright, regardless of panic mashing.
Panic and stamina management
- Read the portrait, not a gauge. Jennifer's portrait in the corner of the screen is her stamina meter: its background starts blue and shifts toward red as she tires. At red she can no longer fight back — the next successful grab is fatal. The cursor, meanwhile, flashes red and blue during panic mode itself; that flash means "mash now," not a stamina reading.
- The panic button is B. When grabbed, mash B as fast as you can. A successful escape is not free: each one costs stamina, so three escapes on one tank is roughly your limit before she is defenceless — treat every grab survived as spending a resource you must then recover.
- Running is the other drain. Running steadily depletes the same stamina, and at low stamina Jennifer begins to trip while running — which is how chases are actually lost. Walk by default; run in bursts between doors.
- Rest before, not during. Stamina recovers by resting — sitting down in a safe room — and recovery is slow in the original. Make it a habit: rest to blue before opening an unopened door, before the bathroom, and immediately after any escape, once you have put a door between you and him.
- Enter new rooms rested and saved by the Continue structure. Death returns you to the title screen's Continue; progress flags and witnessed events may already be locked in, so a rested, methodical first pass beats a fast, exhausted one.
Who It's For
- Survival-horror historians: this is the stalker game before the stalker game was a genre, on the hardware that supposedly could not do horror.
- Adventure-game players who like their puzzles physical — keys inside lockers inside kitchens — and who enjoy a game that grades how much they understood, via the ending rank.
- Replay-driven players: randomised rooms and items, nine endings, and short runs make this an early, genuine "one more run" game.
How to Play It Today
- Clock Tower: Rewind (2024) — the main route. WayForward's enhanced release (published by Limited Run Games) for Nintendo Switch, PlayStation 4, PlayStation 5, Windows, and Xbox Series X/S is the game's first official release outside Japan, with its first official English translation. Original Mode plays the 1995 Super Famicom version as it was; Rewind Mode adds the PlayStation version's extra content and quality-of-life changes. Both modes add save states and a rewind function, plus extras including a new animated opening, vocal theme songs, motion comics, an art gallery, a music player, and an interview with Hifumi Kono. This is the reissue for modern systems.
- Original Super Famicom cartridge: Japan-only release; import copies circulate on the second-hand market.
- Earlier Japan-only digital reissues: the game was reissued in Japan on the Wii Virtual Console (2010) and Wii U Virtual Console (2013), and The First Fear on PlayStation Network (2011). As of November 2026, those storefronts are closed to new purchases, so they are history rather than a buying route — and the original is not part of the Nintendo Switch Online library.
Find the original Japanese cartridge
Disclosure: The Rakuten and Yahoo! Shopping links are standard shopping links. Enkeisha does not earn a commission from purchases made through these links.
Find original hardware editions on eBay
As an eBay Partner Network affiliate, Enkeisha may earn a commission from qualifying purchases made through these links.
Search eBay listings (affiliate link)
Check the language, region, hardware compatibility, condition and authenticity before buying. Search results may include reproductions; links do not endorse individual sellers.