The Legend of Zelda: A Link to the Past — Two Worlds, Eleven Dungeons, and Every Heart Piece: The Deep Strategy Guide
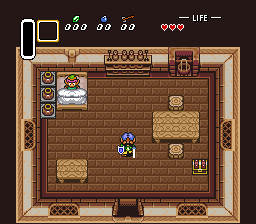
Most action-adventures give you one map to master. A Link to the Past gives you two — a bright Hyrule and its twisted Dark World mirror — and then asks you to solve each by reading the other. This deep guide is built for players who want to finish the Super Famicom / SNES original properly: every dungeon and boss in order, all 24 Pieces of Heart, every major upgrade chain, and the secrets that are easiest to miss, with version differences between the original and later ports kept clearly separate.
Quick Facts
| Item | Detail |
|---|---|
| Japanese title | Zelda no Densetsu: Kamigami no Triforce (ゼルダの伝説 神々のトライフォース) |
| English title | The Legend of Zelda: A Link to the Past |
| Platform (original) | Super Famicom / Super Nintendo Entertainment System |
| Release (Japan, SFC) | November 21, 1991 |
| Release (North America, SNES) | April 13, 1992 |
| Release (Europe, SNES) | September 24, 1992 |
| Developer | Nintendo EAD |
| Publisher | Nintendo |
| Genre | Action-adventure |
| Players | 1 |
| Japanese cartridge | 1,048,576 bytes (8 Mbit), LoROM, battery-backed save |
| Series position | Third entry in The Legend of Zelda series |
Overview
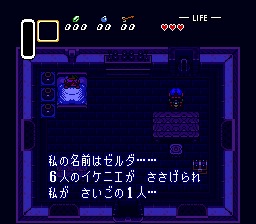
The game opens on a rainy night. Link wakes to a telepathic plea from Princess Zelda, imprisoned in Hyrule Castle, and follows his uncle into the castle — a short, scripted rescue that teaches movement, combat, and the Lamp before opening into free exploration. From there the structure is two quests in sequence. First, collect the three Pendants of Virtue from three Light World dungeons and draw the Master Sword. Second, after the wizard Agahnim sends Link to the Dark World, rescue the Seven Maidens from seven Dark World dungeons, storm Ganon's Tower, and face Ganon himself at the Pyramid of Power.
Two systems define the whole design. The Magic Mirror returns Link from the Dark World to the corresponding point in the Light World, and warp tiles send him back — so nearly every obstacle has two sides, and many secrets exist only in the gap between them. And the Moon Pearl, found early in the third dungeon, lets Link keep his human form in the Dark World; without it he is a helpless rabbit there, which is why the Tower of Hera cannot really be postponed. Exploration is gated almost entirely by items rather than levels: each dungeon's treasure opens new parts of both worlds, which is what makes the upgrade and Heart Piece hunts below interlock so tightly with the main route.
Why It Still Matters
A Link to the Past is the template the series — and much of the action-adventure genre — was built from: the two-world structure, the dungeon-item-boss rhythm, Pieces of Heart, bottles, fairies, and the Master Sword as a mid-game turning point all either debut or crystallise here. It is also unusually honest as a game. It rarely locks progress behind grinding or obscure dialogue; if you are stuck, the answer is almost always a place you have already seen, viewed from the other world or with a newer item in hand. That makes it one of the most satisfying retro games to complete at 100%: the checklist is finite, visible, and fair.
Highlights
- The Dark World reveal done right. Your first trip there strands you on the Pyramid of Power as a rabbit, with the familiar map redrawn hostile. Every Light World landmark has a counterpart to re-learn.
- Dungeons that teach under pressure. Each dungeon revolves around its treasure item and makes you fluent in it before the boss — the Hookshot, Fire Rod, and Cane of Somaria dungeons are standouts.
- A generous, finite secret hunt. Exactly 24 Pieces of Heart, 4 Bottles, and a handful of Great Fairy upgrades — everything in this guide is completable in one playthrough with no missables of consequence.
- Bosses as equipment checks. Most bosses are puzzles about your newest tools: hammer the Helmasaur King's mask off, Hookshot Arrghus's minions away, reflect Agahnim's magic back at him.
Strategy Essentials
Route at a Glance
- Hyrule Castle rescue (prologue) → Eastern Palace → Desert Palace → Tower of Hera → Master Sword → Agahnim (Hyrule Castle Tower).
- Dark World: Palace of Darkness → Swamp Palace → Skull Woods → Thieves' Town → Ice Palace → Misery Mire → Turtle Rock → Ganon's Tower → Ganon at the Pyramid of Power.
- The Dark World dungeons reward Crystals in a numbered order, but several can be tackled out of order once you have the right items. The order above is the intended, smoothest route; noted exceptions appear in the dungeon table.
Dungeon & Boss Table — Light World, Dark World, and Ganon's Tower
| # | Dungeon (World) | Dungeon Item | Boss | Key Points |
|---|---|---|---|---|
| — | Hyrule Castle / Castle Tower (Light) | Boomerang (castle); no big-chest item in the Tower | Ball and Chain Trooper (castle); Agahnim (Tower) | Prologue rescue, then the Tower climb after the Master Sword. Against Agahnim, return his magic orbs with sword swings (the Bug Catching Net also works); dodge the unblockable blue orbs by moving, not reflecting. |
| 1 | Eastern Palace (Light) | Bow | Armos Knights (×6) | First full dungeon. Shoot Eyegores to open paths. For the boss, keep distance and use the Bow — three arrows per knight is the standard pace; when one knight remains it charges, so sidestep and finish it the same way. Reward: Pendant of Courage. Then visit Sahasrahla for the Pegasus Boots. |
| 2 | Desert Palace (Light) | Power Glove | Lanmolas (×3) | Enter with the Book of Mudora. The Power Glove opens the dungeon's second entrance and much of the overworld. Hit each Lanmola's head as it bursts from the sand; the last one moves faster and sprays debris in more directions. Reward: Pendant of Power. |
| 3 | Tower of Hera (Light) | Moon Pearl | Moldorm | On Death Mountain; bring the Magic Mirror from the old man in the caves. Do not skip the big chest — the Moon Pearl is not needed to beat this dungeon, but it is essential for the Dark World. Moldorm's only weak point is its tail; every hit knocks you back, so strike from the side near the platform centre and expect to climb back up if you fall. Reward: Pendant of Wisdom. |
| 4 | Palace of Darkness (Dark) | Magic Hammer | Helmasaur King | First Dark World dungeon; you need Rupees for the monkey Kiki to open the way in. Hammer down stakes and Helmasaur-like enemies. For the boss, hammer its mask until it cracks away, then shoot the exposed jewel with arrows. Reward: Crystal 1. |
| 5 | Swamp Palace (Dark) | Hookshot | Arrghus | Flood and drain rooms by pulling levers and mirroring between floors. The Hookshot pulls the protective minions (Arrghus's eyes) off the boss one by one; sword them, then hit Arrghus directly when it lunges. Reward: Crystal 2. |
| 6 | Skull Woods (Dark) | Fire Rod | Mothula | A multi-entrance dungeon woven through the Lost Woods' Dark World counterpart; several entrances are holes hidden under bushes and skulls. The boss room floor moves and spikes patrol the edges — the Fire Rod is the fast, safe way to damage Mothula while you keep your footing. Reward: Crystal 3. |
| 7 | Thieves' Town (Dark) | Titan's Mitt | Blind the Thief | Enter through the gargoyle statue in the Village of Outcasts. Rescue the "maiden" in the cells and lead her upstairs into the light — she is Blind in disguise. In the boss fight, hit the head; detached heads keep firing, so keep moving and re-target the body. Reward: Crystal 4. The Titan's Mitt unlocks heavy rocks everywhere, including the blacksmith side quest (see Upgrades). |
| 8 | Ice Palace (Dark) | Blue Mail | Kholdstare | Slippery floors and a notorious multi-floor block puzzle; the Fire Rod (or Bombos Medallion) melts the ice block that guards progress — and melts the boss's ice shell. Kholdstare then splits into three eyeballs; keep the Fire Rod or sword ready and watch for falling ice. Reward: Crystal 5. The Blue Mail in the big chest reduces damage taken. |
| 9 | Misery Mire (Dark) | Cane of Somaria | Vitreous | Reach the mire via the warp tile hidden near the Desert (Flute point 6), and open the entrance with the Ether Medallion. The Cane of Somaria creates blocks used for switches, platforms, and the boss: shoot Vitreous's small eyes first, then strike the big eye when it charges. Reward: Crystal 6. |
| 10 | Turtle Rock (Dark) | Mirror Shield | Trinexx | Open the entrance from Death Mountain with the Quake Medallion. A lava-heavy dungeon built around Cane of Somaria rails and pipes. Trinexx has two elemental heads: use the Fire Rod on the ice head and the Ice Rod on the fire head, then sword the snake-like final form and avoid its charges. Reward: Crystal 7. The Mirror Shield blocks beams the Red Shield cannot. |
| 11 | Ganon's Tower (Dark) | Red Mail | Agahnim (rematch) | A gauntlet that re-tests everything, including rematches and torch-and-darkness rooms; you will need the Cane of Somaria, Hookshot, and Fire Rod in rotation. The Red Mail further reduces damage. At the top, Agahnim splits into three — only the solid one takes damage from reflected orbs; watch the shadows to track the real one. Then follow the bat to the Pyramid of Power. |
| — | Pyramid of Power (Dark) | — | Ganon (final) | Four phases of spear throws, spinning trident attacks, and fire bats; in the darkened phase, light both torches to make him visible. Only the Silver Arrows can finish him — see Upgrades. After the fight, touch the Triforce to end the game. |
All 24 Pieces of Heart
Four Pieces make one Heart Container. Link starts with 3 hearts, gains one per major dungeon boss (10 in total: three Pendant dungeons and seven Crystal dungeons) plus the Sanctuary Heart Container after the castle rescue, and the 24 Pieces below add 6 more, for a maximum of 20 hearts. Numbering follows the order used by major English-language guides; the locations, not the numbers, are what matter.
| # | World | Location | Requirement / How to Get It |
|---|---|---|---|
| 1 | Light | Lost Woods | North of the Fortune Teller's hut, cut the centre of the 3×3 grass patch northeast of the thieves' hideout tree and drop into the hole. |
| 2 | Light | Kakariko Village — the well | Jump from the ledge into the well in the northwest of the village; bomb the cracked wall inside and open the chest. (Needs Bombs.) |
| 3 | Light | Kakariko Village — Blind's Hideout | Basement of the grey building in northern Kakariko; bomb the cracked wall on the right and open the chest. (Needs Bombs.) |
| 4 | Light | South of Kakariko — 15-Second Game | Bomb the cracked wall inside the quarrelling brothers' house to open the race start, then reach the far side in 15 seconds or less. (Needs Bombs.) |
| 5 | Light | Great Swamp — Swamp Ruins | Inside the ruins in the southwest, push the blocks, go through the north door, and pull the right-hand lever; exit to find the drained area holding the Piece. |
| 6 | Light | Desert of Mystery — northeast cave (Aginah's cave) | Bomb the cracked south wall inside and open the chest. (Needs Bombs.) |
| 7 | Light | West of the Sanctuary | Dash into the pile of rocks with the Pegasus Boots to reveal stairs; open the chest below. (Needs Pegasus Boots.) |
| 8 | Light | Desert Palace — western exterior ledge | Partway through the dungeon, exit via the western side and follow the ledge south outside; the Piece sits at the end. Reachable while clearing the dungeon. (Needs Book of Mudora to enter.) |
| 9 | Light | Zora's Waterfall | With Zora's Flippers, swim south past the first waterfall, then follow the shallow water west to the grassy ledge. (Needs Zora's Flippers.) |
| 10 | Light | Death Mountain — cave below the path | Climb the long ladder, head east below Spectacle Rock, drop to the cave on the right, and follow it through. (Needs Power Glove to reach Death Mountain.) |
| 11 | Light | Spectacle Rock | Take the warp tile on Death Mountain into the Dark World, step onto the matching spot, and use the Magic Mirror to land on Spectacle Rock in the Light World. (Needs Magic Mirror.) |
| 12 | Light | Near the Lumberjacks' house | After defeating Agahnim the first time, one tree northeast of Kakariko turns a paler green; dash into it with the Pegasus Boots to reveal a stump cave. (Needs Pegasus Boots; after Agahnim.) |
| 13 | Dark | Pyramid of Power | On the pyramid itself: descend the right-hand stairs and drop along the ledges on the eastern side. (Dark World access only.) |
| 14 | Dark→Light | South of the Haunted Grove | In the Dark World, stand in the ring of flowers south of the grove and use the Magic Mirror; enter the cave on the Light World plateau. (Needs Magic Mirror.) |
| 15 | Dark→Light | Lake Hylia island | In the Dark World's Ice Lake, stand in the shallow water inside the large ring of stones in the northwest and use the Magic Mirror to appear on the Light World island. (Needs Magic Mirror, Zora's Flippers.) |
| 16 | Dark→Light | Graveyard cave | In the Dark World's Ghostly Garden, reach the north side (Pegasus Boots through the rock pile, or Titan's Mitt on the skulls), climb the ladder, use the Magic Mirror, and bomb the north wall of the Light World cave. (Needs Pegasus Boots, Magic Mirror, Bombs.) |
| 17 | Dark | Village of Outcasts — Game of Chance | In the chest-marked building on the west side, pay 30 Rupees to open two chests; the Piece is in one of them, but placement is random — you may need several tries. |
| 18 | Dark | Treasure Field — Digging Game | South of the Village of Outcasts, pay 80 Rupees and dig for 30 seconds; the Piece is buried at a random spot, so repeat attempts may be needed. |
| 19 | Dark | Base of Death Mountain (Dark World) | Enter the cave south of the shop east of Skeleton Forest; Hookshot across the pit to a skull, then pass the Bumper while invisible with the Magic Cape, and exit south onto the ledge. (Needs Hookshot, Magic Cape.) |
| 20 | Dark | Stake Garden | East of the Village of Outcasts, lift the dark rocks with the Titan's Mitt and pound all 22 stakes with the Magic Hammer to reveal a cave entrance. (Needs Titan's Mitt, Magic Hammer.) |
| 21 | Dark | Swamp of Evil | Flute to point 6, lift the heavy rock to reveal the warp tile, enter the building west of Misery Mire, and solve the block puzzle at the back; the Piece is in the left chest. (Needs Titan's Mitt, Flute.) |
| 22 | Dark→Light | Swamp of Evil northeast → Desert cave | From the warp tile at Flute point 6, go to the far northeast of the Swamp of Evil, use the Magic Mirror, lift the boulder in the Light World desert to reveal a cave, and solve the puzzle inside. (Needs Titan's Mitt, Flute, Magic Mirror.) |
| 23 | Dark→Light | Death Mountain, west of Turtle Rock | West then south from Turtle Rock, lift the large rock to find a cave; cross the invisible bridge (Ether makes it visible but is optional), bomb through the western cracked wall, exit, and use the Magic Mirror. (Needs Magic Mirror, Power Glove or better, Bombs.) |
| 24 | Dark→Light | Turtle Rock exterior ledge | Inside Turtle Rock's lava room, take the left pipe, beat the two enemies, go south then west, and exit onto the ledge. Walk to its far eastern end, use the Magic Mirror, then enter the Light World cave and defeat the four mimicking enemies to reach the chest. (Needs Cane of Somaria / Quake Medallion for dungeon access, Magic Mirror.) |
Two Pieces (17 and 18) are luck-based mini-game prizes; budget extra Rupees and do not treat a few empty attempts as a bug.
Upgrades: Swords, Shields, Capacity, and Bottles
| Chain | Stage | How to Obtain |
|---|---|---|
| Sword 1 | Fighter's Sword | Story start — from Link's uncle in Hyrule Castle. |
| Sword 2 | Master Sword | Collect all three Pendants, then draw it from the pedestal in the Lost Woods grove. Also enables sword beams at full health. |
| Sword 3 | Tempered Sword | After Thieves' Town (Titan's Mitt): lift the dark rock south of the Village of Outcasts (where the Light World library stands) to free the cursed frog — the lost dwarven smith. Lead him back to the Light World smithy east of Kakariko, reunite the brothers, then pay 10 Rupees to temper; leave one screen and return to collect it. |
| Sword 4 | Golden Sword | After Crystals 5 and 6, buy the Super Bomb at the Dark World Bomb Shop (the counterpart of Link's house), walk it to the cracked wall of the Pyramid of Power, and open the hidden Mysterious Pond. Throw the Tempered Sword in and answer the Great Fairy honestly. Strongest sword. |
| Arrows (final) | Silver Arrows | Same Mysterious Pond: throw in the Bow. Required to defeat Ganon — do not enter the final fight without them. |
| Shield 1 | Fighter's Shield | Story start — from Link's uncle. Blocks fireballs; not beams or lasers. |
| Shield 2 | Red Shield | Throw the Fighter's Shield into the Waterfall of Wishing (northeast, behind Zora's Waterfall; needs Zora's Flippers and Power Glove to reach) and answer honestly. Also sold in some Dark World shops, but the pond upgrade is free. Blocks fireballs and small projectiles more reliably. |
| Shield 3 | Mirror Shield | Big chest in Turtle Rock. The only shield that blocks beam/laser attacks — valuable in Turtle Rock and Ganon's Tower. Cannot be bought. |
| Boomerang | Magical Boomerang | Throw the Boomerang into the Waterfall of Wishing and answer honestly. Flies farther and faster and can be steered more freely. |
| Mail 1→2 | Blue Mail | Big chest in the Ice Palace. Reduces damage taken compared with the Green Tunic. |
| Mail 2→3 | Red Mail | Big chest in Ganon's Tower. Reduces damage further — the best armour in the game. |
| Arrows capacity | 30 → 70 | Pond of Happiness, in the cave on the island in the middle of Lake Hylia (needs Zora's Flippers). Throw Rupees in; every 100 Rupees total lets you choose a capacity increase of +5 (the final step is +10). Maxing both arrows and bombs takes repeated donations. |
| Bombs capacity | 10 → 50 | Same Pond of Happiness — choose Bombs instead of Arrows on alternate upgrades. |
| Bottle 1 | Kakariko merchant | Buy from the merchant in Kakariko Village for 100 Rupees. Available early — do this first. |
| Bottle 2 | Kakariko tavern (back door) | Enter the tavern from its rear entrance and open the chest. |
| Bottle 3 | Under the bridge | Southwest of Link's house / east of Lake Hylia, walk under the stone bridge and wake the camper; he gives you the bottle. (Needs Zora's Flippers to swim there comfortably.) |
| Bottle 4 | The locked chest | Take the locked chest from the ruined house south of the Village of Outcasts (Dark World) to the man at the edge of the Desert in the Light World — without opening it on the way — and he will open it for you. |
Order advice: Bottle 1 and the arrow/bomb capacity upgrades pay off earliest. The Tempered Sword should be done as soon as the Titan's Mitt frees the smith — it roughly doubles your sword strength for the entire second half — while the Golden Sword and Silver Arrows are endgame errands gated by the Super Bomb, so batch them into one Pyramid trip.
Hidden Extras and Easy-to-Miss Systems
Halved magic consumption (the "1/2" mark). East of Kakariko in the Light World stands the smithy; just east of it is a stake and a well. With the Magic Hammer (from the Palace of Darkness), pound the stake, drop into the well, and sprinkle Magic Powder on the strange altar inside. The Mad Batter appears and, meaning to curse you, instead marks your magic meter with "1/2": from then on, every magic-consuming item uses half as much magic. The in-game wording ("your magic power is halved") is famously misleading — it is a pure benefit, and one of the most valuable upgrades in the game for Lamp, Rods, Medallions, and the Magic Cape.
The Flute and the duck. In the Dark World's Haunted Grove, the Flute Boy gives you the Shovel; return to the Light World grove and dig in its northwest area to unearth the Flute. Play it in front of the weathervane in Kakariko Village and the bird sealed inside bursts out — it is usually described as a duck. From then on, playing the Flute anywhere on the Light World overworld summons it to carry you to one of eight destinations: (1) Death Mountain, (2) the Magic Shop, (3) Kakariko Village, (4) Link's House, (5) south of the Eastern Palace, (6) the Desert of Mystery, (7) the Swamp Ruins, (8) the southeast shore of Lake Hylia. Point 6 is the practical one: the warp tile beside it is your gateway to Misery Mire and the Swamp of Evil Heart Pieces. The Flute does not work in the Dark World.
The secret room (the "Chris Houlihan Room") — handle with version care. Deep in the code sits a small failsafe room containing 45 Blue Rupees (225 Rupees in total) and a telepathy tile. It exists in the original Super Famicom / SNES game and can be reached in the original versions by exploiting how the game recovers when a fall's destination fails to load — most famously by dashing with the Pegasus Boots from the Sanctuary area to the hole outside Hyrule Castle without interruption. The naming is version-specific, and this is where guides most often go wrong:
- Japanese Super Famicom version (this article's subject): the room exists and is reachable the same way, but the tile presents it simply as a top-secret room — there is no personal name in the Japanese text.
- North American SNES version: the tile names the room after Chris Houlihan, winner of a 1990 Nintendo Power contest — the name appears only in the North American English text and versions derived from it.
- Game Boy Advance port: the loading fault that made the room reachable was fixed, the telepathy tile was removed, and the room can only be entered via glitches or cheat devices. Later re-releases based on the SNES version (Virtual Console, Nintendo Switch Online) behave like the SNES version, not the GBA port.
So: on the Japanese cartridge, hunt for a "top secret room," not a named Easter egg — and do not use GBA-version advice for the original.
Other one-line secrets worth your time. The Waterfall of Wishing (Red Shield, Magical Boomerang) and the Pyramid's Mysterious Pond (Golden Sword, Silver Arrows) both punish lying — always answer the Great Fairy honestly, or you will simply get your item back unchanged. A Golden Bee, caught by dashing into the blue fairy statue in the cave east of Lake Hylia (the Ice Cave area), is the strongest bottle item most players never find. And the Cane of Byrna, in a cave on Dark World Death Mountain reached by falling from above, gives invincible protection at a magic cost — an excellent safety net for Ganon's Tower.
Who It's For
Players returning for a first 100% run; retro fans who finished the game years ago but never completed the Heart Piece or upgrade hunts; and newcomers who want one authoritative route through a game that respects their time. If you prefer discovering secrets unaided, use only the dungeon table and leave the Heart Piece table for a final sweep — nothing here is permanently missable.
How to Play It Today
- Nintendo Switch Online (Super Famicom / SNES app): the original version, and the most faithful legal route to the game this guide describes, including save states.
- Original cartridge: Super Famicom and SNES cartridges remain common on the second-hand market. Check the battery-backed save before a long run, and note the Japanese cartridge's text is fully in Japanese.
- Game Boy Advance port (A Link to the Past / Four Swords): a fine version with extras, but not identical — the secret room behaviour, some tiles' text, Palace of the Four Sword bonus dungeon, and various small details differ. This guide follows the original.
- Virtual Console versions (Wii / Wii U / New Nintendo 3DS): based on the SNES version; the storefronts for these are closed, so this applies only if you already own them.
Find the original Japanese cartridge
Disclosure: The Rakuten and Yahoo! Shopping links are standard shopping links. Enkeisha does not earn a commission from purchases made through these links.
Find original hardware editions on eBay
As an eBay Partner Network affiliate, Enkeisha may earn a commission from qualifying purchases made through these links.
Search eBay listings (affiliate link)
Check the language, region, hardware compatibility, condition and authenticity before buying. Search results may include reproductions; links do not endorse individual sellers.